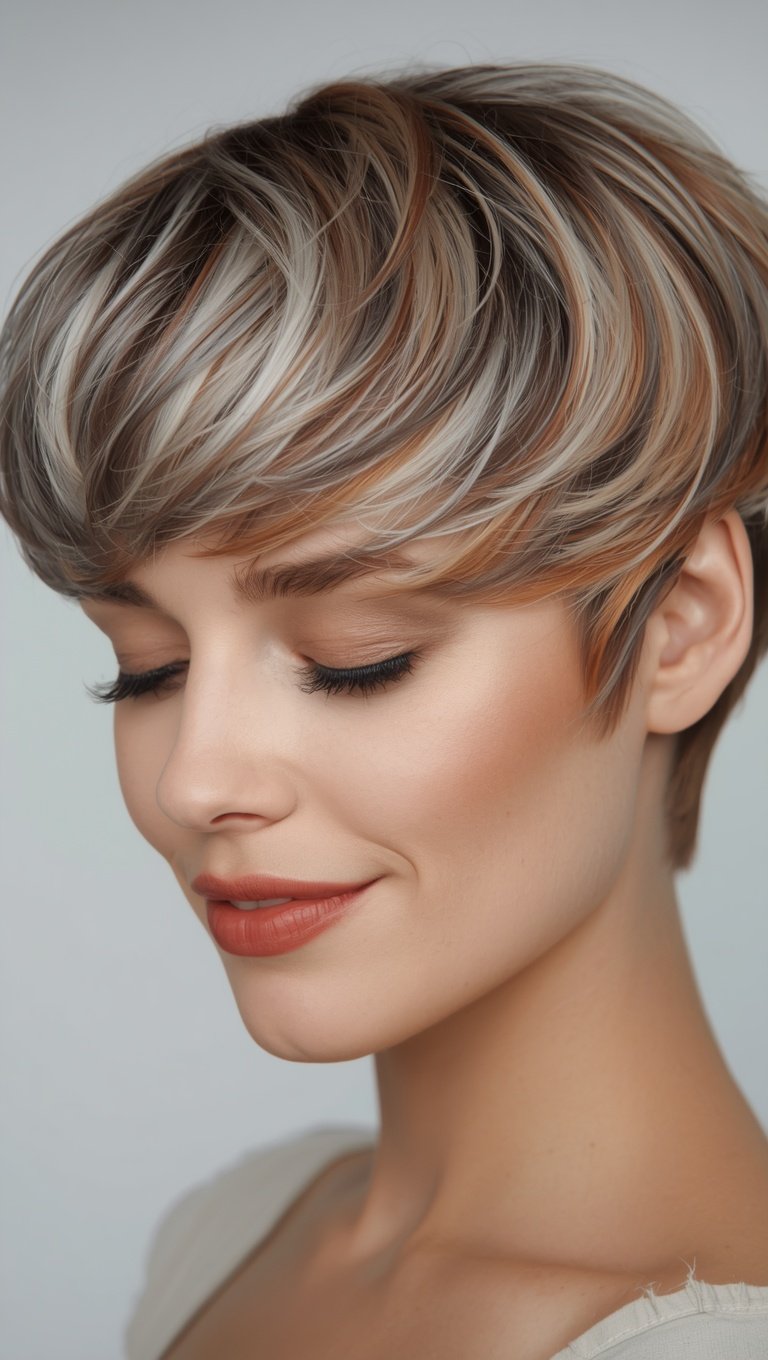
So here’s the thing — a lot of people hear “calico hair” and assume it means you’re going for some kind of costume look.
It’s not that.
Not even close.
Calico hair is actually a super wearable, organic blending technique inspired by the coat pattern of a calico cat.
You know that beautiful mix of orange, cream, black, and brown patches?
That’s the inspo.
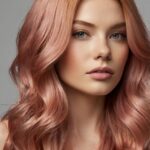
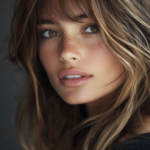
But translated for hair, it becomes this stunning layered palette of warm caramel, soft blonde, deep brunette, and sometimes even a hint of auburn or copper.
The patches aren’t harsh or perfectly defined.
They blend and melt into each other in this very natural, sun-kissed kind of way.
When I first researched the look, I actually thought it would feel “costume-y” on a real person.
But then I saw it on someone in a coffee shop — this woman with effortlessly messy layers and the most beautiful multi-tonal color — and I immediately texted my stylist.
It works because it mimics the way hair actually lightens and deepens naturally over time.
Nothing about it looks forced.
And that’s kinda the whole magic of it.
The Colors That Make Up a Classic Calico Palette

Okay so this is where it gets really fun.
A traditional calico palette pulls from three main color families — and together, they create something that feels almost painterly.
You’ve got your warm caramels and honeys.
Think golden brown, butterscotch, soft amber.
These are the tones that catch the light and make your hair glow.
Then you’ve got your creamy blondes and ivories.
These are the lighter patches — the ones that add brightness and that gorgeous sun-washed contrast.
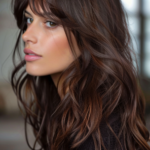
And then there’s the deeper anchor tones — rich brunettes, chestnuts, even a moody auburn.
These give the look depth and make everything else pop.
When I got mine done, my stylist leaned into a really warm palette because of my olive skin tone.
She kept the cream patches soft rather than bright white-blonde, and honestly?
It made the whole thing feel more like a luxe, expensive color rather than a DIY patchwork project.
The palette really does need to feel cohesive.
Wild, but cohesive.
Why Calico Works So Beautifully for Brunettes

If you are a brunette who has always felt like the fun color trends just weren’t made for you — calico is your moment.
I’m serious.
Because calico starts with a brunette base.
The darker tones are part of the whole vision, not something you need to color over or lift away.
When I tackled my own transition from a solid medium brunette, my stylist didn’t have to bleach my entire head.
She worked with my natural depth, using it as one of the patches in the overall design.
That meant less damage.
Less commitment.
And way more dimension.
The brunette patches serve as grounding tones — they keep the look from feeling too light or too “done.”
And if your natural hair is growing in a little darker at the roots?
That actually adds to the calico effect rather than fighting it.
It’s sort of the rare hair color where roots are considered part of the aesthetic.
And honestly, as someone who cannot get to the salon every six weeks, that felt like a personal gift.
How to Talk to Your Stylist About the Look You Want

This part matters so much more than people realize.
Because “calico hair” can mean very different things depending on who’s holding the color brush.
Before my appointment, I put together a little folder of reference photos — not just one, but like eight or nine — and I organized them by what I loved about each one.
This one has the perfect caramel warmth.
This one has patches that feel natural, not blocky.
This one has a root shadow I want to keep.
Being that specific was a total game-changer for the conversation.
I’d also suggest using the word “organic” a lot when describing what you want.
Organic patches.
Organic blending.
Natural-looking transition.
That tells a skilled colorist that you don’t want harsh lines or a heavily painted look — you want something that feels like it grew that way.
Also ask specifically about which technique they’d use — lived-in balayage, color melting, or hand-painted sections — because the method really affects the final vibe.
The Difference Between Calico and Balayage (Because People Always Ask)
Okay I get this question constantly and I love it because the answer is actually kind of nuanced.

Balayage is a technique.
Calico is an aesthetic.
Balayage is the method of painting color onto the hair in a sweeping motion to create soft, natural highlights.
Calico is the overall visual result — that patchy, multi-toned, warm-meets-cool palette inspired by the cat coloring.
So here’s the thing: calico can absolutely be achieved using a balayage technique.
But it can also use color blocking, strategic toning, or panel coloring depending on the effect you’re after.
When I got my calico color, my stylist actually combined two techniques — she did a balayage base for the overall softness, then hand-painted in a couple of more defined patches near the face.
The result was this beautiful blend of both soft gradient and intentional placement.
It felt artistic.
Like she’d actually painted my hair.
And that’s the feel you’re going for with calico — not a formula, but a composition.
Skin Tone Pairings: Which Calico Palette Will Make You Glow

Not every calico palette is going to hit the same on every skin tone — and I think this is where a lot of people get nervous.
But honestly?
The concept is extremely adaptable.
If you have warm or olive skin, lean into the golden caramels, honeys, and burnt coppers.
These tones are chefs kiss against deeper olive complexions.
If you have fair or cool-toned skin, softer palettes with champagne blondes, ash browns, and muted caramels will feel more natural and less harsh.
If you have deep or rich skin tones, a calico palette with deep chestnuts, warm auburn patches, and just a touch of golden bronze can look absolutely stunning.
When I was picking my palette, my stylist held actual color swatches next to my face in natural light.
It sounds so simple but it made such a huge difference.
The right tones actually made my skin look warmer and healthier.
The wrong tones?
Made me look a little washed out.
Trust your stylist on this one.
And if they don’t ask about your skin tone at all during the consultation, that’s a small red flag.
Maintenance: Is Calico Hair High or Low Effort?

I’m going to be so honest with you here because I feel like this topic gets glossed over.
The initial color appointment?
It’s an investment.
We’re talking a multi-step color process that can run anywhere from two to four hours depending on your hair length and starting point.
But the maintenance?
Actually not bad at all.
Because calico is designed to grow out beautifully.
The patches soften over time rather than getting harsh and regrowth-obvious.
I personally do a color refresh every three to four months — not to redo the whole thing, but just to re-tone some of the lighter pieces and maybe touch up the caramel warmth.
Between appointments, I use a purple toning shampoo once a week to keep the blonde patches from going brassy.
And I deep condition every single wash day because multi-tonal color — especially if it involved any lifting — needs moisture.
My hair felt noticeably softer once I committed to that routine.
So yes, it requires a little effort.
But not the constant upkeep of, say, a full bleach job.
Products I Actually Use to Keep Calico Color Vibrant

Product selection matters so much more with color-treated hair — especially when you’ve got multiple tones happening at once.
I use a color-safe, sulfate-free shampoo on every wash.
Sulfates are genuinely not your friend when you’re trying to preserve warmth and vibrancy.
A weekly deep conditioning mask is non-negotiable for me.
I leave it on for like twenty minutes with a shower cap.
It sounds extra but my hair texture improved so dramatically in the first month of doing this.
I’m also a big fan of hair gloss treatments between salon visits.
A clear or lightly tinted gloss adds this incredible shine and helps all the tones look more intentional and polished.
For heat styling — which yes, I still do — a thermal protectant spray every single time.
Color-treated hair is already more fragile than untreated hair.
Heat without protection just accelerates fading and dryness.
Oh and one underrated tip?
Wash your hair in cool or lukewarm water.
Hot water opens the cuticle and lets color molecules slip right out.
Cool water seals everything in.
It’s a small habit that genuinely makes the color last longer.
How to Style Calico Hair to Really Show Off the Color

One of the things I love most about calico hair is that certain styles were basically made to show it off.
Loose waves are my personal favorite.
When you curl or wave calico hair, the different tones catch the light at different angles and it creates this incredible depth and movement.
It genuinely looks like you spent hours on it even when it took fifteen minutes.
A messy low bun is another go-to.
With calico tones, even a thrown-together bun has this effortless, expensive-looking texture to it because the color variation adds so much visual interest on its own.
A half-up half-down style is great because it shows off both the top layers (usually where the lighter and more defined patches sit) and the longer, deeper underneath sections.
If you have bangs or face-framing layers, make sure your colorist puts some attention into those front pieces specifically.
The color you see first when you look in the mirror — and the color everyone else notices first — is right there at your face frame.
Getting those front patches right is everything.
My Honest Opinion: Is Calico Hair Worth It?

I want to give you a genuinely real answer here and not just a glossy “yes absolutely” response.
For me?
Completely, totally worth it.
It changed the way I felt about my hair in a way I didn’t expect.
I went from having a perfectly fine, perfectly forgettable brunette to having hair that people actually commented on.
Not in a loud, over-the-top way.
In a “your hair color is so beautiful, how do you get it like that?” kind of way.
And that’s exactly the energy calico gives you.
It’s the kind of color that looks almost natural — like maybe you were just born with it — but also clearly intentional and elevated.
The cost is real though.
I won’t pretend a quality calico color job is cheap.
But if you save up for a good stylist who specializes in multi-tonal color work, the results last long enough that you’re not running back every few weeks.
For me, the longevity plus the low-maintenance grow-out made it worth every penny.
Calico for Short Hair: Does It Actually Work?

I get asked this all the time and I love bringing it up because the answer is a very enthusiastic yes.
Short hair and calico color are actually kind of a dream combination.
When your hair is shorter, the patches are more visible, more defined, and the overall effect can feel really bold and intentional in the best way.
A pixie cut or a short bob with calico tones?
Absolute statement.
The key with short hair is that the patches need to be thoughtfully placed — because there’s less length to blend everything out through.
Your colorist will probably use smaller, more precise sections to create the calico effect rather than large sweeping brushstrokes.
I had a friend with a chin-length bob who got calico tones done last summer and honestly?
Her color looked more striking and more artistic than mine at the time.
The contrast was so clear and beautiful on her shorter cut.
So if you’ve been hesitating because your hair isn’t long enough — let that go.
Short calico hair is genuinely one of my favorite versions of this look.
When Calico Goes Wrong — And How to Avoid It
Okay real talk time.
Because yes, calico can go wrong.
And I want to save you from that experience.
The most common mistake I see is when the patches end up looking too blocky or too obviously placed.
It ends up looking less like a calico cat and more like a zebra.
The fix?
Make sure your stylist blends the edges of each patch really thoroughly.
The transitions should melt, not stop abruptly.
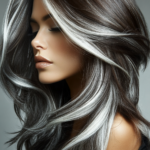
The second most common issue is an unbalanced palette — too much contrast between the lightest and darkest tones without enough mid-tones bridging the gap.
You end up with a look that feels harsh rather than organic.
Always make sure there are at least two or three mid-range tones in your palette to act as connectors.
The third thing?
Choosing a stylist who isn’t experienced with multi-tonal color work.
This is truly not the look to try with someone who mostly does single-process color or basic highlights.
Look at their portfolio specifically.
Ask to see examples of balayage, color melting, or similar multi-tonal work before you book.
Your hair will thank you.