Remember that feeling when you first discovered how a fresh manicure could completely transform your mood?
Standing in the drugstore at thirteen, mesmerized by those tiny bottles of possibility, you probably had no idea how nail art would evolve into the creative expression it is today.
Pastel nails have become the ultimate canvas for self-expression while maintaining that soft, dreamy aesthetic that works year-round.
Watercolor Pastel French Tips


French tips have grown up since the 90s, and their pastel rebirth is everything your nail game needs right now.
Instead of stark white, imagine baby blue, mint green, or lavender tips fading into a neutral base like a watercolor painting.
You can achieve this look by using a makeup sponge to dab the pastel shade onto just the tips, creating that beautiful diffused effect that looks professional even when done at home.
The beauty of pastel French tips is their versatility – subtle enough for conservative workplaces but interesting enough to earn compliments.
Try alternating different pastel colors on each finger for a playful rainbow effect that still feels cohesive thanks to the soft color palette.
For extra dimension, ask your nail tech (or challenge yourself) to add a fine line of metallic silver or gold between the pastel tip and the neutral base.
This technique elevates the look from cute to sophisticated in seconds.
Remember to apply a high-quality top coat to seal in your design and add that salon-level shine that makes pastel colors pop.
For longer nails, try extending the watercolor effect further down the nail for an elongating effect that’s stunning when you gesture or type.
Short nails?
No problem – pastel French tips actually look incredibly chic on shorter lengths, offering a modern take on a classic style without overwhelming smaller nail beds.
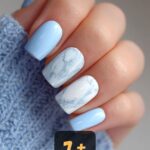
Pastel Marble Dreams

Marble nails might sound intimidating, but the pastel version is surprisingly forgiving for DIY attempts and absolutely ethereal when done right.
Think of the gentle swirls of cotton candy blending into clouds – that’s the vibe you’re aiming for with pastel marble.
You can create this effect using a thin brush to drag diluted pastel polish through a white base, mimicking those delicate veins that make marble so captivating.
Lilac and mint together create an unexpected combination that looks like something from another planet – in the best possible way.
For a more subtle approach, try a barely-there pink base with whispers of blue marble effect, perfect for those who want their nails noticed without shouting for attention.
The key to pastel marble is patience – allowing each layer to dry before adding the next swirl prevents the colors from becoming muddy.
Your marble design can be concentrated on just one or two accent nails if you’re new to nail art or prefer a more minimalist approach.
Don’t forget that adding a matte top coat completely transforms pastel marble, giving it a sophisticated stone-like appearance that looks expensive no matter what products you used.
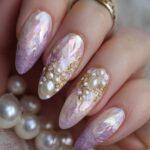
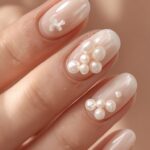
For special occasions, incorporate a touch of silver or pearl into your marble swirls to catch the light when you move your hands.
The beauty of pastel marble nails is how they grow out gracefully – the abstract nature of the design means no obvious grow-out line for at least two weeks.
Cloud Nine Pastel Skies

Cloud nails capture that dreamy, head-in-the-clouds feeling we all sometimes need amid busy schedules and endless notifications.
Creating fluffy pastel clouds on your nails is like carrying a tiny piece of a perfect sky day wherever you go.
You can achieve this look with a small makeup sponge, gently dabbing light blue, lavender, or pink polish in cloud-like formations against a white or very pale blue background.
The imperfect nature of cloud designs makes this ideal for beginners – no straight lines or perfect circles required.
For added dimension, try layering different pastel shades within each cloud, perhaps darker at the bottom fading to almost white at the top.
Cloud designs work beautifully as a full set or as accent nails paired with solid pastel nails in complementary colors.
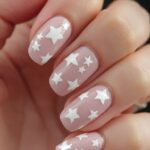
For a whimsical touch, add tiny silver stars or miniature rainbows to create a storybook sky on your fingertips.
The softness of this design makes it perfect for spring and summer, but also offers a cheerful reminder of blue skies during gray winter months.
Don’t be afraid to extend your sky design to the tips of your nails, allowing the clouds to wrap around for a more immersive effect.
When showing off your cloud nails on social media, natural daylight will capture their dreamy quality best, making them perfect for your next nail selfie.
Cloud designs grow out quite gracefully, as the random pattern doesn’t create an obvious line of demarcation near your cuticles.
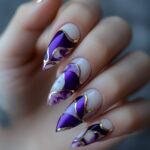
Pastel Negative Space Geometry

Negative space nail designs have revolutionized modern manicures, and pastel versions add a sophisticated softness to this contemporary technique.
The concept involves leaving portions of your natural nail (or clear base coat) visible, creating shapes and patterns with the contrast.
You can create striking geometric designs with painter’s tape or vinyl nail stencils, laying them down to mask areas that will remain clear.
Pastel lavender triangles floating on a clear base offer a minimalist yet impactful look that’s perfect for those who appreciate modern design.
For a business-friendly option, try thin pastel lines creating architectural shapes across an otherwise bare nail.
The beauty of negative space designs is their longevity – as your nails grow, the design remains proportional without an obvious grow-out line.
Pale yellow and mint green geometric shapes play beautifully against clear backgrounds, adding a spring-like freshness to this contemporary technique.
For special occasions, try adding a single thin line of metallic polish to outline your pastel shapes, creating definition that catches the light as you move.
Don’t hesitate to combine different geometric shapes within your design – mixing circles, triangles, and straight lines creates visual interest while the pastel palette maintains cohesion.
If you’re concerned about nail strength with partially bare nails, remember that a good quality clear base and top coat provide protection while maintaining the negative space effect.
This style photographs exceptionally well for social media, with the clear spaces creating a floating effect that makes followers do a double-take.
Gradient Pastel Rainbow


Rainbow nails never go out of style, but the pastel version offers a sophisticated take that’s wearable for virtually any occasion.
Imagine each nail as a different shade in a perfect pastel spectrum, from baby pink to lavender to mint to pale yellow and soft blue.
You can arrange colors in traditional rainbow order or experiment with your own unique combination that complements your skin tone and personal style.
The key to elevated rainbow nails is consistency in finish – keeping all shades equally muted creates that coveted pastel palette that looks intentional rather than childish.
For an extra dimension, try creating a subtle gradient effect on each nail, with the color fading from more saturated at the tip to almost transparent at the base.
This technique creates an elongating effect on shorter nails while adding visual interest to longer shapes.
For office settings, try a more subtle approach with the rainbow effect appearing only on the tips in a pastel French manicure variation.
The joy of pastel rainbow nails is their mood-boosting quality – it’s nearly impossible to feel completely down when glancing at a perfect spectrum of soft colors on your fingertips.
If you’re feeling creative, incorporate the rainbow concept vertically rather than across nails, with each nail featuring its own miniature gradient from one pastel shade to another.
Remember that lighting dramatically affects how pastel colors appear – they may look different in natural light versus indoor lighting, offering an ever-changing look.
Professional nail artists can create seamless transitions between colors, but at-home attempts have their own charming, slightly imperfect quality that makes them uniquely yours.
Pastel Animal Print


Animal prints have transcended their bold beginnings to find new life in soft pastel iterations that feel fresh and unexpectedly wearable.
Imagine leopard spots in baby blue against a pale pink background, or zebra stripes in lavender on a mint green base – suddenly wild prints become approachably chic.
You can create simple animal prints at home using a thin nail art brush and a steady hand, or invest in stamping plates designed specifically for these patterns.
The contrast between the typically bold nature of animal prints and the softness of pastel colors creates a visual interest that elevates your manicure beyond ordinary.
For a subtle introduction to this trend, try limiting the animal print to just one or two accent nails while keeping the others in complementary solid pastels.
Pastel cow print has emerged as a surprisingly versatile option, with its irregular organic shapes working beautifully in lavender, mint, or baby blue against a white or cream base.
The beauty of pastel animal prints is their chameleon-like quality – they can read as playful or sophisticated depending on how you style them and the nail shape you choose.
On almond or coffin-shaped nails, pastel leopard print takes on an elongating effect that looks elegant rather than overwhelming.
For maximum impact, try different scale patterns – perhaps larger spots near the cuticle gradually becoming smaller toward the tip, creating a dynamic visual flow.
Don’t forget that topcoat choice dramatically affects the final look – glossy topcoats make pastel animal prints pop, while matte finishes create a more sophisticated, textured appearance.
When wearing pastel animal prints, simple jewelry often works best to let your nails become the statement accessory that catches everyone’s attention.
Pastel Dotticure Delight


There’s something inherently joyful about dots on nails, and when rendered in pastel shades, they create a confetti-like celebration on your fingertips.
The beauty of pastel dotticure lies in its accessibility – you can create perfect dots using simple household items like bobby pins, toothpicks, or the end of a makeup brush.
Try clustering tiny dots of different pastel shades to create a gradient effect that appears to cascade down your nail like gentle rainfall in multiple colors.
For a more structured look, arrange your dots in geometric patterns – perhaps a triangle formation or parallel lines that create a modern polka dot interpretation.
Varying the size of your dots adds dimension, perhaps starting with larger dots near the cuticle that gradually become smaller toward the tip.
The negative space between dots becomes part of the design itself, creating breathing room that prevents the look from becoming too busy or overwhelming.
For an unexpected twist, try creating a French tip entirely composed of clustered pastel dots that gradually become more sparse toward the nail bed.
This technique creates an ombré effect without requiring any blending or gradient tools – perfect for nail art beginners looking for impressive results.
Don’t forget that nail shape affects how dotticure appears – on shorter, rounded nails, dots create a playful, bubbly effect, while on long stiletto nails, they create a more dramatic cascade.
For special occasions, consider adding one or two metallic dots among your pastels to catch the light and add unexpected dimension to your design.
The beauty of pastel dotticure is its forgiving nature – slightly imperfect dots add to the handcrafted charm that makes this style so endearing.
Pastel Abstract Minimalism

Abstract nail art allows for complete creative freedom while pastel colors keep the look wearable and sophisticated rather than chaotic.
Think of your nails as tiny canvases for Mondrian-inspired color blocking or Matisse-like organic shapes rendered in soft hues of mint, peach, and lavender.
You can create abstract designs using thin brushes for irregular lines, small makeup sponges for blurred shapes, or even the end of a bobby pin for precise dots and details.
The key to successful abstract nail art is balancing complexity with negative space – allowing some clear or neutral areas prevents the design from becoming visually overwhelming.
This technique creates a cohesive look across your manicure that draws the eye across your entire hand rather than to individual nails.
For office-appropriate abstract nails, try limiting more complex designs to just one or two fingers while keeping others in solid coordinating pastels.
Abstract designs photograph beautifully for social media, often creating optical illusions or different impressions depending on the angle and lighting.
Don’t worry about symmetry or perfection – the beauty of abstract nail art lies in its deliberately imperfect, artistic quality that makes each manicure uniquely yours.
For a truly bespoke look, consider incorporating elements that have personal meaning – perhaps shapes inspired by your favorite architecture or patterns from meaningful textiles.
The subtle nature of pastel colors allows for more complex designs without becoming visually overwhelming – you can layer multiple elements while maintaining an elegant look.
Remember that your abstract design can evolve throughout the life of your manicure – perhaps adding small additional elements after a week to refresh the look.
Pastel Foil Accents


Metallic foil against pastel backgrounds creates a stunning contrast that catches light and attention with minimal effort.
You can apply foil flakes to strategic areas of your pastel manicure using special glue or by pressing them into still-tacky gel polish before curing.
The organic, slightly random placement of foil creates a luxurious abstract effect that elevates simple pastel nails to statement accessories.
For maximum impact with minimal effort, try a solid pastel base with foil concentrated just at the cuticle area, creating a “jewelry-like” effect at the base of each nail.
This placement draws attention to your hands while requiring less precision than full-nail designs.
The textural contrast between smooth, creamy pastel polish and metallic foil creates visual interest even in the simplest designs.
For special occasions, try arranging foil pieces in a gradient from dense concentration at the cuticle to sparse placement at the tips, creating an elegant “fading” effect.
Don’t forget that top coat application is crucial with foil designs – apply it gently with minimal strokes to prevent disturbing the foil placement.
The beauty of foil is its ability to add instant glamour to even the softest, most subdued pastel shade, making it perfect for elevating a simple manicure for unexpected events.
Remember that lighting dramatically affects how foil appears – your nails will look different in daylight versus candlelight, offering an ever-changing accessory.
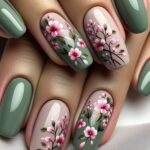
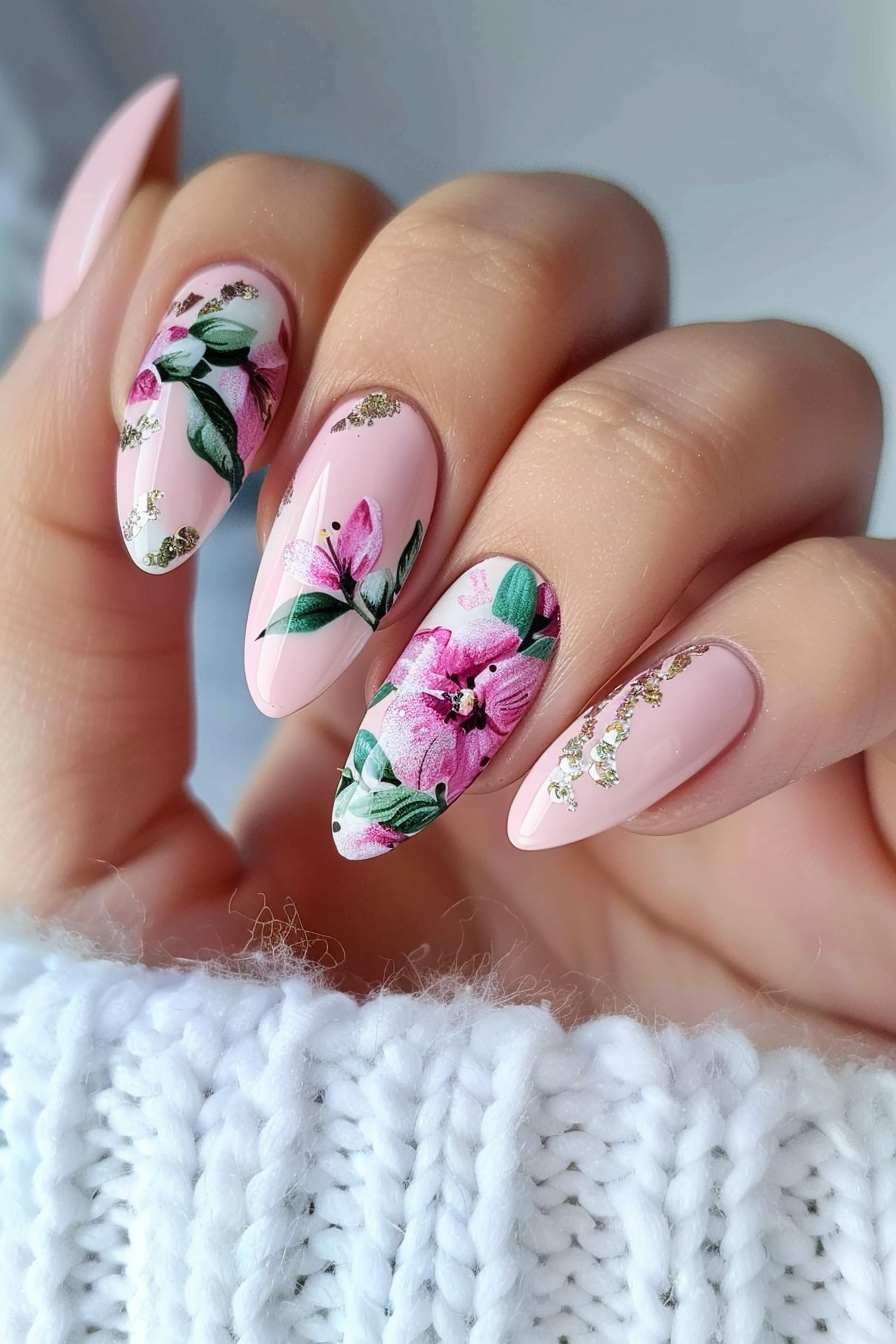
Pastel Floral Fantasy


Floral designs find their perfect expression in pastel colors, creating delicate blooms that look hand-painted even when created with simple techniques.
You don’t need advanced artistic skills to create pastel flowers – using a dotting tool to make five dots in a circle, then dragging a thin brush through them creates instant flower petals.
Try varying the size of your flowers, perhaps creating a focal point with a larger bloom on your ring finger while scattering tiny buds across your other nails.
Mixing flower varieties – perhaps roses in pale pink, forget-me-nots in baby blue, and lavender sprigs – creates a curated bouquet effect that looks professionally designed.
For a modern twist on floral nails, try geometric shapes as backgrounds for your pastel blooms – perhaps pale yellow flowers against mint green squares for unexpected contrast.
Don’t forget that adding tiny details like flower centers in a slightly darker shade or delicate stamens creates dimension that elevates your floral design.
For season-appropriate designs, consider which flowers match the time of year – cherry blossoms for spring, daisies for summer, or chrysanthemums for fall, all rendered in appropriate pastel hues.
The placement of your floral design dramatically affects the overall look – flowers clustered at the cuticle create a “growing” effect, while diagonal placement across the nail creates movement.
Remember that floral nails photograph beautifully for social media, often garnering more engagement than simpler designs due to their intricate, artistic quality.
The beauty of pastel nail art lies in its forgiving nature – softer colors blend more easily and show fewer mistakes than their bolder counterparts.
Remember that your nails are a form of self-expression that you carry with you everywhere, a tiny canvas for creativity that can brighten not just your look but your mood.