Okay, so let me just say this — the square nail shape is having a serious moment, and I am fully here for it.
It’s clean.
It’s strong.
It’s got this effortless confidence that rounded nails just don’t give me the same way.
When I switched to square tips a while back, I honestly felt like my whole hand looked more polished — like, instantly more styled.
The flat edge just photographs beautifully too, which, let’s be honest, matters when you’re holding a sparkler and someone’s pointing a camera at you.
For 4th of July specifically, the square shape does something really special.
It gives the classic red, white, and blue color blocking a structured, editorial feel — like your nails belong on a mood board, not just a holiday table.
If you’ve been doing round or oval nails forever, I’d really encourage you to try square just for the holiday weekend.
You might not go back.
The Classic Red, White, and Blue Color Block — My Go-To Starting Point

Every year, I come back to this look.
Not because I lack creativity — but because it genuinely never fails.
You paint each nail a solid color — red, white, or blue — and alternate them across both hands.
Simple.
Stunning.
So satisfying to look at.
The trick I always use is to do two thin coats instead of one thick one.
It keeps the color crisp and the finish smooth, which matters a lot with square nails because the flat tip really shows off your polish quality.
I like to use a bright, true red — not coral, not burgundy — just that classic American red.
Navy works better than royal blue for a more sophisticated vibe, but honestly both are gorgeous.
And white?
White on square nails looks incredibly clean and chic.
If I had to pick just one combo to wear forever on the 4th, this would be it.
Trying a French Tip With a Patriotic Twist
Okay, this one is so cute and I feel like not enough people talk about it.

Take the classic French manicure concept — but make the tips red or blue instead of white.
Or, do alternating colored tips across your nails.
Red tip, blue tip, white tip.
The base stays nude or soft white, and the result is this really elegant, grown-up patriotic look.
It feels less costume-y than a full color block and more like something you’d see on a fashion influencer at a rooftop 4th of July party.
When I did this last summer, so many people asked me where I got my nails done.
I did them myself at my kitchen table with a nail tape strip to get that perfect straight line across the tip.
That’s my little hack — nail tape is everything for a clean French edge on square nails.
Peel it off before the top coat dries and you get the crispest line.
Absolutely worth it.
Stars and Stripes Nail Art That Actually Looks Doable

I know nail art can feel intimidating, but stay with me here.
Stars and stripes on square nails are actually one of the more forgiving designs because the flat surface gives you more room to work with.
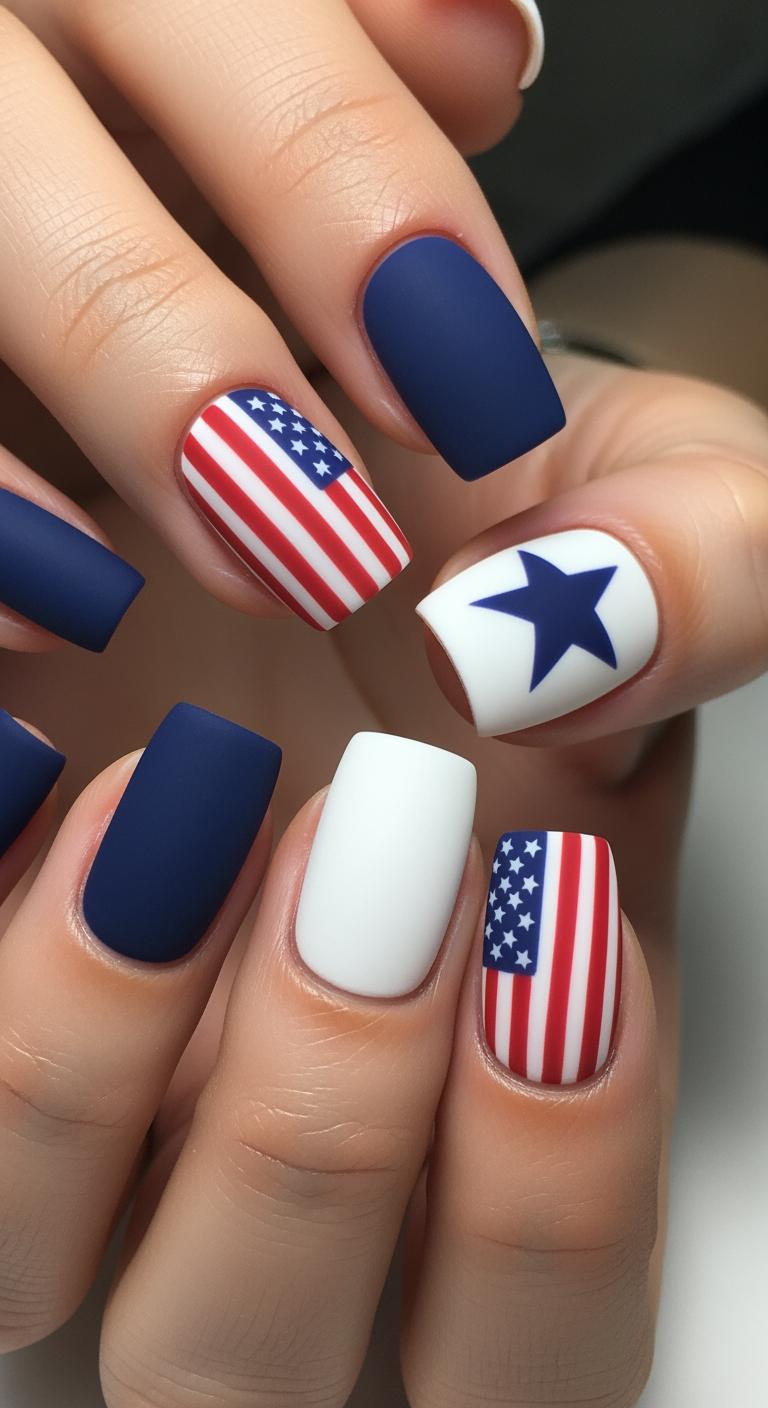
I like to pick one or two accent nails — usually the ring fingers — and do a mini flag design on just those.
The rest of the nails stay solid red, white, or navy.
For the stars, I use a dotting tool dipped in white polish.
Tiny dots in a cluster — done.
They don’t have to be perfect.
They just have to be charming.
For stripes, a thin nail art brush dragged horizontally across a red base in white gives you the most satisfying result.
It takes maybe five minutes per nail and the payoff is huge.
The rest of your set carries the look, so those two accent nails just need to feel festive — not flawless.
My Glitter Moment — Because Sometimes More Is More

There are years when I want elegant.
And then there are years when I want to full-on sparkle at the fireworks show.
This is for the second kind of year.
A deep navy base with chunky red and silver glitter on top?
Absolutely unhinged in the best way.
Or a clear glitter gradient — heavy at the tips, fading toward the cuticle — over a white base.
It catches the light like crazy, especially at night when the fireworks are going off above you.
I’m obsessed with holographic glitter for this look specifically.
It shifts between red, blue, and silver depending on the angle, which feels almost poetic for the 4th.
If glitter isn’t your everyday thing, just do it on your ring fingers as an accent.
You get the sparkle without committing to a full glitter set.
And trust me — it photographs incredibly.
The Negative Space Design I Keep Coming Back To
This is my “I want to look cool but effortless” nail look.

This is my “I want to look cool but effortless” nail look.
Negative space designs use your natural nail as part of the art — so you’re not painting the whole nail, you’re leaving sections bare intentionally.
For the 4th, I love doing a diagonal stripe of red across a clear base, with a tiny blue star near the cuticle area.
It looks modern.
A little edgy.
Still completely patriotic.
The square shape really elevates this design because the geometric nail shape and the geometric negative space feel intentional together.
Like, they belong to the same aesthetic.
If you’re someone who doesn’t love a full opaque manicure, this is genuinely the most stylish alternative.
I’ve worn this to 4th of July events and had people assume it was done at a high-end nail salon.
It wasn’t.
Just me, some nail tape, and a Saturday afternoon.
Ombre Nails in Patriotic Colors — Softer, but Still Stunning

Not everyone wants bold and graphic.
And honestly?
Sometimes the softer approach is the one that turns the most heads.
A red-to-white ombre, or a white-to-blue gradient, on square nails has this dreamy, watercolor quality that feels really feminine and pretty.
I did a red-to-pink-to-white ombre once for the 4th and got more compliments on that set than almost any other I’ve ever worn.
To do this at home, you sponge the colors onto the nail using a makeup sponge.
Dab, dab, dab — build it slowly.
It takes a couple of layers to get it blended but it’s very forgiving.
The square shape holds the gradient really well because of that flat edge — it gives the ombre a defined ending point that looks intentional.
Finish with a glossy top coat and the colors just melt into each other beautifully.
Matte Finish for a Modern, Editorial Patriotic Look

Can we talk about matte nails for a second?
Because I feel like they’re so underused for holiday manicures and it genuinely makes me a little sad.
A matte top coat over a classic red, white, and blue set completely transforms the vibe.
Suddenly it feels less “festive craft table” and more “fashion week street style.”
I tried this look on a whim and honestly could not stop staring at my own hands.
The colors look richer, deeper, and somehow more intentional with a matte finish.
Navy matte especially looks so luxurious on square nails.
It has this velvety quality that feels really high-end.
You can buy a matte top coat for just a few dollars and apply it over any polish.
One coat is usually enough.
Just make sure your color coat is fully dry first, otherwise the matte finish can look streaky.
This is one of my favorite little upgrades that costs almost nothing but looks like it cost a lot.
Florals and Patriotism — Yes, Really, It Works

Okay, hear me out.
Tiny red and blue florals on a white square nail base is one of the most unexpectedly pretty 4th of July looks I’ve ever tried.
It’s feminine.
It’s soft.
And it still reads completely patriotic because of the color palette.
I used a thin nail art brush and dotted tiny five-petal flowers in red and navy across a crisp white base.
Added a tiny yellow dot center for each flower and suddenly my nails looked like a vintage Americana quilt.
In the best way.
This is a great option if you love the holiday but want something that feels more “pretty garden party” than “flag parade.”
It works beautifully for the 4th because the colors carry all the patriotic energy while the floral shape keeps things soft and romantic.
If you’re not confident with a brush, tiny floral nail stickers exist and they look just as gorgeous.
What to Use for Long-Lasting Color All Weekend

Here’s the thing nobody tells you about holiday nails.
The 4th of July is hard on a manicure.
You’re in and out of water, handling food, applying sunscreen, holding cold drinks — your nails take a beating.
So the base you choose actually really matters.
I always start with a good bonding base coat — not just a clear polish, a real base coat that grips the color.
Then I do my color in two thin layers.
And I finish with a thick, high-shine top coat that I also seal over the tips of my square nails.
That tip sealing step is the one most people skip, and it’s the reason nails chip at the edge first.
Reapply a layer of top coat every day or two and your set will genuinely last all the way through the weekend.
Gel polish is obviously the most durable option if you have a lamp — but even regular polish treated this way holds up really well.
My Favorite Tools for Getting Square Nails Right at Home

Getting a perfect square shape at home is so much easier than people think — you just need the right tools.
A glass nail file is my absolute top recommendation.
It gives you more control than an emery board and seals the nail edge as you file, which means less chipping later.
To shape square nails, file straight across the top first — flat and even.
Then just lightly file the corners to soften them the tiniest bit so they don’t snag on things.
That’s it.
You don’t need to round them — just knock off the very sharpest point.
A cuticle pusher and some cuticle oil before you start make such a difference in how clean and polished your finished nails look.
And for nail art?
A thin detail brush and a dotting tool cover probably 80% of all the designs I’ve mentioned.
Both are inexpensive and completely change what’s possible at home.
Honestly, once you have the right tools, square nails feel really easy to maintain.
How to Pick the Right Shades for Your Skin Tone

This is something I wish someone had told me earlier — not all reds and blues are created equal, and the right shades make a huge difference.
If you have a fair or light skin tone, a true cherry red and a bright cobalt blue are going to pop the most.
White will look crisp and clean.
If you have a medium or olive skin tone, a deeper brick red and a rich navy are going to be so flattering — they warm up against your skin in the most beautiful way.
For deeper skin tones, bold and saturated is always the move.
A vivid scarlet, a deep royal blue, and a bright white look absolutely stunning and make the colors sing against deeper complexions.
Honestly though?
The 4th of July is one of those holidays where you can lean into whatever shade of red, white, and blue makes you happy.
There’s no wrong answer.
Just pick the ones that make you smile when you look at your hands.
That feeling is always the right guide.