Okay, I have to confess something.
For years I side-eyed press-on nails at the drugstore like they were beneath me.
I thought they screamed “fake” from a mile away, all shiny and stiff looking.
Then my sister wore a set to her engagement party and I legit asked her which salon she went to.
She just laughed and wiggled her fingers at me.
That was the moment everything changed for me, you guys.
Now I’m the friend texting everyone “wait, these are press-ons?” pics at 11pm.
So today I’m spilling every little trick I’ve learned since then.
Grab your coffee, because we’re getting into it.
The Shape Secret Nobody Talks About

Here’s the thing I didn’t know back then.
Shape is doing so much more work than color ever will.
Almond and squoval shapes tend to mimic natural nail growth the closest.
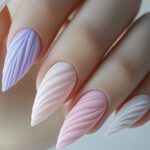
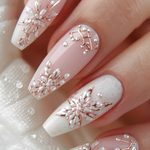
Coffin and stiletto shapes are gorgeous, but they read as “obviously a set” way faster.
I’m not saying skip them, because they’re fun for a night out.
But if your whole goal is undetectable, start with a shape close to what your own nails naturally do.
When I picked almond for the first time, my coworker genuinely thought I’d just had a really good manicure.
That felt so good, ngl.
And it made me realize the shape decision happens before you even touch glue.
So take an extra minute in the aisle or scrolling online.
Look at your own bare nails first.
What shape do they kind of want to be?
Match that energy.
It sounds small, but it’s honestly the difference between “cute nails” and “wait, are those real.”
Nail Prep Is Ninety Percent Of The Magic

I used to skip this step completely.
Big mistake, huge.
Your natural nail has this shiny top layer, and oils sitting on the surface too.
Press-ons need something to actually grip onto.
So the first move is always a gentle buff, just enough to knock off the shine.
Not aggressive, just enough that it feels slightly matte to the touch.
Then wipe everything down with rubbing alcohol on a cotton pad.
I do this twice honestly, because oils sneak back so fast.
Push your cuticles back too, gently, with a wooden stick.
This isn’t optional in my book anymore.
When I skipped prep once because I was running late, my set lifted within two hours.
Two hours, at brunch, so embarrassing.
Now I treat prep like the non-negotiable first date before the real relationship starts.
Ten minutes of prep buys you like ten days of wear.
That trade is worth it every single time.
Sizing Is Where Most People Rush (Don’t)

I get it, you’re excited, you want them on now.
But please, please do the sizing step first.
Lay out all ten nails in the kit next to your actual fingers.
Every brand includes multiple sizes per finger for a reason.
Your thumb and pinky are almost never the same width, and neither are the rest.
I like to actually place each tip on my nail bed before committing to anything.
It should cover edge to edge without pinching your skin or leaving gaps on the sides.
If it’s pinching even slightly, size up.
Gaps on the side mean the nail will catch on stuff constantly, and trust me, that’s annoying.
I learned this the hard way pulling a sweater over my head and losing a nail mid-sweater.
So embarrassing, and also kind of funny now.
Take the extra five minutes here.
It genuinely changes how natural the whole set looks once it’s on.
Glue Versus Tabs, My Honest Take

I’ve tried both more times than I can count.
Tabs are great for a quick event, like one night out.
But if you want something that survives real life, glue wins every time for me.
The little brush-on glue pens give you way more control than the tube kind.
A thin, even layer is all you need, more is not better here.
I made that mistake early on, gooping it on thinking it’d last longer.
It just made everything messier and honestly weaker.
Less glue, applied thin, cures better and looks flatter against your nail.
Flatter means it’s harder for anyone to spot the edge.
If you’re someone who works with your hands a lot, glue is worth the slightly longer removal process.
I do my own nails on Sunday nights now, it’s kind of become my little ritual.
Glass of wine, glue pen, some trashy reality show playing in the background.
It’s become one of my favorite parts of the week honestly.
The Cuticle Line Is Your Biggest Tell

This one took me forever to figure out.
If there’s a visible gap at your cuticle, that’s the first thing people notice.
Even a tiny sliver of natural nail peeking through gives it away instantly.
So when you’re sizing, pay close attention to the base width specifically.
The tip should sit right at your cuticle line without overlapping onto your skin.
Overlapping onto skin is just as bad as a gap, by the way.
It traps moisture and actually causes lifting faster.
I like to press from the cuticle outward when applying, not the other way around.
That way you’re sealing the most visible part first.
Hold pressure right there for a good twenty seconds.
I actually count it out loud sometimes, which probably looks silly.
But it works, and that’s what matters.
Nailing this one detail is honestly the closest thing to a cheat code I’ve found.
Finish Matters More Than You’d Think

Glossy finishes are stunning, don’t get me wrong.
But high shine can sometimes catch light in a way that looks a little plasticky.
Soft matte or a slightly satin finish tends to read more like real, healthy nail.
If I’m going for the most undetectable look, I lean satin almost every time.
Save the high gloss for special occasions when you want that statement look anyway.
I did my cousin’s bridal shower nails in a soft milky pink satin finish.
Three different people asked if she’d just had them done at a salon that morning.
She just smiled and let me take the credit later, ha.
There’s something about that slightly muted shine that feels expensive and effortless at once.
It’s a small styling choice, but it changes the whole vibe.
If your natural nails have a soft sheen normally, match that energy with your set.
Little things like this add up to something that just feels right.
Length Is Where People Give Themselves Away

I love a dramatic length as much as anyone.
But if undetectable is the actual goal, shorter reads more real.
Anything past your fingertip by more than a few millimeters starts to look costume-y fast.
I usually go about one to two millimeters beyond my natural nail edge.
It still gives you that clean, finished look without screaming “extensions.”
When I wore a longer set to a work dinner once, my boss actually commented on it.
Not in a bad way, but it definitely got noticed as “different.”
That told me everything I needed to know.
Shorter lengths also just feel more comfortable for typing and everyday stuff, ngl.
So there’s a practical bonus too.
If you’re new to press-ons, start shorter than you think you want.
You can always go longer once you’re more confident with application.
Baby steps, honestly, that’s how I built up my whole routine.
My Press-and-Hold Technique

This part is so simple but people rush right through it.
Apply glue to both the tip and your natural nail, just a thin layer on each.
Starting at the cuticle, angle the tip in and press down slowly.
Roll your finger slightly as you press, working from base to tip.
Then hold, actual firm pressure, for a solid twenty to thirty seconds.
I set a timer honestly, because “counting in my head” always ends early.
This step is what prevents that lifted edge you see on rushed sets.
While you’re holding, avoid bending your finger or moving around.
I know it’s tempting to just check your phone one-handed.
Resist that urge, just this once.
The bond needs that stillness to actually set properly.
Once you release, avoid touching water for at least an hour if you can help it.
This one habit alone fixed like ninety percent of my lifting issues.
Fixing Bubbles And Lifting Without Starting Over

Sometimes you’ll get a little air bubble near the base.
Don’t panic, and definitely don’t rip it off.
Gently press around the bubble to see if it flattens with more pressure.
If it doesn’t, a tiny pin can release trapped air, then press again immediately.
For lifting at the edges, a dot of glue slipped underneath usually saves the whole nail.
I keep my glue pen in my bag now for exactly this reason.
It’s saved me more than once during a long day out.
If a nail pops off completely, don’t just glue it back dry.
Redo the alcohol wipe on both surfaces first.
Skipping that step means it’ll just pop off again within hours.
I learned this one through pure trial and error, mostly error.
But now it’s second nature, and honestly kind of satisfying to fix on the fly.
How I Make Mine Last Ten Plus Days

Applying cuticle oil daily, around the edges, keeps things sealed and flexible instead of brittle.
I avoid hot showers right after application, waiting a full day if I can.
Using my fingertips instead of nails to open cans or peel stickers helps a ton too.
I know, it’s a habit change, but it’s worth it.
Sleeping with satin pillowcases has weirdly helped mine last longer too.
Less friction overnight apparently means less lifting.
I reapply a thin topcoat around day five to refresh the shine and add a protective layer.
It’s a small five minute touch up that extends the whole set noticeably.
Little maintenance habits like these turned my sets from three-day wonders into two-week keepers.
Consistency is honestly the whole secret.
Removal Without Wrecking Your Real Nails
This part scared me for the longest time.

I thought ripping them off was just part of the deal.
It’s not, and please don’t do that to your poor nails.
Soak a cotton ball in acetone, place it on the nail, then wrap in foil.
Let that sit for ten to fifteen minutes, patience is key here.
The press-on should slide off gently, no prying, no cracking.
If it resists, soak a few more minutes rather than forcing it.
After removal, your natural nail might feel a little dry.
I always follow up with cuticle oil and a hand cream immediately after.
Give your nails a short breather before the next set if you can.
Even just a day or two helps them recover their natural moisture.
Treating removal with the same care as application changed my whole relationship with press-ons.
My natural nails are honestly healthier now than before I started.
My Personal Favorite Looks And Occasions

For everyday wear, I gravitate toward soft nudes and milky pinks.
They go with everything and they photograph so well without trying.
For date nights, I love a deep chocolate brown with a satin finish.
It feels moody and expensive without being loud.
For summer, a warm terracotta or soft coral just makes me happy looking down at my hands.
Weddings and showers call for that milky white or champagne shimmer every time.
If you want a little variation, try mixing one accent nail in a slightly different shade.
It keeps things interesting without overwhelming the whole set.
I also love swapping finishes seasonally, matte in fall, glossy in spring.
It’s such a small change that makes the same shape feel completely fresh again.
My best advice honestly is to build a little rotation of two or three go-to sets.
That way you’re never scrambling last minute before an event.
Trust me, future you will thank present you for the prep.
A Few Extra Hacks I Swear By

Keep a nail file in your bag for any snagged edges throughout the day.
A tiny smoothing fix can save you from a full nail catching on things.
I also keep spare tips from my kit in a little pouch, just in case.
Losing one nail doesn’t have to mean the whole manicure is ruined.
Applying a cuticle oil pen throughout the week keeps the whole set looking fresh, not just healthy.
It genuinely extends the life of the glossy or satin finish too.
If your hands run warm or you sweat a lot, size down slightly on width.
Warmth can cause tiny amounts of swelling that mess with the fit otherwise.
And honestly, practice a few times on a “low stakes” weekend before wearing a set somewhere important.
The first couple tries are always a little clumsy, and that’s completely normal.
By set three or four, it starts feeling like second nature.
That’s when the compliments really start rolling in.