Ready to shock the world with nails that literally glow brighter than a rave?
Ordering press-ons? The free manicure type finder reads your nail widths on four brands’ size charts.
These acid-inspired designs aren’t for the faint of heart – they’re for nail rebels who want to make every room they enter light up like a neon sign.
Get ready to discover the most electrifying nail art that’ll have people doing double-takes from across the street.
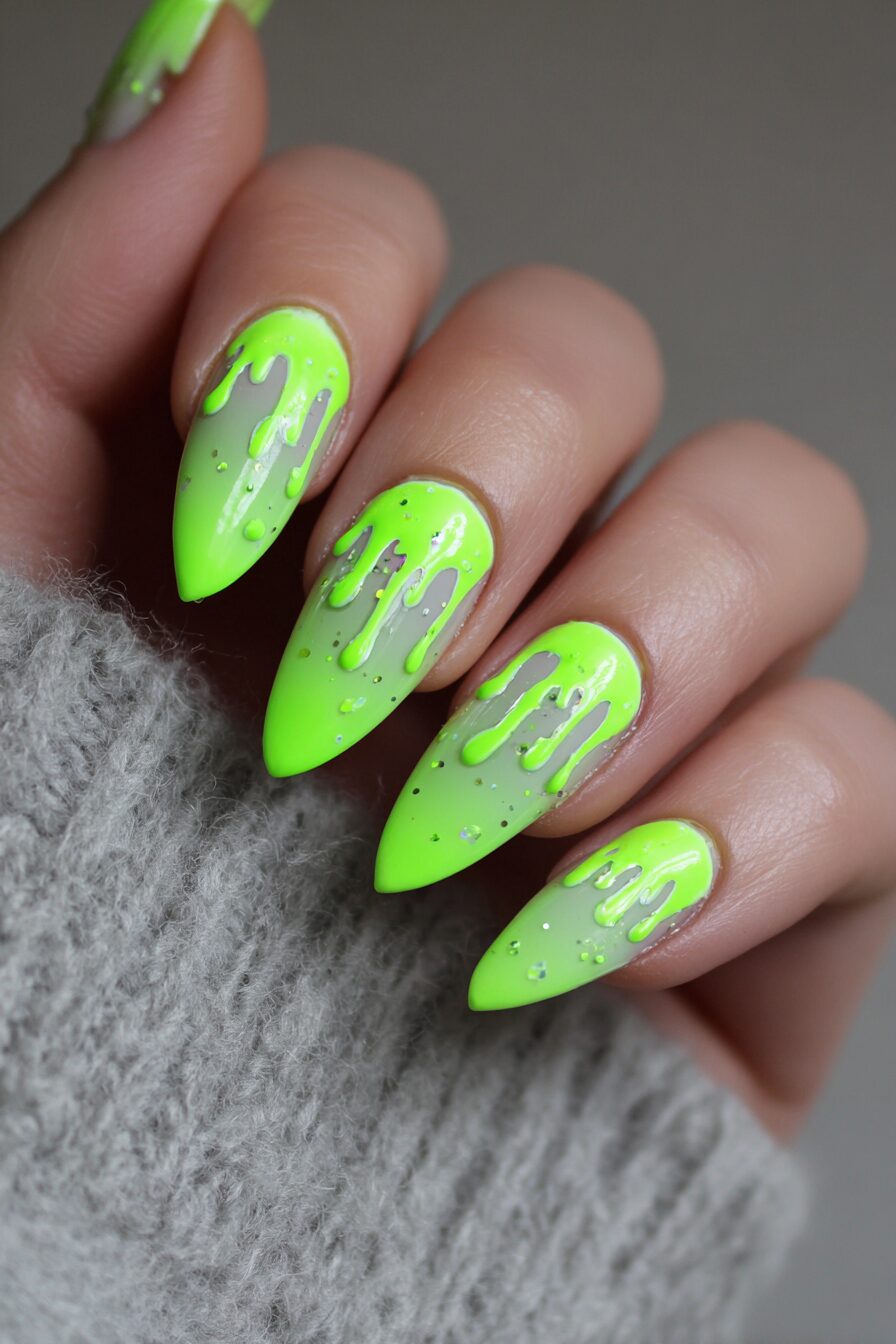
Neon Green Slime Drip Design


Your nails are about to look like they’ve been dipped in radioactive ooze straight from a sci-fi movie.
This design starts with a jet-black base that makes the neon green pop like nothing you’ve ever seen before.
The slime effect gets created by layering different shades of electric green polish, starting with the brightest lime at the cuticle and gradually building up layers that drip down toward the tips.
You’ll want to use a thick gel polish for this look because it holds its shape better and gives you that authentic gooey texture.
The secret sauce here is applying the green in uneven, organic shapes that actually look like they’re melting down your nails.
Some nail artists add tiny black dots or bubbles within the green to make it look even more like toxic waste.
The finishing touch involves a glossy top coat that makes the whole design look wet and slimy – exactly what you’re going for.
This design works especially well on longer nails because you get more surface area to create those dramatic dripping effects.
The contrast between the black base and the electric green creates an optical illusion that makes your nails appear to glow in normal lighting.
Under blacklight or UV lighting, this design absolutely comes alive and turns your fingertips into tiny green beacons.
You can customize this look by adding silver chrome accents or tiny rhinestones that look like metal pieces floating in the slime.
The best part about this design is that it’s actually pretty forgiving – if you mess up a drip, you can just call it “authentic slime texture” and roll with it.
Electric Blue Lightning Bolts


Prepare to channel Thor’s power right through your fingertips with lightning bolts that look like they could actually zap someone.
This design transforms your nails into miniature storm clouds that crackle with electric energy.
You start with a deep navy or black base color that serves as your stormy night sky backdrop.
The lightning bolts get painted using the brightest electric blue polish you can find, mixed with a tiny bit of white to make them really pop.
The trick to making realistic lightning is painting jagged, zigzag lines that branch out in unexpected directions – real lightning never follows a straight path.
You’ll want to use a super thin nail art brush or even a toothpick to create those fine, crackling details that make the lightning look authentic.
Some nail artists add a subtle purple or silver outline around the lightning to give it more dimension and make it look like it’s actually glowing.
The design works best when you vary the thickness of the lightning bolts – some should be bold and thick while others are thin and delicate.
Adding tiny white dots around the lightning creates the illusion of electrical sparks flying off in all directions.
You can make this design even more dramatic by using glow-in-the-dark blue polish for the lightning bolts.
The contrast between the dark base and the bright blue creates an almost 3D effect that makes the lightning appear to jump off your nails.
This design looks incredible under both natural and artificial lighting, but it really comes alive in dimmer settings where the electric blue seems to pulse with energy.
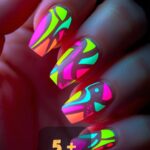
Hot Pink Tie-Dye Swirl

Get ready to transport your nails straight back to the most epic music festival of all time with swirls that look like liquid cotton candy.
This psychedelic masterpiece combines multiple shades of hot pink, magenta, and fuchsia in a hypnotic swirl pattern that seems to move when you look at it.
The technique starts with applying different shades of pink polish in random dots across your nail while the base coat is still slightly wet.
You then use a thin brush or toothpick to swirl the colors together, creating organic, flowing patterns that never repeat exactly the same way twice.
The key to achieving that authentic tie-dye look is working quickly before the polish starts to set – you want those colors to blend smoothly into each other.
Adding touches of electric purple or neon orange to the mix creates those unexpected color pops that make the design truly eye-catching.
Some nail artists incorporate holographic polish into the swirls, which creates an almost kaleidoscope effect as the light hits different angles.
The beauty of this design lies in its imperfection – the more random and organic your swirls look, the more authentic the tie-dye effect becomes.
You can customize the intensity by using either pastel pinks for a softer vibe or going full neon for maximum impact.
The swirl patterns work especially well when they flow from the cuticle toward the tip, creating a sense of movement and energy.
Adding a matte top coat gives this design a completely different personality, making the colors look more muted and vintage.
This design pairs perfectly with festival fashion, bohemian outfits, or any time you want to add a splash of retro psychedelic energy to your look.
Glow-in-the-Dark Radioactive Design


Your nails are about to become the ultimate conversation starter that literally lights up every dark room you enter.
This design combines the classic radioactive symbol with phosphorescent polish that charges up in daylight and glows green in the dark.
You begin with a black or dark gray base that makes the glow effect even more dramatic when the lights go down.
The radioactive symbols get painted using bright yellow or lime green glow-in-the-dark polish that you can find at specialty nail supply stores.
The three-blade radioactive symbol works best when painted large enough to be clearly recognizable – you want people to immediately understand the reference.
Adding small dots or splatter effects around the main symbol creates the illusion of radioactive particles floating around your nails.
You can enhance the glow effect by applying multiple thin layers of the phosphorescent polish rather than one thick coat.
The design becomes even more impressive when you add tiny silver or white highlights to make certain parts of the symbol appear to shine brighter.
Some nail artists create a gradient effect by making the center of the symbol brighter and letting it fade toward the edges.
The glow typically lasts for several hours after being charged up, making this design perfect for evening events or parties.
You can charge the glow by holding your nails under a bright light or in direct sunlight for a few minutes before heading into darker environments.
This design works particularly well for Halloween, sci-fi themed parties, or any time you want to add some literal spark to your outfit.
Neon Orange Sunset Gradient

Transform your nails into miniature masterpieces that capture the most stunning sunset you’ve ever witnessed.
This design recreates that magical moment when the sky explodes into brilliant shades of orange, pink, and yellow right on your fingertips.
The gradient technique starts with the darkest orange at the base of your nail and gradually transitions to bright yellow at the tips.
You’ll need at least three different shades of orange polish, ranging from deep coral to electric tangerine to create a smooth transition.
The blending happens while the polish is still wet, using a makeup sponge to dab and blend the colors together seamlessly.
Adding touches of hot pink or magenta to certain areas creates those dramatic color pops that make real sunsets so breathtaking.
The key to achieving a professional-looking gradient is building up the colors slowly with multiple thin layers rather than trying to get it perfect in one go.
Some nail artists add tiny gold or silver glitter particles throughout the gradient to simulate the way sunlight sparkles and dances across the sky.
The design becomes even more stunning when you add small cloud-like white accents using a dry brush technique.
You can customize the intensity by making some nails more yellow-dominant while others lean more toward the orange spectrum.
The gradient works particularly well on longer nails because you have more space to showcase the full color transition.
This design pairs beautifully with summer outfits, beach vacations, or any time you want to carry a little piece of that perfect sunset with you wherever you go.
Electric Purple Galaxy Marble

Prepare to turn your nails into portals to another dimension with swirling galaxy patterns that look like they contain actual stardust.
This cosmic design combines deep purple, electric violet, and hints of silver to create a marble effect that resembles distant nebulae.
The technique begins with a dark purple or black base that serves as the infinite space backdrop for your galaxy creation.
You then drop different shades of purple polish onto the wet base and use a thin brush to create swirling, marble-like patterns.
The magic happens when you add tiny dots of silver or white polish to represent stars scattered throughout your miniature galaxy.
Some nail artists incorporate holographic polish into the marble pattern, which creates an incredible depth effect that makes the design appear three-dimensional.
The swirling technique works best when you follow organic, flowing movements rather than trying to create perfect symmetrical patterns.
Adding touches of electric blue or hot pink to certain areas creates those unexpected color variations that make real galaxies so mesmerizing.
You can enhance the cosmic effect by using a fine brush to paint thin white lines that represent distant shooting stars or cosmic dust trails.
The marble pattern should flow differently on each nail to create the impression that you’re looking at different sections of the same vast galaxy.
Finishing with a glossy top coat makes the colors appear to have incredible depth, like you’re peering through a telescope into deep space.
This design works particularly well for sci-fi fans, astronomy enthusiasts, or anyone who wants to carry a piece of the universe on their fingertips.
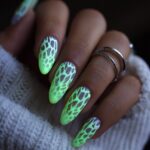
Lime Green Snake Print

Get ready to unleash your wild side with reptilian patterns that make your nails look dangerously beautiful.
This fierce design mimics the scales and patterns of exotic snakes using electric lime green and black accents that create an almost hypnotic effect.
The base color should be the brightest lime green you can find – the kind that practically glows under fluorescent lighting.
The snake scale pattern gets created using a small brush to paint overlapping oval shapes in slightly darker green, building up layers of texture.
Black accents around each scale create definition and make the pattern pop with three-dimensional realism.
You can vary the scale sizes across your nails to create a more organic, authentic reptilian texture that looks like actual snake skin.
Some nail artists add tiny white or silver highlights to certain scales to simulate the way light reflects off real snake skin.
The pattern works best when it flows in different directions on each nail, creating the illusion that the snake skin continues seamlessly across all your fingers.
Adding subtle gradient effects within individual scales makes the design even more realistic and visually interesting.
You can customize the look by incorporating other neon colors like electric yellow or hot pink for a more fantastical, mythical creature vibe.
The design becomes even more striking when you add a matte top coat to some nails while leaving others glossy.
This bold pattern pairs perfectly with edgy fashion choices, rock concerts, or any time you want to show the world your fearless personality.
Fluorescent Yellow Geometric Patterns

Your nails are about to become geometric masterpieces that look like they were designed by a mathematician who loves neon lights.
This ultra-modern design combines sharp angles, clean lines, and blazing yellow polish to create patterns that are both sophisticated and eye-catching.
The geometric approach starts with mapping out your design using tape or nail stencils to ensure perfectly crisp lines and angles.
Fluorescent yellow polish serves as both the background and accent color, creating contrast through different geometric shapes and negative space.
You can create triangles, diamonds, chevrons, or abstract angular patterns that give your nails a futuristic, almost architectural appearance.
The key to successful geometric nail art is patience – each section needs to dry completely before you remove the tape or add the next layer.
Adding black or white accents to certain geometric sections creates depth and makes the yellow areas appear even more vibrant.
Some nail artists incorporate metallic silver lines to outline certain shapes, giving the design a high-tech, digital aesthetic.
The beauty of geometric patterns lies in their versatility – you can make them as simple or as complex as your skill level allows.
Each nail can feature a different geometric pattern while still maintaining a cohesive overall look through the consistent color scheme.
The fluorescent yellow creates an almost electric effect that makes your nails visible from across a room.
This design appeals to people who love modern art, architecture, or anyone who wants nail art that looks like it belongs in a contemporary art museum.
Bright Coral Holographic Shimmers

Prepare to mesmerize everyone around you with nails that shift and change color like magical chameleons with every movement.
This ethereal design combines bright coral base color with holographic top coats that create rainbow prisms dancing across your nails.
The coral shade should be vibrant and warm, serving as the perfect backdrop for the holographic effects that will layer on top.
Holographic polish contains special particles that break light into spectral colors, creating an almost liquid rainbow effect.
The application technique involves layering the holographic polish in thin, even coats to build up the maximum prismatic effect.
Different angles and lighting conditions will reveal different colors within the holographic spectrum, making your nails constantly interesting to look at.
You can enhance the effect by adding holographic glitter or chrome powder to certain areas for extra dimension and sparkle.
The coral base color provides warmth that makes the cool holographic tones appear even more vibrant and magical.
Some nail artists create gradient effects by applying the holographic polish more heavily at the tips and fading it toward the cuticle.
The design works particularly well in natural sunlight, where the holographic elements really come alive and create stunning visual effects.
Adding small rhinestones or gems strategically placed throughout the design amplifies the sparkle factor even more.
This sophisticated yet playful design works for both casual and formal occasions, adapting its personality based on the lighting and your outfit choices.
Electric Teal Chrome Mirror Finish

Get ready to turn your nails into liquid metal mirrors that reflect light like polished chrome bumpers on a vintage car.
This ultra-modern design uses special chrome powder to create a finish so reflective that people will literally see themselves in your nails.
The process begins with a black gel base coat that provides the perfect dark backdrop for the chrome effect to really pop.
Chrome powder gets rubbed onto the tacky layer of gel polish using a silicone tool or your finger, creating that signature mirror finish.
The electric teal shade adds a futuristic twist to the classic chrome look, making your nails appear almost otherworldly.
The application technique requires working quickly and evenly to ensure the chrome finish appears smooth and flawless across the entire nail surface.
Different lighting conditions will make the chrome finish appear to shift and change, creating an almost liquid metal effect.
You can create accent designs by masking off certain areas before applying the chrome, leaving some sections with the base color showing through.
The mirror finish is so reflective that it actually picks up and reflects the colors of your clothing and surroundings throughout the day.
Some nail artists add geometric tape patterns before applying the chrome to create striking negative space designs.
The durability of chrome nails is impressive when sealed properly with a quality top coat designed specifically for chrome finishes.
This cutting-edge design appeals to fashion-forward individuals who want nail art that looks like it came from the future.
These acid-bright nail designs prove that your fingertips can be the ultimate fashion statement.
Each look brings its own personality and energy, giving you endless ways to express your bold, fearless style.
Pick your favorite design and get ready to light up every room you enter!