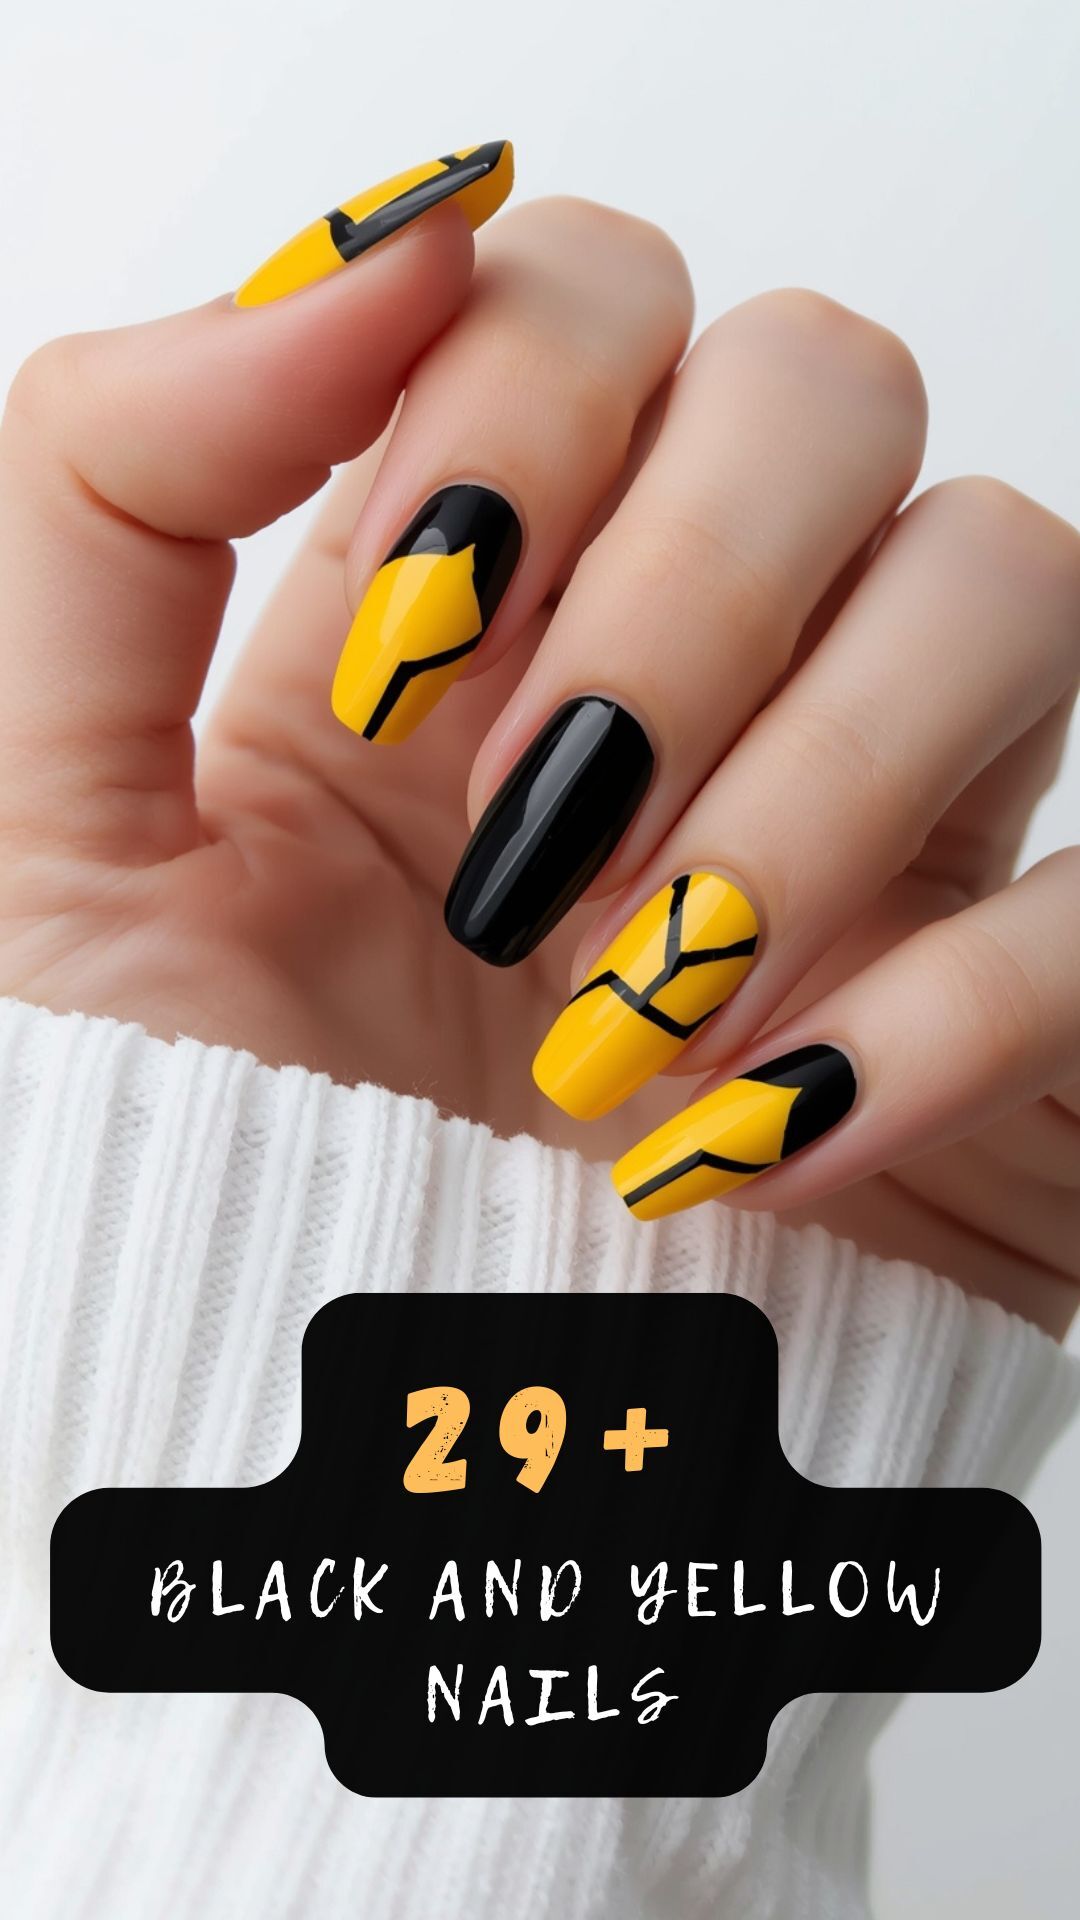
The high contrast between these bold, bright shades creates an eye-catching effect that demands attention.
Black represents mystery, power, and sophistication.
Yellow is associated with happiness, optimism, and energy.
Black keeps things edgy and cool, while yellow injects vibrancy and fun.
This color duo is ideal for someone who wants nails that are bold and expressive, yet still chic.
Ordering press-ons? The free manicure type finder reads your nail widths on four brands’ size charts.

Sunflower Nails

What better way to sport the chic black and yellow color combo than with a lively sunflower design?
Sunflowers represent joy, warmth, positivity and summer fun, making them the perfect motif for your nails any time of year.
There are endless options for creating artistic sunflower nail art using simple polish or more advanced manicure techniques.
For a basic sunflower look, start by painting your nails black as the base color.
Once the polish is completely dry, use yellow nail polish or acrylic paint to create yellow sunflower shapes featuring a circle center and pointy petals on one or two accent nails.
Add details like green arrow-shaped leaves and curving stems with brown or green polish to give the sunflowers dimension.
This classic look is quick, easy and makes a bright statement!
To take the design up a notch, paint different sizes of sunflowers on multiple nails to create a full sunflower garden scene.
Use a detail brush and green polish to paint grass at the base of the stems for a more realistic effect.
Add bumblebees buzzing from flower to flower using small black dotted bodies and wings.
Accent with gold glitter or shiny top coat on the sunflower centers to look like the pollen-covered middle.
Another simple but pretty sunflower nail idea is to paint each nail a different sunflower stage.
Do a closed sunflower bud, a partially opened flower, a full bloom, and one shedding its petals to mimic the life cycle.
Keep the colors clean and minimalist for a delicate natural look.
This works great as a spring or summer manicure to represent the changing seasons.
If you want something bolder, make your sunflowers stand out starkly against the black base by using bright, saturated yellows and ruby reds for the centers.
Go big and paint a giant sunflower across all five nails on one hand.
Add touches of shimmery gold and glossy top coat to make it shine.
To add retro flair, use white polish to paint simple daisy shapes interspersed between your yellow and black sunflowers for a 1970’s vibe.
Outline the daisies in black for definition.
For minimalist sunflower nails, paint your nails black, then use a detail brush to create abstract white-trimmed sunflowers on just two accent nails.
The subtle floral against the black background is sophisticated and artsy.
If you’re feeling creative, turn your sunflowers into beautiful works of nail art.
Hand paint the petals in swirling strokes in shades of sunny yellow, orange and gold metallic to mimic Van Gogh’s iconic paintings.
Connect the sunflowers together with cascading vines.
For a pop art spin, paint graphic yellow circles for the sunflower centers and use triangle shapes in green, purple, blue and red for the petals.
Outline them thickly in black.
The bright colors and bold outlines are retro and fun.
For textured sunflowers, apply a sheer coat of yellow glitter polish over black for subtle shimmer.
Use gel glue to attach faux yellow flower petal appliques for dimensional centers.
Outline the petal edges in black for definition.
Instead of classic sunflowers, put a unique spin on your manicure with a field of vibrant multi-colored Gerbera daisies against a black backdrop.
Use every color of the rainbow and paint on long slender petals with black stems.
Make your sunflowers stand out by using black glitter polish as your base color instead of plain black for a sparkling midnight garden look.
The glinting shine makes the yellow pop even more.
For minimalistic nails, simply paint your ring finger black and your middle finger bright yellow – like a simple flower against soil.
Its basic but interesting negative space look works beautifully.
Honeycomb Nails

Honeycomb patterns in black and yellow immediately create an eye-catching, on-trend geometric nail look.
The hexagonal shapes resemble the interior of a bee hive, making this a fun manicure option for spring and summer.
There are endless ways to get creative with this artistic nail idea.
For a graphic honeycomb pattern, start by painting your nails black as the base color.
Once the polish is completely dry, use a dotting tool and bright yellow nail polish to make hexagonal shapes of different sizes on top of the black background.
Keep the design graphic and abstract for a modern look, or make it more realistic by outlining the hexagons with slightly thicker hive-like lines.
To give your abstract honeycomb nails extra flair, add 3D embellishments like gold studs, rhinestones or glitter inside some of the hexagonal cells.
This adds pretty dimension and texture.
For a bolder bee theme, paint on yellow and black striped bumblebees buzzing around the honeycomb using small dotted bodies, wings and antennae.
Make your honeycomb pattern into negative space by painting your nails yellow first, then using a dotting tool to create black hexagonal shapes on top, leaving the yellow peeking through.
Try making the honeycomb on just 2-3 accent nails for a more subtle look.
Bumblebee Nails

What’s more cheerful than cute bumblebees buzzing around your nails?
This playful design is perfect for summer and easy to achieve using simple polish techniques.
Start with a base coat of bright sunny yellow polish on all nails.
For a smooth finish, apply 2-3 thin coats and allow each layer to fully dry before adding the next.
Once the yellow base color is complete, use a small detail brush dipped in black polish to paint on bumblebee bodies.
Make rounded oval or teardrop shapes with tapered abdominal segments.
Position bees on 1 or 2 accent nails.
Paint two small black dots for cartoonish eyes and skinny straight lines for antennae.
Use the detail brush to add wings, painting two thin black curved shapes extending from each bee’s body.
For a more natural effect, make the wings translucent by diluting the black polish with clear topcoat before painting them.
Outline the wings with a thin line of yellow polish to accentuate them.
You can also add yellow stripes across the bees’ abdomens for detail.
Use white polish to add dots along the stripes or on the heads for a cute polka dot texture.
For extra whimsy, use green polish to paint tiny blades of grass on the nail tips to create little yards for the bees to buzz around in.
Add touches of yellow or white for small flowers.
Give your bees little personalities by painting on smiles, bows, hats or glasses with black or colored polish.
Come up with fun looks like a hip hop bee in sunglasses, a preppy bee with a sweater vest, or a sleepy bee in a nightcap.
For added flair, use glossy topcoat to give your bees’ bodies a shiny polished look like a real insect exoskeleton.
This makes them look more three-dimensional.
On accent nails without bees, paint different flower designs like daisies, roses, and violets using white, pink and purple polish.
Make them cartoony with hard edges or soft watercolor textures.
The garden scenes complement the busy bumblebees.
For sparkling bees, mix gold, silver or iridescent glitter polish into your yellow base color before painting your nails for a shimmery sand textured effect.
The glittery shine makes the whole look pop.
Try using striping tape to paint concentric black and yellow stripes on some nails to mimic bumblebee patterns.
Place the bee accents on top for a coordinating style.
For minimalist bees, paint two coats of black polish as your base color.
Once dry, use a toothpick and yellow polish to dot on oval bee bodies only – no other details.
The simplicity is chic and eye-catching.
Black and Yellow Checkered Nails


Checkered print nails are a classic and timeless look that immediately evokes retro vibes.
The high contrast black and yellow checkers create an eye-catching optical illusion on nails.
There are many creative ways to make this design modern and fun.
Start by painting your nails in straight, evenly spaced alternating black and yellow squares for a traditional checkerboard pattern.
Use a nail art detail brush and be patient – the smaller and sharper the squares are, the better the illusion.
Once the checkered pattern is painted on, enhance it by drawing thin black vertical lines in between some squares for definition.
You can also draw horizontal and diagonal lines for a geometric spin.
For extra flair, add shiny silver studs, rhinestones or glitter on select checkers.
This adds pretty pops of light and dimension to the pattern.
Make your black and yellow checkered nails modern by using matte polish finishes instead of shine.
Matte polish has a more contemporary look and the color contrast really stands out.
For an abstract take, paint the checkered squares with uneven widths and angles so they look handpainted.
You can also alternate between normal squares and diamond shapes for interest.
Only paint the checkered pattern on two accent nails and keep the rest a solid black or yellow base color.
This makes the print pop as a focal point without being overwhelming.
Use striping tape to mask off your nail and create defined squares, then paint over it in black and yellow polish.
Remove the tape promptly for incredibly clean, straight lines and perfectly sized checkers.
For minimalism, paint alternating nails solid black and solid yellow for a subtle checkerboard effect.
Leave the negative space between nails as contrast.
Try a sheer neutral base color like blush pink or nude on all nails first.
Once dry, hand paint black and yellow squares over top.
The natural nail peeking through softens the harshness.
Make some of your checkers iridescent by mixing black and yellow glitter polish into the colors before painting them on.
The sparkling shine makes the pattern pop.
For a pastel color scheme, paint your checkers in light lilac and pastel yellow.
Soften them further by lightly sponging white polish over the squares to mute the colors.
Smiley Face Nails

What’s more cheerful than smiley faces?
This happy nail idea is simple to achieve using basic polish techniques and minimal details.
Start by painting all your nails a bright sunny yellow.
This instantly evokes feelings of happiness and optimism.
Once the yellow base color is completely dry, use a thin nail art brush dipped in black polish to paint miniature smiley faces on one or two accent nails.
Keep the faces clean and minimalist featuring basic dots for eyes and upside down U shapes for smiles.
Avoid adding other facial features so they remain simplistic and cartoonish.
For some variety, paint the smiles in different expressions like upturned grins, closed eye smiles, or open-mouthed laughs.
You can also add eyebrows, winks, or tongues sticking out.
Make some of your smileys have fun personalities by adding small accessories like bows, hats, glasses, headbands or sunglasses using colored polish.
For an extra pop of color, paint the eyes and mouths in different colors like blue, red, or neon shades instead of plain black.
This makes them even more lively against the yellow background.
Paint a French tip smiley at the end of your ring fingernail for a cute surprise accent.
For minimalist nails, paint accent smiles on just the two middle nails while keeping the rest of the hands yellow.
Create smiley face stacks by painting a tiny smiley on top of a bigger one and a larger one on top of that, overlapping them in a pyramid shape.
Make it a full on emoji theme by adding hand-painted hearts, stars, music notes and other symbols to complement your smileys.
On one accent nail, gather all your smileys together into a little party scene, holding props like flowers and balloons.
Black and Yellow Striped Nails


Vertical stripes in bold black and sunny yellow have an instant retro and mod appeal.
This color combo is reminiscent of bumblebees, taxi cabs, referees, and old fashioned candy shops.
Painting clean, crisp stripes is easy with the right polish techniques.
Start by painting your nails a bright vibrant yellow as the base color.
Apply two coats and let each one dry thoroughly before adding the next to ensure an opaque finish.
Once the yellow is completely dry, use striping tape to mask off sections of each nail where you want the stripes to be.
Carefully paint the exposed areas black using steady strokes and full coverage.
For the sharpest edges, immediately remove the striping tape while the black polish is still wet by gently pulling it off parallel to the nail.
This prevents smudging.
Finish with a fast-drying glossy top coat like Seche Vite to seal in the design.
The high shine makes the stripes look bold and vivid.
Play around with different stripe widths and angles.
Stripes don’t have to be straight vertical.
Try diagonals, wavy lines, or chevrons pointing downwards.
Make some nails alternate thin and thick stripes for visual interest.
Varying the negative space creates depth and dimension.
For a glittery twist, use a yellow glitter polish with gold flecks as your base color, then paint the stripes in black glitter polish as well for lots of sparkle.
Paint just 1 or 2 accent nails with stripes to make them pop, keeping the other nails solid yellow or black.
This prevents the look from becoming too busy.
Add coordinating details like bees, flowers or honeycombs to the solid nails to complement the stripe theme.
For a retro spin, paint some of your stripes in the classic red and white candy cane pattern.
Pair with matching ’50s makeup and hair.
Black and Yellow Gradient Nails


For a softer, more subtle take on the black and yellow nail trend, try a gradient fade effect.
Blending these bold shades creates an artistic ombre look that’s sexy and modern.
Start by painting all nails with a bright yellow base color.
Apply two thin coats and allow to dry fully before gradients.
Once the yellow is dry, lightly sweep black nail polish vertically down each nail starting from the tip and working upwards.
Leave a hint of yellow peeking through at the cuticle.
Use a light hand so the black blends delicately into the yellow for a subtle faded effect rather than harsh lines.
Think sunset gradients.
While the polish is still wet, take a clean makeup sponge and gently dab it against the gradient to further soften and blur the black into the yellow.
This creates a seamless blend.
For glossy dimension, finish with a fast-drying top coat like Seche Vite.
The high shine makes the gradient really pop.
Try making some nails fade from black at the cuticle to yellow at the tip for reverse ombre gradient nails.
You can also create a bold diagonal gradient by painting the blacks and yellows at an angle rather than straight vertical.
For an abstract look, use a dotting tool to lightly dot the black polish over dry yellow nails, letting the colors bleed into each other.
Soften even further with a brush dipped in rubbing alcohol.
Make some nails black and some yellow, keeping the gradient effect on just 1 or 2 accent nails for a more subtle statement.
Play with different color combinations like lilac fading down into lavender or emerald green into lime green.
For glittery gradients, use a black glitter polish and paint thin coats to gradually layer it over yellow glitter nails.
Let each coat dry before the next layer.
Geometric Black and Yellow Nails


If you love graphic prints, go bold with geometric shapes on your black and yellow nails.
Triangles, circles, lines – get creative with patterns and mathematical designs using painterly techniques or nail tape.
Start by painting nails on one hand black and the other yellow for an instantly striking color block effect.
On the yellow hand, use a thin brush and black polish to paint shapes like triangles, rectangles, diamonds, squiggles, and diagonal lines in different sizes.
Outline them for added definition.
On the black hand, paint corresponding shapes in bright yellow, also outlining them in black.
Play with positive and negative space by making the shapes big and small.
Look up abstract geometric art for inspiration on interesting angles, intersections and color placement within the shapes.
Mimic patterns you love on your nails.
Use striping tape to create perfect triangles, trapezoids, arrows and chevrons.
Apply two coats of yellow or black over the tape, then remove it promptly for super sharp edges.
For a pixelated video game look, paint your nails black and use a dotting tool dipped in yellow to make lots of tiny squares in a pattern.
Outline in black.
Make abstract mosaic nails by painting irregular angular patches of black and yellow next to each other like a quilt.
Outline the edges for extra definition.
For boho flair, paint all your nails yellow first.
Once dry, use a black polish pen to hand draw geometric paisleys, mandalas, arrows and sun shapes in black.
Black and Yellow Polka Dot Nails

What’s cuter than polka dots?
Paint your nails yellow, then use a dotting tool to scatter different sized black dots randomly on each nail.
Keep them small and dainty for a retro vibe, or make them bigger and varied for a playful look.
You can also connect the dots into fun shapes.
Polka dots are a quirky accent that’s always in style.
Halloween Black and Yellow Nails

Halloween is the perfect occasion to rock black and yellow nails!
Paint all your nails black first.
Then add jack-o-lanterns, ghosts, spiders, candy corns, or other spooky motifs with yellow polish.
Go bold with glitter, jewels, striping tape, or even nail stickers to take the theme up a notch.
This mani will get you in the spirit for all your Halloween festivities.
Bumblebee and Daisy Nails

Here’s another way to mix yellow daisies and bumblebees for a coordinating look.
Start with a yellow base.
Paint on minimalist daisies on two nails – a round center with small petals is all you need.
Next, add dotted bumblebees in flight with black polish on the other nails.
Finish with black stems and leaves.
The busy bees buzzing around the cheerful daisies create a delightful garden scene on your nails.
Black and Yellow Chevron Nails

Chevron stripes in black and yellow have a retro diner style.
Paint the base yellow, then use striping tape to create defined chevron stripes in black pointing towards the nail tip.
For a playful accent, add mini black dots along some of the stripes.
Remove the tape carefully while the polish is still wet for super sharp lines.
This fun loving nail idea pairs perfectly with full 50’s inspired hair and makeup.
Abstract Black and Yellow Nail Art


Don’t feel like meticulously painting on designs?
Go bold and abstract instead.
Start with a black base coat.
Then use yellow polish to randomly splatter, drizzle, and splatter paint on top.
You can also make jagged stripes, geometric shapes, and freehand dots.
The abstract effect is modern and artsy.
Embrace the imperfections and let your creativity shine through.
Black and yellow make the perfect fashionable pair when it comes to nails.
Their high contrast and boldness create eye-catching, graphic designs.
Yet these colors also have a retro charm that’s always in style.