I was standing in line at my coffee shop last spring when a stranger grabbed my hand.
Not in a weird way, I promise.
She just saw my nails catch the light from the window and gasped a little.
“What IS that,” she said, staring at my fingertips like they were made of actual mirrors.
Honestly, I get that reaction almost every time now.
Chrome nails are one of those things that photos genuinely do not do justice.
You have to see them move under a light, under the sun, under a candle at dinner, to get it.
So today I’m breaking down everything I know about this look, the stuff nobody tells you, the mistakes I made, and how you can get that liquid-metal finish for yourself.
Grab your coffee.
This one’s a good one.
What Chrome Nails Actually Are

Okay so let’s start with the basics because I definitely didn’t understand this at first.
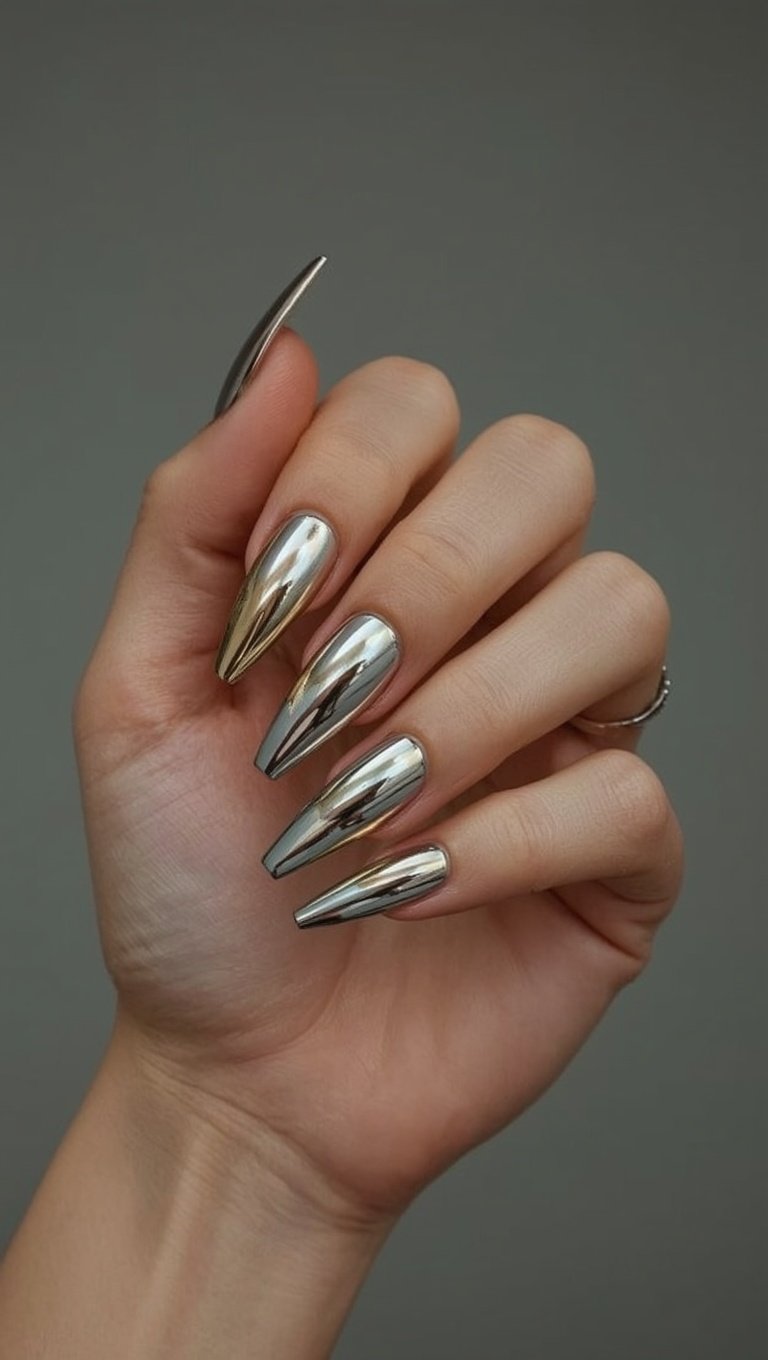
Chrome nails aren’t a polish color.
They’re a powder.
A super fine, pigmented powder that gets buffed directly onto a cured gel base.
That’s the secret.
It’s not paint, it’s basically a mirror you’re rubbing onto your nail with a little sponge applicator.
The pigment molecules are so small and so reflective that they create this optical illusion of liquid metal.
And that’s why it looks different than literally any metallic polish you’ve ever used.
Metallic polish has visible brush strokes if you look close.
Chrome has none.
It’s smooth, it’s glassy, it’s almost unsettling how perfect it looks.
I remember the first time I read about the process I thought it sounded kind of complicated.
It’s really not, once you get the hang of it.
But it is finicky in a way that regular polish just isn’t.
You can’t rush it.
You can’t skip steps.
The base has to be flawless because chrome powder shows every single bump, every ridge, every tiny imperfection underneath it.
So in a weird way, chrome nails are almost a test of how good your prep work is.
Which honestly changed how I approach my whole manicure routine now, not just this look.
My First Time Trying Chrome Nails

I tried this for the first time in my kitchen, at like eleven at night, because I am that person.
I’d bought a chrome powder kit online on a whim.
No real plan.
I did my base coat, cured it, and started rubbing the powder on with the little sponge applicator.
Nothing happened.
I mean nothing.
It just looked like gray dust smeared on my nail.
I almost gave up right there and went to bed defeated.
But I kept buffing, a little more pressure, a slightly different angle.
And then it happened.
This one nail just lit up.
Like actual chrome, like the bumper of an old car.
I sat there wiggling my finger under my kitchen light for way too long.
My husband walked in and asked why I was talking to my own hand.
I did not have a good answer for him.
That night taught me something important though.
The powder needs friction and the right base to activate.
It’s not going to look shiny the second you touch it.
You have to work it in, almost like you’re polishing a piece of jewelry.
Once I understood that, every attempt after got so much easier.
And honestly more fun, because now I know what’s coming.
Choosing Your Chrome Shade

There are so many chrome shades out there now and it can feel overwhelming.
Silver is the classic, the one that started this whole trend.
It’s the most reflective, the most true mirror finish you can get.
If you want maximum shine, silver wins every time.
Rose gold chrome is my personal go-to though.
It’s warmer, softer somehow, even though it’s still doing that mirror thing.
I find it looks incredible with warmer skin tones especially.
Gunmetal is the moodier option, and I love it for fall.
It reads almost like liquid pewter under warm lighting.
There’s also a green-gold chrome that I did not expect to love as much as I do.
It shifts colors depending on the angle, kind of like a beetle shell.
If you’re new to this, start with silver or rose gold.
They’re the most forgiving and honestly the easiest to find in kits.
Once you’re comfortable with the technique, branch out.
That’s when it gets really fun.
I keep three or four shades in my drawer now, just for different moods.
Some days I want the loud silver mirror.
Other days I want something quieter, like the gunmetal.
Pick your color the way you’d pick a lipstick, based on how you want to feel that day.
That’s genuinely how I choose mine now.
Prepping Your Nails for the Perfect Mirror Finish

I cannot stress this enough, prep is everything with chrome.
Start with clean, dry nails, no oil residue at all.
Push back your cuticles gently.
File your nail shape however you like it, oval, square, almond, whatever feels like you.
Buff the surface of your natural nail lightly, just enough to remove the shine.
This helps everything stick properly later.
Apply a thin base coat and cure it fully under your lamp.
Here’s where people rush, and I get it, you’re excited.
But you need a smooth, bubble-free gel color base before the chrome goes on.
Any dent, any streak, any unevenness will show through the chrome like a spotlight on it.
I usually do two thin coats of a black or nude gel polish as my base.
Black makes the chrome look almost holographic and intense.
Nude gives it a softer, more subtle glow.
Cure each layer fully.
Then apply a no-wipe top coat, and this part matters a lot.
If your top coat has a tacky layer, the powder won’t grip right.
Cure it, and don’t touch it with your bare fingers.
Any oil from your skin can mess with the activation.
I learned that one the hard way, smudged one nail with my thumb and had to start over.
Patience here saves you so much frustration later, trust me on this one.
DIY Chrome Powder vs. Salon Gel Chrome

So this is the question I get asked the most, should you DIY or go to a salon.
Honestly, it depends on your patience level and your budget.
Doing it yourself is so much cheaper long term.
A pot of chrome powder can last you through dozens of manicures.
But it does take practice, and your first few attempts might look streaky.
Mine definitely did.
Salon chrome tends to look a little more even right away because the tech has done this a thousand times.
Their hands know exactly how much pressure to use.
There’s also something kind of lovely about sitting in that chair and just letting someone else handle it for an hour.
I still go to my nail tech for special occasions, weddings, big trips, that kind of thing.
But for regular weeks, I do my own now.
It’s become this little ritual I actually look forward to.
If you’re someone who loves the process of doing your own nails, invest in a good kit.
If you just want the result without the mess, book a salon appointment and don’t feel guilty about it.
There’s no wrong answer here.
Both give you that same jaw-dropping mirror finish in the end.
The only real difference is who’s doing the buffing.
The Application Process, My Step by Step

Let me walk you through exactly what I do now.
Cured gel base, check.
No-wipe top coat, cured and cool to the touch.
I dip my sponge applicator into the powder pot.
Tap off the excess, this part matters more than you’d think.
Too much powder and it gets clumpy instead of smooth.
I press the sponge onto the nail and start rubbing in small circles.
Gentle at first, then a little firmer.
You’ll see the shine building gradually, almost like polishing silverware.
I go over every part of the nail, including the edges, so there’s no dull patch.
Once the whole nail is shiny and even, I use a clean, dry brush to sweep off any loose powder.
This step keeps things from feeling gritty later.
Then I seal it with another top coat, cured fully.
That top coat protects the chrome and helps it last so much longer.
I always do my pinky last actually.
Not for any real reason, it’s just become part of my rhythm.
Little habits like that make the process feel less like a chore and more like a small ritual just for me.
Once you find your own rhythm, it goes so much faster.
My first manicure took almost two hours.
Now I can do both hands in about forty minutes.
Practice really does make a difference here.
Common Mistakes I Made

Let’s talk about what went wrong so you can skip these headaches.
Mistake one, touching the tacky top coat with bare fingers.
Instant smudge, instant redo.
Mistake two, using too much powder at once.
It clumps and looks chalky instead of mirror-like.
Mistake three, not curing the base long enough.
If it’s even slightly soft, the chrome won’t activate properly.
Mistake four, skipping the buff step on my natural nail.
The chrome showed every tiny ridge underneath, it was humbling.
Mistake five, applying lotion right before starting.
Any oil on your skin or nail sabotages the whole process.
Mistake six, and this one’s silly but true, doing this in bad lighting.
You genuinely cannot tell if you’ve covered the whole nail evenly without good light.
I now do this near a window during the day whenever I can.
Mistake seven, rushing the sealing top coat.
If you don’t fully cover the chrome, it can wear away in patches within days.
Every single one of these mistakes taught me something though.
Nothing was wasted, even the redos.
I actually think the frustrating first attempts made me appreciate the good ones so much more.
So if your first try looks a little rough, that’s completely normal.
Mine did too, more than once.
How to Make Chrome Nails Last Longer
This finish is gorgeous but it can be a little more delicate than regular gel.

The top coat seal is your best friend here, don’t skip it or rush it.
I always cure mine a few extra seconds longer than the bottle says.
Wearing gloves for dishes and cleaning makes a real difference too.
I know, I know, nobody wants to actually do that.
But chemicals and hot water are chrome’s biggest enemies.
Applying cuticle oil daily keeps the whole manicure looking fresh longer.
Just avoid getting oil directly on the nail surface itself, keep it around the edges.
I also try not to use my nails as tools, no opening cans, no scratching off stickers.
That’s a hard habit to break honestly, I’m still working on it.
If you notice any dullness starting around day five or six, a quick swipe of top coat can revive the shine.
I keep a bottle in my bag for exactly this reason.
Avoid super hot showers right after application if you can help it.
Heat can affect the cure before it’s fully set.
With good care, mine typically lasts two to three weeks before I want a change.
That’s honestly better than a lot of regular gel colors I’ve tried.
The mirror finish is tougher than it looks, it just needs a little respect.
Treat it well and it’ll treat you well right back.
Chrome Nail Shapes That Show Off the Shine Best

Shape actually changes how the chrome catches light, which I did not expect.
Almond shapes create this beautiful gradient of light down the nail.
It’s soft and elegant, my personal favorite for chrome specifically.
Square nails give you a bold, flat mirror effect, almost like tiny compact mirrors.
I love this one for silver chrome especially.
Coffin shape stretches the shine out even more.
It’s dramatic in the best way.
Oval is the most classic and honestly the most forgiving if your application isn’t perfectly even.
Round nails soften the whole look, great if you want something more subtle and everyday.
Short nails work beautifully with chrome too, don’t let anyone tell you it’s only for long nails.
Some of my favorite chrome manicures have been on short, practical nails.
There’s something so satisfying about a tiny mirror on a short, clean nail.
If you’re growing your nails out and dealing with different lengths right now, chrome actually helps disguise that.
The shine draws the eye across the whole nail rather than focusing on length.
I found that out by accident during a growing-out phase and it became my go-to trick.
Try a few shapes if you can and see which one makes you want to keep staring at your own hands.
Because you will be staring at your own hands a lot with this look, I promise you that.
Pairing Chrome Nails With Outfits and Occasions

Silver chrome with a little black dress is basically a cheat code for looking put together.
It photographs so well too, if that matters to you.
Rose gold chrome pairs beautifully with warm neutrals, camel coats, cream sweaters, that whole palette.
I wore it to a fall wedding last year and got so many compliments.
Gunmetal chrome feels edgier, I love it with leather jackets and darker denim.
It adds this unexpected shine to an otherwise moody outfit.
For everyday wear, I actually reach for chrome more than I expected to.
It elevates even the simplest jeans and t-shirt combo.
There’s something about catching a glimpse of your own shiny nails while typing or driving that just makes you feel a little more put together.
For big occasions, silver or a color-shifting chrome feels celebratory without being over the top.
I did silver chrome for my sister’s engagement party and it felt so fitting for the moment.
For work, I sometimes go with a quieter rose gold so it feels polished but not too loud.
Chrome nails really do adapt to whatever mood or event you’re dressing for.
That versatility is honestly why I keep coming back to this look again and again.
It’s not just a trend to me anymore, it’s become part of how I get dressed.
Seasonal Chrome Variations

Chrome isn’t just a summer thing, and I think a lot of people assume it is.
In spring, I love a soft rose gold or a pale champagne chrome.
It feels fresh without being too flashy for the season.
Summer is when I go bold, bright silver especially catches the sun beautifully on vacation.
There’s nothing like seeing that mirror shine against a tan in July.
Fall calls for the moodier tones, gunmetal and a deep bronze chrome feel so right against sweater weather.
I switch to these the second the leaves start turning, it’s basically a ritual for me now.
Winter is when I bring in cooler silvers and even a icy blue-toned chrome.
It looks incredible against dark winter coats and holiday outfits.
Honestly, chrome against snow is one of my favorite things, it just glows.
I’ve started thinking of my nail color the way I think about my wardrobe, seasonal and intentional.
It sounds a little extra typing it out, but it genuinely makes getting ready more fun.
Each season gets its own little chrome moment now.
If you only try one seasonal shift, do the fall gunmetal.
It surprised me the most out of all of them.
I did not expect to love a darker chrome as much as I do the bright ones.
Chrome Nail Art Combos I Love

Chrome doesn’t have to cover the whole nail, and some of my favorite looks use it as an accent.
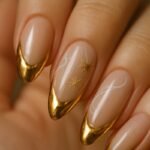
A french tip with just the tips done in chrome is so chic and understated.
I did this for a work event and got asked about it constantly.
Chrome on just one accent nail, usually my ring finger, is my lazy-day go-to.
It gives you that shine without committing to a full ten nails of maintenance.
Ombre chrome, where it fades from color into mirror shine, is stunning but definitely more advanced.
I’d only recommend that once you’re comfortable with the basic technique.
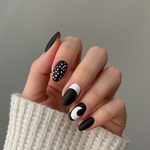
Pairing matte black polish with one or two chrome accent nails creates this incredible contrast.
It’s moody and shiny at the same time, which sounds contradictory but works so well together.
Adding tiny rhinestones near the cuticle on a chrome base takes it from everyday to special occasion instantly.
I do this combo for holidays especially.
Negative space chrome, where you leave part of the nail bare and chrome the rest, is another favorite of mine.
It feels modern and a little unexpected.
My advice, start simple with a full chrome mani first.
Get comfortable with the technique before you start layering in extra art.
Once the basics feel easy, the creative options really do open up in a big way.
My Chrome Nail Kit Essentials

If you want to try this at home, here’s exactly what’s in my kit right now.
A good gel base and top coat, this is not the place to skimp on quality.
Cheap top coats often don’t cure properly and the chrome just won’t stick right.
A UV or LED lamp, whichever your gel system requires.
Chrome powder in at least two shades to start, I recommend silver and rose gold.
A few sponge applicators, they wear out so keep extras on hand.
A soft, clean brush for sweeping away loose powder.
Nail files and a gentle buffer for prep work.
Cuticle oil, because healthy skin around your nails makes the whole look better.
Rubbing alcohol and a lint-free wipe for cleaning the nail before you start.
Little hack, keep your chrome powder pots sealed tightly between uses.
Air exposure can affect how well the pigment activates later.
Another hack, work in a well lit space, natural daylight if you can manage it.
You will catch mistakes so much faster that way.
Store your brushes standing up so the bristles keep their shape.
I learned that one after ruining a favorite applicator by tossing it loose in a drawer.
Building this kit little by little made the whole hobby feel so much more approachable.
You don’t need everything at once, just start with the basics and add from there.
That’s exactly how I did it, one little addition at a time.