Tired of spending a fortune on nail appointments that never quite match your vision?
Torn between gel, acrylic and dip? The free manicure type finder picks the type for how long you want it and for your own nails.
You’re about to discover the secret to achieving salon-worthy western nail art right from your bedroom.
These modern nail designs blend classic western aesthetics with contemporary trends, giving you that effortlessly chic look everyone’s been asking about on social media.
Classic French Tips with a Modern Geometric Twist


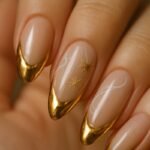
Your grandmother’s French manicure just got a serious upgrade that’ll have everyone doing double-takes.
Instead of the traditional curved white tip, you’ll create sharp geometric lines using contrasting colors like deep burgundy, forest green, or even metallic gold.
Start by applying a nude or clear base coat to clean, shaped nails.
Using nail tape or steady hands, create angular lines across your nail tips – think triangular shapes, diagonal cuts, or even zigzag patterns.
The beauty of this design lies in its versatility; you can make each nail slightly different while maintaining a cohesive color palette.
Choose two to three colors that complement each other and alternate them across your nails.
For added dimension, try using a matte topcoat on some nails while leaving others glossy.
This contrast creates visual interest without being overwhelming.
The key to nailing this look is precision – take your time with each line and clean up any mistakes with a small brush dipped in nail polish remover.
You can also experiment with negative space by leaving parts of your natural nail visible within the geometric design.
This technique adds a modern, minimalist touch that’s perfect for both casual and formal occasions.
The best part about this design is its longevity – geometric patterns tend to chip less noticeably than traditional French tips because the lines naturally camouflage minor wear.
You’ll find yourself reaching for this design again and again because it pairs beautifully with any outfit in your wardrobe.
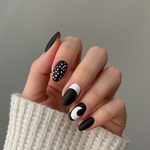
Minimalist Line Art That Speaks Volumes

Simple black lines on a neutral base create the most sophisticated nail art you’ve ever worn.
This design proves that sometimes less really is more, especially when executed with clean, confident strokes.
Begin with a light pink, beige, or soft gray base color that complements your skin tone.
Once completely dry, use a thin nail art brush or even a regular fine-tip marker to draw delicate lines across your nails.
Think abstract faces, geometric shapes, or even simple botanical outlines that look like they belong in a modern art gallery.
The magic happens when you vary the thickness and direction of your lines – some can be bold and straight while others are delicate and curved.
You don’t need artistic training to master this look; imperfection actually adds to its charm and authenticity.
Focus on creating balance across all ten nails rather than making each one identical.
Some nails can feature just a single curved line, while others might have intersecting straight lines forming interesting patterns.
The monochromatic color scheme keeps everything cohesive even when the designs vary significantly.
For extra sophistication, try using different shades of the same color family – perhaps charcoal lines on a light gray base, or navy on powder blue.
This subtle variation adds depth without compromising the minimalist aesthetic.
The beauty of line art nails lies in their versatility and timeless appeal.
They work equally well in corporate boardrooms and weekend brunches, making them the perfect go-to design for busy lifestyles.
Negative Space Geometric Patterns for the Modern Minimalist


Your natural nails become part of the design in this breathtaking technique that’s taking social media by storm.
Negative space nail art creates stunning visual effects by strategically leaving portions of your nail bare while painting precise geometric shapes around them.
Start with a clear base coat to protect your natural nails and create a smooth canvas.
Using nail tape, create clean geometric shapes like triangles, rectangles, or hexagons on different areas of each nail.
The tape acts as a stencil, ensuring crisp, professional-looking lines that would be nearly impossible to achieve freehand.
Choose one or two bold colors that contrast beautifully with your natural nail color – deep emerald, rich burgundy, or classic black work particularly well.
Paint over the exposed areas, making sure to seal the edges of the tape to prevent bleeding.
Remove the tape while the polish is still slightly wet to avoid peeling and create those satisfying sharp edges.
The result is a sophisticated pattern where your natural nail becomes an integral part of the design.
You can create different patterns on each nail while maintaining visual harmony through consistent color choices.
Try alternating between triangular cutouts on some nails and rectangular frames on others.
The key is maintaining balance – if one nail features a large negative space area, pair it with nails that have smaller geometric elements.
This design technique also makes your manicure last longer because chips and growth are less noticeable when they occur in the negative space areas.
The modern, architectural feel of these patterns makes them perfect for anyone who appreciates contemporary design and wants their nails to reflect their sophisticated taste.
Marble Effect Nails That Look Professionally Done


Creating stunning marble nails at home is easier than you think and delivers results that rival expensive salon treatments.
This technique gives you those gorgeous, organic swirls that look different on every nail, making each finger a unique work of art.
Begin with a white or light gray base coat that’s completely dry before starting the marble effect.
You’ll need two to three colors in the same family – think soft pinks with deeper roses, or cool blues with navy accents.
Drop small amounts of your chosen colors onto a plastic surface or paper plate.
Using a makeup sponge or small piece of natural sea sponge, dab into the colors and gently press onto your nail in a rolling motion.
The irregular texture of the sponge creates those beautiful, organic marble patterns that look so expensive and sophisticated.
Work quickly while the polish is still workable, blending colors by dabbing and rolling the sponge in different directions.
Each nail will turn out slightly different, which is exactly what makes this design so captivating and realistic.
Don’t worry about perfection – real marble has imperfections and variations that add to its beauty.
For extra dimension, add thin veining lines using a fine brush and a slightly darker shade from your color palette.
These delicate lines should follow the natural flow of your marble pattern, enhancing rather than overpowering the organic swirls.
Finish with a glossy topcoat to enhance the depth and give your marble nails that polished, luxurious appearance.
The sophisticated neutral tones make this design appropriate for any occasion while still being eye-catching enough to earn compliments wherever you go.
Abstract Color Blocking for the Bold and Beautiful


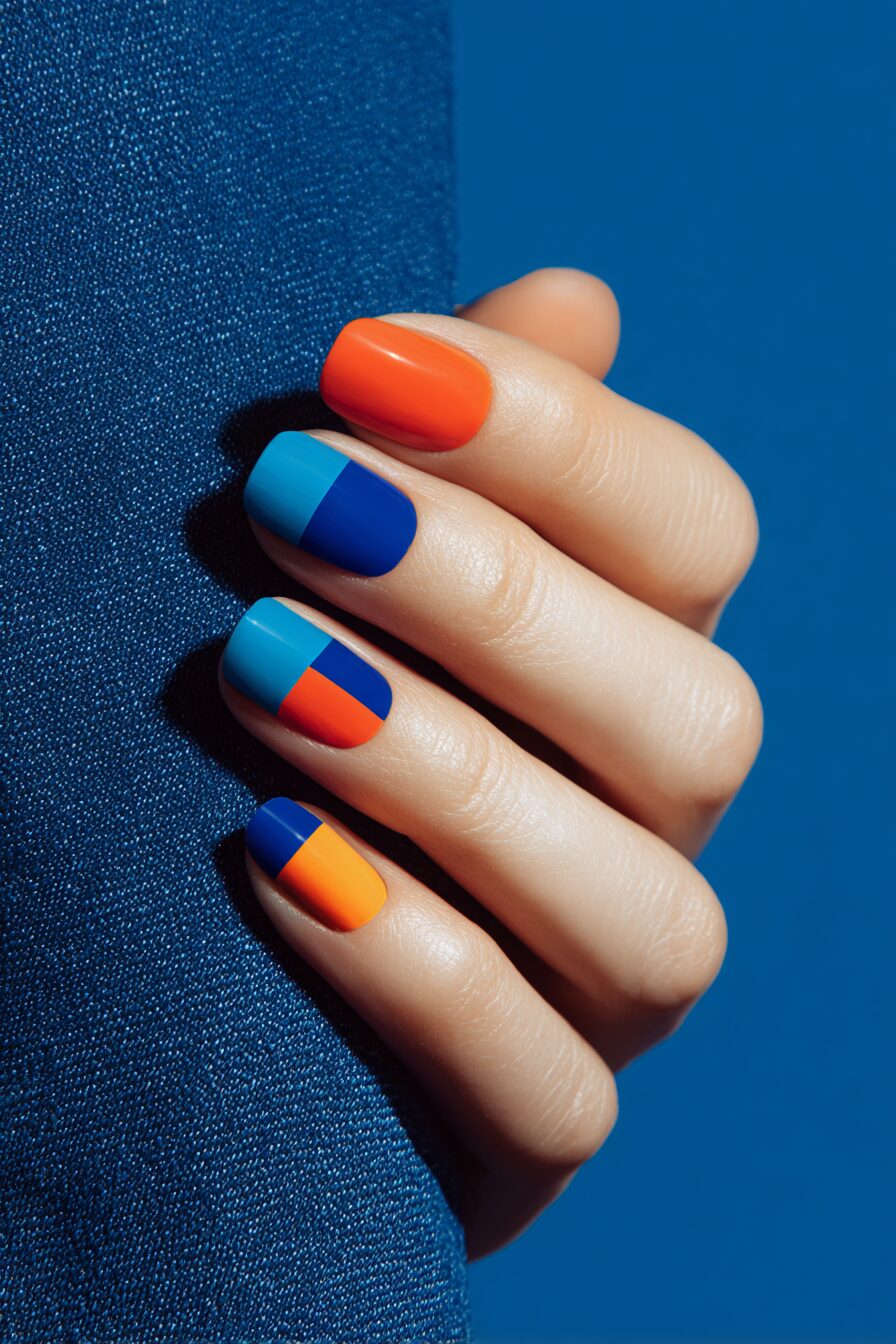
Transform your nails into tiny canvases featuring bold, modern art that would make Mondrian jealous.
Color blocking takes the guesswork out of nail art while delivering maximum visual impact through strategic color placement.
Choose three to four colors that either complement each other beautifully or create striking contrast – think coral, navy, and cream, or go bold with bright yellow, hot pink, and turquoise.
Start with a clear base coat, then map out your color blocks using nail tape or freehand painting if you’re feeling confident.
The beauty of abstract color blocking is that there are no rules – you can create large blocks that cover half the nail, thin strips that run vertically or horizontally, or even small squares scattered across the nail surface.
Each nail can feature a different combination of your chosen colors, creating a cohesive yet varied look across all ten fingers.
The key is maintaining some consistency – perhaps use the same base color on several nails, or ensure each color appears at least twice across your full manicure.
For a more sophisticated approach, incorporate negative space by leaving some areas of your natural nail visible between color blocks.
This technique prevents the design from becoming overwhelming while adding a modern, editorial feel.
You can also play with texture by using matte polish for some blocks and glossy for others within the same manicure.
The contrast between finishes adds another layer of visual interest without requiring additional colors.
Color blocking works particularly well when you want to incorporate seasonal colors or match specific outfits for special events.
The bold, graphic nature of this design makes it perfect for expressing your personality and artistic side while still maintaining a polished, intentional appearance.
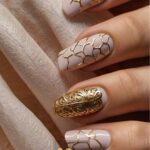
Metallic Accent Nails That Catch Every Light

One strategically placed metallic nail can elevate your entire manicure from ordinary to absolutely stunning.
The accent nail trend allows you to experiment with bold metallics without overwhelming your hands or your budget.
Choose a neutral base color like nude, soft pink, or classic white for nine of your nails.
For your accent nails – typically the ring fingers – select a metallic polish in gold, silver, rose gold, or even an iridescent shade that shifts colors in different lighting.
The contrast between matte neutrals and high-shine metallics creates a sophisticated balance that works for both professional settings and evening events.
You can take this design further by adding texture to your metallic accent nails using techniques like sponging or dry brushing.
Apply your metallic polish normally, then while it’s still slightly tacky, gently dab a makeup sponge over the surface to create a subtle textured effect.
This technique catches light differently across the nail surface, creating depth and visual interest.
For special occasions, try layering different metallic shades – start with a gold base and add copper highlights, or begin with silver and add holographic topcoat.
The layering technique creates complex, multidimensional color that looks expensive and custom-made.
You can also reverse the concept by painting nine nails in metallic and choosing two neutral accent nails for a bold, editorial look.
This approach works particularly well with rose gold or champagne metallics paired with soft gray or taupe neutrals.
The beauty of metallic accent nails is their versatility – they transition seamlessly from day to night and complement any color in your wardrobe.
The reflective quality of metallics also helps make your hands appear more elegant and draws attention to your beautifully shaped nails.
Gradient Ombre Effect for Seamless Color Transitions


Master the art of seamless color blending to create nails that look like they were painted by professional artists.
The ombre technique creates beautiful gradual color transitions that add depth and dimension to your manicure.
Start by selecting two to three colors within the same family – perhaps light pink blending to deep rose, or soft blue transitioning to navy.
Apply your lightest shade as the base color and allow it to dry completely.
Using a makeup sponge, apply your medium shade to about two-thirds of the sponge surface and your darkest shade to one-third.
Gently dab the sponge onto your nail, rolling it slightly to blend the colors where they meet.
The key to perfect ombre is working quickly while the polish is still workable and building up the color gradually through multiple light applications.
Don’t expect perfection on the first try – ombre nails often require two or three rounds of sponging to achieve that seamless blend.
Clean up around your nail beds with a small brush dipped in polish remover to maintain crisp, professional edges.
For a modern twist, try horizontal ombre where colors blend from side to side rather than tip to base.
This technique works particularly well with sunset colors – orange blending to pink to purple – or ocean-inspired blues and greens.
You can also create vertical ombre by dividing your nail into sections and blending colors from one side to the other.
The organic, flowing nature of ombre makes it incredibly forgiving – small imperfections blend into the overall design rather than standing out as mistakes.
This technique also photographs beautifully, making it perfect for special events or when you want your nails to look stunning in social media photos.
Textured Matte Finish for Sophisticated Elegance

Ditch the glossy topcoat and embrace the luxurious world of matte nail finishes that exude understated sophistication.
Matte nails have a velvety, non-reflective surface that looks incredibly expensive and modern.
The beauty of matte finish lies in its ability to make even the simplest colors look complex and interesting.
Start with any traditional nail polish color – deep burgundy, forest green, or classic black work particularly well with matte finishes.
Apply your color in thin, even coats, allowing each layer to dry completely before applying the next.
Once your color is fully dry, apply a matte topcoat using the same technique you’d use for regular topcoat – thin, even strokes from cuticle to tip.
The transformation is immediate and dramatic – your nails suddenly look like they belong in a high-end fashion magazine.
You can create interesting contrast by using matte finish on some nails and leaving others glossy within the same manicure.
This mixed-finish approach adds visual texture without requiring different colors or complex designs.
For extra sophistication, try matte over metallic polishes – the result is a unique satin finish that’s neither fully matte nor metallic.
Matte finish also works beautifully with nail art – try painting simple geometric shapes in glossy polish over a matte base for stunning contrast.
The key to maintaining matte nails is avoiding oil-based products that can create shiny spots on the matte surface.
Use cuticle oil sparingly and apply it only to the cuticle area, avoiding contact with the nail surface.
Matte nails photograph beautifully and complement both casual and formal outfits, making them perfect for anyone who wants sophisticated nails without flashy designs.
Delicate Floral Silhouettes for Feminine Charm

Create enchanting botanical nail art using simple silhouette techniques that look intricate but are surprisingly easy to master.
Floral silhouettes capture the essence of flowers without requiring detailed painting skills or expensive nail art tools.
Begin with a soft, neutral base like pale pink, cream, or light gray that will make your floral silhouettes pop.
Choose a contrasting color for your flowers – black creates dramatic, graphic silhouettes while deep purple or navy offers a softer, more romantic feel.
Using a thin nail art brush or even a toothpick, create simple flower shapes by painting five small oval petals around a central point.
The beauty of silhouettes is that they don’t require realistic detail – you’re capturing the basic shape and form of flowers rather than creating botanical illustrations.
Vary the sizes and positions of your flowers across different nails to create a natural, organic feel.
Some nails can feature a single large bloom while others might have clusters of tiny flowers.
Add simple stems and leaves using thin, curved lines that connect your flowers and create flow across your manicure.
You can also incorporate different types of flowers – mix simple five-petaled blooms with elongated tulip shapes or small daisy forms.
For added interest, try creating some flowers that extend from one nail to the next, creating the illusion of a continuous botanical pattern across your hands.
The monochromatic color scheme keeps the design sophisticated while the organic shapes add feminine charm.
This technique also works beautifully with seasonal variations – try cherry blossoms in spring, sunflowers in summer, or bare branches in winter.
The delicate nature of floral silhouettes makes them perfect for romantic occasions, garden parties, or any time you want your nails to feel feminine and elegant.
Modern Chrome Tips for Futuristic Glamour

Step into the future with chrome nail tips that create an otherworldly, mirror-like finish that’s impossible to ignore.
Chrome nails deliver high-impact glamour with a futuristic edge that looks incredibly expensive and sophisticated.
Start with a black or dark gray base coat that will enhance the reflective quality of the chrome finish.
Apply your base color in thin, even coats and allow it to cure completely – any imperfections in your base will show through the chrome.
Chrome powder requires a special application technique that’s different from traditional nail polish.
Apply a tacky base coat or gel topcoat and cure it partially, leaving the surface slightly sticky.
Using a silicone tool or your finger covered with a plastic glove, gently rub chrome powder onto the tacky surface.
The powder adheres to the sticky base and creates that incredible mirror finish that reflects light from every angle.
Work in small sections to ensure even coverage and buff the powder gently to eliminate any streaks or unevenness.
You can create chrome tips by applying the powder only to the top third of your nails, leaving the base in your original color.
This modern take on French tips looks incredibly futuristic and sophisticated.
For extra dimension, try using different chrome shades – rose gold chrome over pink base, or holographic chrome over white for rainbow effects.
Seal your chrome finish with a gel topcoat to protect the delicate powder and ensure longevity.
The key to perfect chrome nails is patience and gentle handling – rushing the process or applying too much pressure can create uneven results.
Chrome nails photograph beautifully and catch light in the most stunning ways, making them perfect for special events, parties, or any time you want to make a bold style statement.
These western nail designs prove that you don’t need expensive salon visits to achieve stunning, professional-looking manicures.
Each technique offers its own unique charm while remaining accessible for nail art beginners and enthusiasts alike.
Start with the designs that appeal most to you, and don’t be afraid to experiment with color combinations and personal touches that reflect your individual style.
Your nails are about to become your favorite accessory.