I know this sounds boring, but stay with me — skincare prep is honestly where long-lasting makeup is made or broken.
When I tackled my flaky, oily T-zone situation a while back, I realized my makeup was sliding off because my skin was dehydrated underneath.
Wild, right?
Oily skin can actually be thirsty skin.
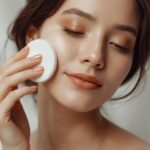
I started using a lightweight, oil-free moisturizer about ten minutes before applying anything.
Just enough time for it to actually sink in.
You want your skin plump but not slick.
Think of it like priming a canvas — you wouldn’t paint on a rough, uneven surface and expect it to look beautiful.
If your skin is dry and patchy, your foundation will cling to dry spots and fade faster everywhere else.
A well-hydrated base gives your makeup something smooth and even to actually grip onto.
I’m obsessed with this step now.
It takes maybe two extra minutes and the difference is kind of insane.
The Primer Step Is Not Optional (I Learned This the Hard Way)

For the longest time I thought primer was a scam.
Like, why add another product if I’m just layering foundation on top anyway?
Then I actually used a good one and I genuinely could not believe the difference.
Primer creates a physical barrier between your skin and your makeup.
It fills in texture, controls oil, and gives your foundation something to actually hold onto.
I use a silicone-based primer for days when I know I’ll be out for hours.
For days my skin is feeling more normal and cooperative, I’ll reach for something lighter and more hydrating.
The trick I love?
Letting it sit for a full five minutes before you touch your foundation.
Most people slap foundation on immediately and then wonder why it pills or feels patchy.
You have to let the primer set.
Give it a moment.
Make your coffee.
Check your phone.
Then come back and start your base.
My Foundation Trick That Changes Everything

I used to pile on foundation trying to get full coverage, and it always looked cakey and faded by noon.
Then I switched to thin, buildable layers — and everything clicked.
Less product on your face means less product to slide off your face.
I apply one light layer, let it breathe for thirty seconds, then build only where I actually need it.
Around my nose, my chin, any redness I want to even out.
The rest of my face gets that natural, skin-like finish that actually lasts.
Setting each layer slightly before adding the next is something I genuinely believe in.
You can use a tiny bit of loose powder between coats if your skin runs oily.
It sounds like a lot of steps but once you do it a few times it becomes total muscle memory.
And the payoff is a foundation look that still looks intentional at 9pm.
The Setting Powder Moment (Use Less Than You Think)

Setting powder is your best friend and your worst enemy, honestly.
Too much and you look flat, cakey, and ten years older than you are.
Too little and everything slides.
The sweet spot?
A whisper of translucent powder, focused on the places that get oily fastest.
For me that’s my forehead, nose, and chin — basically my whole T-zone.
I use a fluffy brush and tap off the excess before it even touches my face.
The baking method — where you let a thick layer of powder sit for a few minutes — is something I do only under my eyes.
It sets concealer perfectly and prevents creasing.
But I skip it everywhere else because I actually want to look like I have skin, not a mask.
A light, natural set is always going to last longer than a heavy one anyway.
The skin has nowhere to “move” the makeup when the finish is natural.
Setting Spray Is the Step You’re Probably Skipping

I resisted setting spray for so long because it felt like one product too many.
Then a makeup artist used one on me before a photo shoot and I was absolutely converted.
Setting spray works by essentially melting your powder layers together into a more cohesive finish.
It removes that powdery, surface-level look and makes everything feel more like skin again.
The trick is to hold the bottle about eight to ten inches away from your face and spritz in an X and then a T motion.
Let it dry naturally — don’t fan your face or touch it.
I’ve also heard of spritzing it onto your brushes before applying eyeshadow to make the color more pigmented and longer-lasting.
I tried it and honestly?
It works.
Setting spray is one of those products that feels optional until you use it consistently.
And then suddenly you feel like something is missing every time you skip it.
The Eye Makeup Longevity Trick I Swear By

Eye makeup is the first thing I used to touch up because it just… disappeared by midday.
Mascara would smudge, eyeshadow would fade, and my liner would soften into nothing.
The fix that changed everything for me was using an eyeshadow primer.
It’s a tiny, often overlooked step, but it transforms how long your eye look actually lasts.
I also started setting my concealer under my eyes with a very light dusting of powder before I do my eye makeup.
That way, any fallout from my eyeshadow doesn’t stick to a tacky base — it just brushes away cleanly.
For eyeliner, switching to a waterproof gel formula made a huge difference for me.
And I always tightline my upper waterline now — it fills in the lash line so there’s no gap for liner to migrate into.
These small shifts took my eye makeup from lasting maybe five hours to a full day without touching it.
Blush and Bronzer That Actually Sticks Around

Nothing is more sad than looking in the mirror at the end of a long day and seeing zero trace of the pretty blush flush you applied that morning.
I used to think blush just faded and that was that.
But it doesn’t have to.
The trick I discovered is applying cream blush first — directly onto my foundation while it’s still slightly tacky — and then very lightly dusting a powder blush on top.
The cream grips the foundation.
The powder locks in the cream.
You get this gorgeous, layered flush that feels almost built into your skin.
Same idea works with bronzer.
Cream first, powder second, and suddenly your sun-kissed look actually lasts.
I also always finish with a tiny mist of setting spray over my cheeks specifically after my blush is done.
It’s sort of my secret weapon at this point.
Lip Color That Doesn’t Disappear After One Sip of Coffee

Okay, lip color longevity might be the most frustrating part of all of this.
You apply the most beautiful shade, you take one sip of your latte, and half of it is gone.
Here’s what I do now and it actually, genuinely works.
I line my lips first with a lip liner — not just the edges, but the entire lip.
This creates a base that your lipstick has something to actually hold onto.
Then I apply my lipstick, blot gently with a tissue, and apply one more layer.
That double-layer-and-blot method locks in so much more pigment than a single swipe.
For extra staying power, I dust a tiny bit of translucent powder over my lips between the two coats.
It sounds strange but it works.
If I know I’m going to be somewhere I can’t touch up, I’ll also choose a satin or matte formula over a gloss — they just hold on longer by nature.
The Touch-Up Kit I Keep in My Bag

Even with all of the above, there are days when a little touch-up is just realistic and honestly, fine.
But I keep my touch-up kit tiny and strategic.
I carry blotting papers instead of adding more powder — blotting papers lift oil without adding any extra product or cakiness.
A small, portable setting spray is another one I always have on me.
A spritz can revive a tired-looking base better than anything else mid-day.
I keep a travel-size concealer for any spots that need attention, and a cream blush stick for a quick cheek refresh.
That’s genuinely it.
Everything fits in a little zippered pouch inside my bag.
The goal isn’t to redo your makeup throughout the day — it’s to maintain what’s already there with the least amount of effort possible.
Simple.
Light.
Quick.
The Products I Keep Going Back To (And Why)

I want to be honest with you — there’s no one magic product that fixes everything.
What keeps makeup lasting is the system of products working together.
That said, there are categories of products that consistently perform better for me.
Waterproof and longwear formulas for anything near my eyes or on my lips.
Oil-free, non-comedogenic foundations for my base.
Finely milled setting powders rather than thick, heavy ones.
And setting sprays with a “lock” or “fix” in the name tend to do exactly what they promise.
I also think it’s worth spending a little more on your primer and setting spray specifically — those two products are doing the hardest work, and the quality difference is really noticeable.
Your foundation doesn’t have to be the most expensive thing in your routine, but the products that hold everything in place?
Worth investing in.
How Weather and Your Skin Type Change Everything

This is something I didn’t fully understand for a while, and I think it’s so important.
What works in a cool, dry autumn is not the same as what works in a sticky, humid summer.
When it’s humid and warm, I go lighter on everything and lean harder into waterproof formulas.
I also switch to a mattifying primer and skip any dewy-finish products because my skin will do that on its own, thank you very much.
In winter, when my skin runs drier, I use more cream-based products and skip heavy powder as much as possible.
Your skin changes seasonally, and your routine should sort of adapt with it.
If you’ve been following the same routine all year and wondering why your summer makeup never lasts — it might literally just be the humidity.
Pay attention to how your skin feels that morning, and choose your products based on that rather than a fixed routine.
My Biggest Mindset Shift Around Long-Lasting Makeup

The most important thing I want to leave you with isn’t a product tip — it’s a perspective shift.
Long-lasting makeup isn’t about using the most product.
It’s about using the right products in the right order.
Less is genuinely more when it comes to staying power.
When I stopped trying to layer on coverage and started thinking about structure — primer, thin base, set, spray — everything changed.
Your makeup will move through the day no matter what you do, and that’s okay.
The goal is for it to move gracefully, not disappear completely.
When I started thinking of my routine as building something that’s meant to last — not just throwing things on and hoping for the best — I stopped feeling frustrated by the end of the day.
And honestly?
My skin looks better now too, because I’m treating it better.
That’s kind of the nicest little bonus.