Picture this: you’re sitting by a pristine lake at golden hour, watching the water shimmer like liquid glass, and suddenly you realize your nails could capture that exact same magic.
Ordering press-ons? The free manicure type finder reads your nail widths on four brands’ size charts.
Lake-inspired nail art brings the peaceful vibes of nature’s most calming waters right to your fingertips, creating a serene escape you can carry with you everywhere.
These designs blend the soothing blues, gentle ripples, and natural beauty of lakeside scenery into wearable art that’ll have everyone asking where you got your nails done.
Sunset Reflection Lake Nails

You’ll absolutely fall in love with sunset reflection lake nails that capture the breathtaking moment when the sky meets water in perfect harmony.
Start with a deep navy or charcoal base that represents the darker depths of evening water, then blend warm oranges, pinks, and golden yellows across the upper portion of each nail.
The magic happens when you create that mirror effect by painting thin horizontal lines in metallic gold or silver, mimicking how the water’s surface reflects the colorful sky above.
Use a small detail brush to add subtle ripples by dragging the metallic polish in gentle wavy patterns across the reflection area.
The key to nailing this look is in the gradient technique – you’ll want to use a makeup sponge to blend the sunset colors seamlessly from light to dark.
Don’t forget to add tiny white dots or streaks to represent the sun’s rays dancing on the water’s surface.
This design works beautifully on both short and long nails, though longer nails give you more canvas space to showcase the full sunset gradient.
You can make this look even more dramatic by adding a glossy topcoat that mimics the wet appearance of actual lake water.
For extra dimension, try using holographic or iridescent polish in the reflection areas to catch light just like real water would.
The beauty of sunset lake nails lies in their versatility – no two sunsets look exactly the same, so you can customize the colors to match your favorite lakeside memory or simply go with whatever sunset palette speaks to your soul.
Crystal Clear Water Ripple Effect


Nothing says serene lake vibes quite like crystal clear water ripple nails that make your fingertips look like they’re gently disturbed by the softest breeze.
Begin with a completely transparent or very pale blue base that mimics the clarity of pristine lake water on a perfect summer day.
The ripple effect comes to life through strategic placement of thin, curved lines in slightly darker blue or silver polish that radiate outward in concentric circles.
You’ll want to start with one small “drop” point on each nail and work your way outward with increasingly larger semicircular lines.
Use a striping brush or nail art pen to create these delicate ripples, making sure each line varies slightly in thickness and opacity for the most realistic water movement effect.
The beauty of this design lies in its simplicity and the way light plays across the different textures and sheens of polish.
Layer a high-gloss topcoat over everything to enhance that wet, just-touched-by-water appearance that makes people want to reach out and touch your nails.
You can elevate this look by adding tiny air bubbles using white or pearl polish dabbed on with a dotting tool in random patterns.
Some nail artists love to incorporate fine holographic glitter in the ripple lines to simulate how sunlight catches and fractures on moving water.
The positioning of your ripples matters too – placing them off-center or at different points on each nail creates a more natural, organic feel that mimics how real water movement is never perfectly symmetrical or predictable.
Misty Morning Lake Serenity


Misty morning lake nails capture that magical time when fog dances across still water and everything feels hushed and ethereal.
You’ll create this dreamy effect by starting with a soft, muted blue-gray base that represents the water in early morning light.
The mist effect comes from carefully applied white or pearl polish using a fan brush or sea sponge to create soft, cloudy patches across parts of each nail.
Blend the white into the base color so there are no harsh lines – you want that seamless, floating-on-air quality that real morning mist has.
Add depth by incorporating various shades of gray and pale lavender in the misty areas, creating layers that suggest fog at different distances and densities.
The water portion should remain darker and more defined, while the “mist” areas become increasingly light and diffused as they move up the nail.
You can enhance the ethereal quality by using a matte topcoat on the misty sections while leaving the water areas glossy, creating interesting texture contrasts.
Tiny dots of white or pearl polish scattered throughout can represent dewdrops that form in the cool morning air.
This design works particularly well with a soft, rounded nail shape that enhances the gentle, peaceful feeling of the overall look.
The key to perfecting misty morning nails is restraint – you want suggestion rather than bold statement, whispers of color rather than shouts, creating that sense of quiet contemplation that comes with watching fog lift off still water as the world slowly wakes up.
Autumn Lake With Floating Leaves

Autumn lake nails bring the warm, cozy feeling of fall lakeshores right to your fingertips with rich colors and delicate leaf details.
Start with a deep teal or forest green base that captures the darker, richer tones lake water takes on during the cooler months.
The magic happens when you add tiny autumn leaves “floating” on the surface using burnt orange, golden yellow, deep red, and warm brown polish.
Use a small detail brush to paint individual leaves in various shapes – maple leaves with their distinctive points, oval-shaped elm leaves, and simple rounded shapes for variety.
Make some leaves appear to be floating flat on the surface while others look like they’re just touching down or slightly submerged.
You’ll want to vary the sizes and orientations of the leaves to create a natural, scattered appearance that mimics how leaves actually fall and drift on real water.
Add subtle shading to each leaf using slightly darker versions of your base colors to give them dimension and make them appear three-dimensional.
The water itself can have gentle ripples around some of the leaves, suggesting the tiny disturbances they create as they land and float.
A glossy topcoat over everything except the leaves, combined with a slight matte finish on the leaf details, creates interesting textural contrast that makes the leaves appear to actually be resting on top of the water rather than painted onto the nail surface.
Starry Night Lake Reflection


Starry night lake nails transform your fingertips into miniature windows showcasing the breathtaking beauty of a star-filled sky reflected in still water.
Begin with a gradient base that transitions from deep midnight blue at the cuticle to black at the tip, representing the depth and darkness of nighttime lake water.
The star reflection effect requires patience and precision – you’ll paint tiny white or silver dots on the upper portion of each nail to represent the actual stars in the sky.
Then comes the magical part: creating the reflection by painting corresponding dots lower on the nail, but slightly offset and elongated vertically to mimic how stars appear stretched in gently moving water.
Use different sizes of dots to represent various star brightnesses, with some tiny pinpricks and others slightly larger to suggest particularly bright stars or distant planets.
A thin silver or white line painted horizontally across the middle of each nail can represent the horizon line where sky meets water.
The reflection portion should be slightly more blurred and less defined than the “sky” portion, achieving this effect by gently dabbing the reflected stars with a small brush while the polish is still slightly wet.
You can add extra magic with holographic or glitter polish scattered sparingly throughout both the sky and reflection areas.
The final touch involves multiple thin coats of high-gloss topcoat to enhance that mirror-like water surface quality that makes the reflection effect truly believable and mesmerizing.
Peaceful Blue Gradient Depths


Peaceful blue gradient nails capture the serene depths of a calm lake, transitioning from shallow, light blue waters to the mysterious deep blue of the lake’s center.
You’ll start this design at the cuticle with the palest possible blue – almost white – that represents the crystal-clear shallow areas where you can see straight to the sandy bottom.
Gradually blend deeper and deeper shades of blue as you move toward the nail tip, incorporating aqua, turquoise, sky blue, and finally deep navy or midnight blue.
The blending technique is crucial here – use a makeup sponge to dab and blend each color while the polish is still wet, creating seamless transitions without visible lines or bands.
Work in thin layers, building up the color gradually rather than trying to achieve full opacity in one coat, which gives you better control over the gradient effect.
The beauty of this design lies in its simplicity and the calming psychological effect of blue tones that naturally evoke feelings of peace and tranquility.
You can enhance the depth illusion by adding subtle white highlights near the cuticle area to suggest sunlight filtering through shallow water.
Tiny flecks of silver or holographic glitter scattered throughout can represent particles floating in the water or light reflecting off microscopic bubbles.
The gradient should flow differently on each nail – some can be more dramatic with stark contrasts, while others feature gentle, subtle transitions.
A high-gloss finish is essential for this look, as it mimics the reflective quality of real water and enhances the depth perception that makes this design so mesmerizing and soothing to look at.
Mountain Lake Reflection Scene

Mountain lake reflection nails create a complete landscape on your fingertips, featuring majestic peaks perfectly mirrored in still alpine waters.
Start with a pale blue or soft gray base for the sky portion at the top of each nail, then transition to darker blue or teal for the water section below an imaginary horizon line.
The mountain silhouettes are painted in dark gray or black, creating simple but recognizable peak shapes that vary from nail to nail for a panoramic effect across your whole hand.
The reflection magic happens when you paint the same mountain shapes upside down in the water portion, but make them slightly less defined and more wavy to suggest gentle water movement.
Use white polish to add snow caps to the mountain peaks, creating bright highlights that will also appear in the reflected versions below.
The key to realistic reflections is making the reflected mountains slightly darker and less crisp than the originals, achieved by mixing a tiny bit of the water color into your mountain shade.
Add depth to the scene with multiple mountain layers – closer mountains in darker shades and distant peaks in lighter, more muted tones that suggest atmospheric perspective.
Small touches like tiny evergreen trees painted as simple triangular shapes along the shoreline can enhance the alpine lake feeling.
The water surface can have subtle horizontal lines in silver or white to suggest gentle lapping against the shore.
Complete the scene with a few clouds painted in white or pale gray, and don’t forget their reflections in the water below, creating a complete miniature landscape that captures the breathtaking beauty of high-altitude lake scenery.
Water Lily And Lily Pad Paradise

Water lily and lily pad nails bring the enchanting beauty of a peaceful pond ecosystem right to your fingertips with delicate flowers and floating greenery.
Begin with a medium to dark green base that represents the deeper water areas where lily pads and flowers naturally thrive in real pond environments.
Paint lily pads using various shades of green – from bright spring green to deeper forest tones – creating circular or oval shapes with small notches cut out to mimic their distinctive natural form.
The lily pads should appear to be floating on the surface, so paint them with flat, matte colors that contrast against the glossy water base underneath.
Water lilies themselves require delicate brushwork using white, pale pink, or soft yellow polish to create the layered petal effect that makes these flowers so captivating.
Start with larger back petals and layer smaller ones on top, using slightly darker shades at the base of each petal to create depth and dimension.
Add tiny yellow centers to the flowers using a dotting tool, representing the stamens that give real water lilies their distinctive appearance.
Vary the sizes and stages of bloom across different nails – some can have fully opened flowers while others show buds just beginning to emerge from the water.
Small details like tiny water droplets painted in clear polish with white highlights can rest on the lily pad surfaces, enhancing the realistic water environment feel.
The arrangement should feel natural and organic, with lily pads overlapping slightly and flowers positioned at different angles, creating a miniature pond garden that captures the serene beauty of these aquatic paradises.
Sandy Shoreline Meets Water


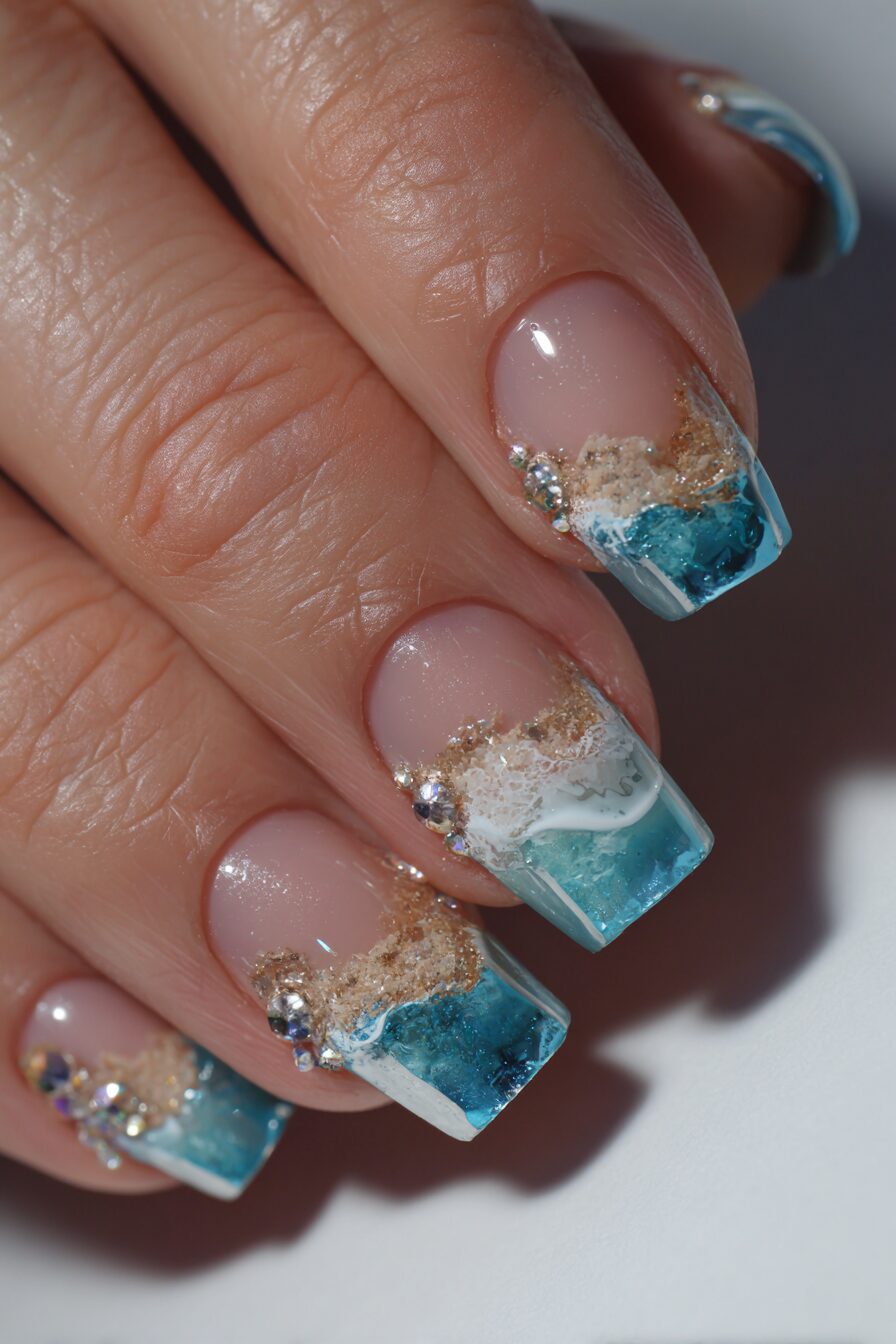
Sandy shoreline nails capture that perfect moment where crystal-clear lake water gently laps against a pristine sandy beach, creating a miniature vacation on your fingertips.
The design begins with creating the sand portion using warm beige, tan, or golden polish applied to roughly one-third of each nail, typically at the tip or cuticle area.
The water section uses clear or very pale blue polish, blending seamlessly into the sand area to create that natural shoreline where water meets land.
Add texture to the sand using fine sand-colored glitter or by stippling with a sea sponge to create the grainy appearance of real beach sand.
The water’s edge should have a gentle foamy appearance, created using white polish applied with a fan brush or sponge to suggest the bubbles and foam that form where waves meet shore.
Tiny shells painted in white, pink, or pearl can be scattered across the sandy portions, using a detail brush to create simple spiral or fan shapes.
Small pebbles or stones in gray and brown can add variety to the shoreline, painted as tiny oval shapes in various sizes for realistic beach debris.
The water portion can have gentle wave lines painted in slightly darker blue or teal, suggesting the movement of shallow water over sand.
Footprints pressed into the sand make charming details, created using a small brush to paint tiny oval impressions trailing across the sandy area.
A high-gloss topcoat over the water areas contrasted with a more matte finish on the sandy portions creates textural differences that enhance the realistic shoreline effect and make your nails look like tiny windows into a perfect lakeside retreat.
Crystal Clear Pebble Bottom


Crystal clear pebble bottom nails showcase the mesmerizing beauty of pristine lake water so clear you can see every stone and pebble resting on the bottom below.
Start with a completely transparent or very pale blue base that represents the crystal-clear water of an untouched mountain or spring-fed lake.
The pebbles are the stars of this design, painted in various sizes using gray, brown, tan, white, and even hints of soft pink or blue to represent the diverse stones found on natural lake bottoms.
Each pebble should be painted as a smooth, rounded oval or circle, with subtle shading using slightly darker versions of the base color to give them three-dimensional appearance.
Vary the sizes dramatically – some pebbles can be tiny dots while others take up significant portions of the nail space, creating realistic size distribution.
The positioning should appear random and natural, with some pebbles overlapping others to suggest depth and the way stones naturally settle and layer over time.
Add subtle highlights to each pebble using white or pearl polish to suggest how underwater stones catch and reflect filtered sunlight from above.
The water depth effect comes from making pebbles near the “surface” (cuticle area) larger and more defined, while those in “deeper” areas (nail tip) appear smaller and slightly blurred.
Tiny air bubbles scattered throughout can be created using white dots of various sizes, representing the natural bubbles that form in clear, cold lake water.
The final effect should create an optical illusion that makes viewers feel like they’re looking down through several feet of pristine water at a beautiful stone-covered lake bottom that seems almost within reach.
These lake-inspired nail designs offer endless possibilities for creating your own peaceful oasis wherever you go.