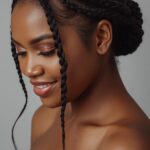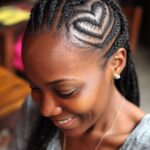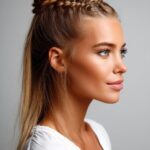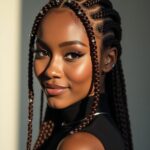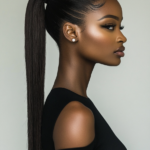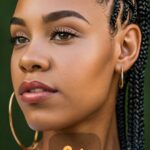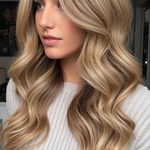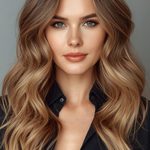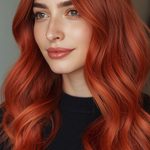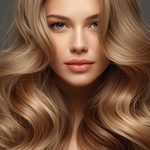
Quick weaves are your secret weapon for switching up your look without the commitment or hefty price tag of traditional sew-ins.
These versatile styles can take you from boardroom boss to weekend warrior in just a few hours, and the best part is you can do most of them yourself with a little practice and the right products.
If you’re prepping for a special event or just want to give your natural hair a break while looking absolutely stunning, these ten quick weave ideas will become your go-to styling arsenal.
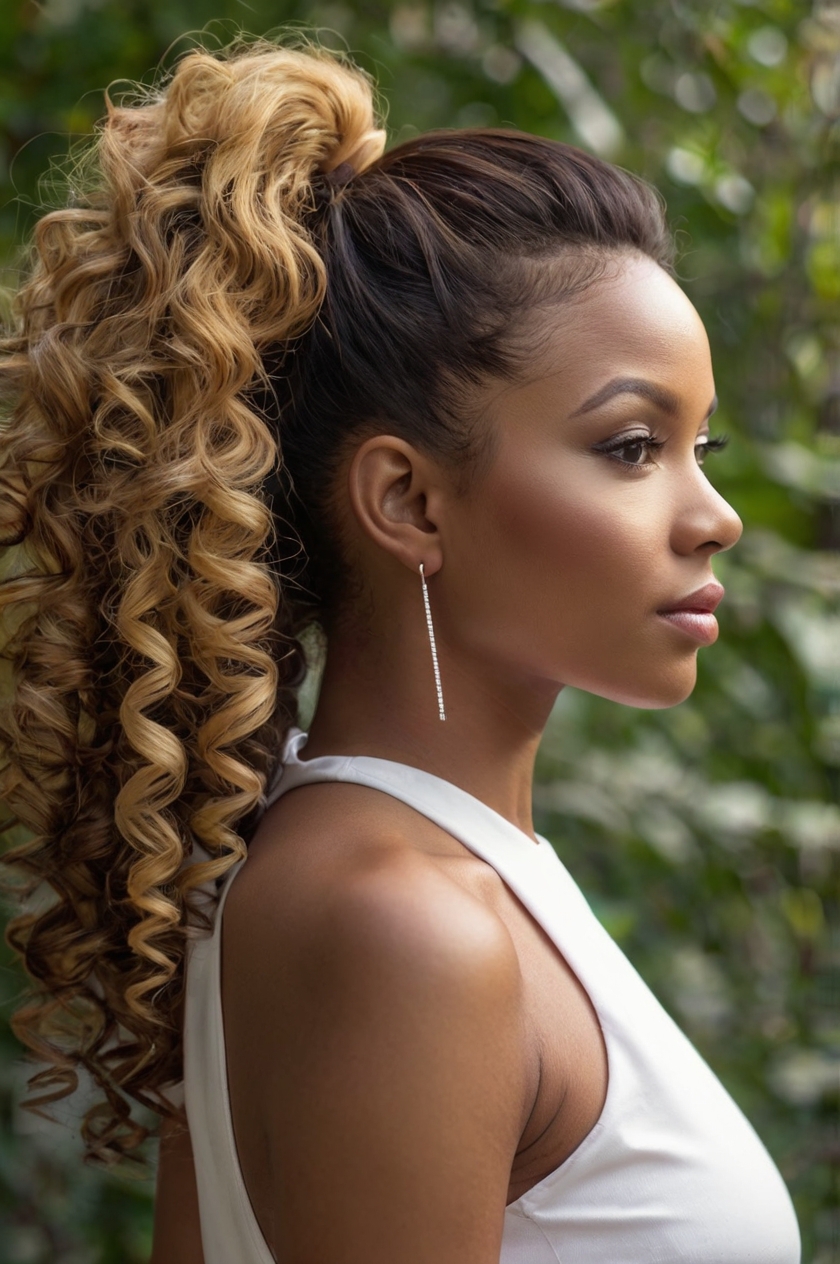
Voluminous Curly Ponytail

Nothing says “I’m ready for anything” quite like a full, bouncy ponytail that moves with you as you conquer your day.
This style is perfect for those times when you want your hair up and out of your face but still want to make a statement that’s impossible to ignore.
The key to nailing this look is choosing the right curl pattern – you’ll want something with enough body to create that wow-factor volume, but not so tight that it becomes difficult to manage or style into a sleek ponytail base.
Begin by sectioning off the crown area of your natural hair, leaving it loose while you braid the sides and back into flat cornrows that all point toward where your ponytail will sit.
This technique ensures that when you gather everything together, you’ll have a smooth, bump-free base that looks professionally done.
Apply your bonding glue to the cornrowed sections, then carefully place your curly weave tracks, making sure they blend seamlessly with the loose hair you left at the crown.
The placement is crucial here – you want the tracks to follow the natural direction your hair would fall when pulled back, creating a gradual transition from your scalp to the added hair.
Once your tracks are secure and completely dry, gently brush your natural hair back with the weave, using a boar bristle brush to smooth everything together without disturbing the curl pattern too much.
Gather all the hair at your desired height – mid-level works great for most face shapes – and secure with a strong elastic that matches your hair color.
Here’s where the magic happens: take a small section of hair from the ponytail and wrap it around the elastic to hide it, securing the end with a bobby pin tucked underneath where no one can see it.
Now you can really play with the curls – gently separate larger curl clumps with your fingers to create more volume, and don’t be afraid to fluff and tease gently at the base of the ponytail for extra height.
A light mist of curl-enhancing spray will help maintain the bounce and definition throughout the day, while a flexible hold hairspray ensures everything stays put without feeling crunchy or stiff.
Beach Wave Lob

The beach wave lob is that perfectly imperfect style that looks like you just rolled out of bed with naturally gorgeous hair, even though we all know that effortless look actually takes some serious skill to achieve.
This shoulder-length cut with loose, tousled waves works for literally every occasion – from casual coffee dates to semi-formal events where you want to look put-together but not overdone.
The beauty of this style lies in its forgiving nature; if a few pieces fall out of place or the waves aren’t perfectly uniform, it actually adds to the authentically relaxed vibe you’re going for.
Start with a lob-length weave that has enough natural texture to hold waves well – you don’t want something too silky that won’t grip the curl, but you also don’t want anything too coarse that will look unnatural against your skin tone.
Prepare your natural hair by creating flat braids that follow the natural growth pattern, paying special attention to making sure the braids at your hairline are as flat as possible since this area will be most visible.
When applying the bonding glue, work in thin layers and allow each section to become slightly tacky before pressing the weave tracks into place – this ensures a stronger hold that will last longer.
The wave creation process is where this style really comes to life, and you have several options depending on your skill level and the tools you have available.
For the most natural-looking waves, try the twist-and-scrunch method: divide damp hair into sections, apply a texturizing mousse, twist each section away from your face, then scrunch upward while blow-drying with a diffuser attachment.
If you prefer using hot tools, a large barrel curling iron works beautifully – curl random sections in alternating directions, then immediately run your fingers through each curl to break it up and create that relaxed, undone texture.
The key to authentic beach waves is irregularity; you don’t want every wave to be the same size or start at the same point on the hair shaft.
Finish with a sea salt spray that adds texture and a slight hold without making the hair feel stiff or crunchy.
For maintenance, this style is incredibly low-maintenance – simply scrunch with a little leave-in conditioner on day two, and you’re ready to go.
High Top Knot with Face-Framing Pieces

The high top knot is your answer to those days when you want to look effortlessly chic while keeping your hair completely off your neck and out of your way.
This style strikes the perfect balance between casual and sophisticated, making it ideal for everything from yoga class to brunch with friends to even some professional settings.
The secret to making this look intentional rather than sloppy lies in the details – those face-framing pieces that soften the severe lines of a high bun and the smooth, polished base that shows you put thought into your styling.
Begin your quick weave application by creating a strategic braid pattern that supports where your top knot will sit – you’ll want most of your natural hair braided toward the crown area, with a few strategic pieces left loose around your hairline.
These loose pieces will become your face-framing layers, so choose them carefully based on what’s most flattering for your face shape.
Apply your weave tracks in sections, focusing on creating length and volume in the crown area where your bun will have the most impact.
The tracks around your hairline should be placed carefully to blend seamlessly with those loose pieces you left out, creating a natural transition that doesn’t look like an obvious add-on.
Once your weave is secure and dry, it’s time to create that perfect high knot – gather all your hair at the very top of your head, right at the crown, and secure with a strong elastic.
The height is crucial here; too low and it becomes a regular bun, too far back and it throws off the proportions of your entire look.
Twist the ponytail loosely and wrap it around the base, but here’s the key: don’t make it too perfect or tight.
You want some pieces to naturally fall and create texture, giving the knot that effortless, slightly messy vibe that’s so on-trend right now.
Secure the bun with bobby pins that match your hair color, and don’t forget to tuck the ends under so they’re not visible.
Now for those face-framing pieces – use a small barrel curling iron to create loose waves that curve away from your face, then gently finger-comb them to soften the curl and create natural-looking movement.
Goddess Locs with Golden Accessories

Goddess locs represent the perfect fusion of protective styling and bohemian elegance, creating a look that’s both culturally rooted and utterly contemporary.
This style involves creating individual loc-like sections with your quick weave hair, then adorning them with metallic accessories that catch the light and add an element of luxury to your everyday look.
The beauty of goddess locs lies in their versatility – you can wear them loose and flowing for a romantic vibe, or gather them into elaborate updos for special occasions.
The golden accessories aren’t just decorative; they serve as focal points that draw attention to the intricate texture and movement of the locs themselves.
Begin by selecting a textured weave that has enough grip to hold the twisted loc shape – you’ll want something with a natural kink or wave pattern rather than silky straight hair that will slip and unravel.
Your braid pattern should be designed to support the weight of the locs while maintaining a natural-looking hairline, so create small to medium-sized braids in a grid pattern across your entire head.
Apply the bonding glue in small sections, as you’ll be working with shorter pieces of weave hair to create each individual loc.
The loc creation process requires patience but delivers stunning results – take small sections of the weave hair and twist them tightly from root to tip, occasionally pausing to reinforce the twist and ensure it holds its shape.
Each loc should be roughly the same thickness for uniformity, but don’t worry about making them absolutely perfect – slight variations add to the authentic, handmade appearance that makes this style so appealing.
As you complete each loc, secure the end temporarily with a small elastic band to prevent unraveling while you work on the rest.
Once all your locs are formed, it’s time to add those gorgeous golden accessories that make this style truly special.
Loc jewelry comes in many forms – from simple metal cuffs that slide over individual locs to elaborate chains and charms that can be woven throughout multiple sections.
Start with a few key pieces and build up gradually; you want the accessories to enhance the style without overwhelming it.
Focus on placing the most eye-catching pieces around your face and crown area where they’ll be most visible, then add smaller accents throughout the rest of your hair for a cohesive, balanced look.
Side-Swept Bangs with Loose Waves

Side-swept bangs paired with loose waves create a romantic, feminine look that flatters virtually every face shape while adding an element of timeless elegance to your overall appearance.
This versatile style works beautifully for everything from casual day looks to formal evening events, and the combination of structured bangs with flowing waves provides the perfect balance of polished and effortless.
The side-swept bangs frame your face beautifully while the loose waves add movement and volume that photographs wonderfully and looks stunning in person.
The secret to making this style work lies in creating bangs that blend seamlessly with your quick weave while maintaining their shape and sweep throughout the day.
Begin by planning your bang placement carefully – you’ll want to leave some of your natural hair out at the hairline to create the most natural-looking fringe possible.
Section off the area where your bangs will fall, keeping it separate from the rest of your hair while you apply the weave to the remaining sections.
Your braid pattern should accommodate the bang area by creating flat braids that won’t interfere with the natural fall of your fringe.
Apply your weave tracks starting from the back and working toward the front, stopping before you reach the sectioned bang area.
Choose a length that complements the side-swept bang style – medium to long lengths work best because they provide enough weight and movement to balance the shorter fringe area.
Once your weave is secure, it’s time to cut and style those gorgeous side-swept bangs that will frame your face perfectly.
Start by cutting the bang section longer than you think you need – you can always trim more, but you can’t add length back once it’s gone.
Cut at a slight angle, with the longest pieces falling just past your eyebrow and gradually getting shorter as they sweep toward your temple.
The key to perfect side-swept bangs is the angle and the way they blend into the rest of your hair – they should look like a natural extension rather than an obvious add-on.
Style the bangs using a round brush while blow-drying, sweeping them across your forehead in the direction you want them to fall.
For the loose waves in the rest of your hair, use a large barrel curling iron, curling random sections in alternating directions and immediately running your fingers through each curl to soften and separate them.
Finish with a light-hold hairspray that maintains the wave pattern and keeps the bangs in place without looking stiff or artificial.
Braided Crown with Flowing Hair

The braided crown with flowing hair underneath is a stunning style that combines the elegance of an updo with the romance of loose, flowing locks.
This look features intricate braiding around the hairline and crown area, while the majority of the hair flows freely down the back and shoulders, creating a style that’s both sophisticated and approachable.
It’s perfect for special occasions when you want to look polished and put-together while still maintaining a soft, feminine appeal that photographs beautifully.
The braided crown adds visual interest and keeps hair away from your face, while the flowing sections provide movement and volume that creates a stunning silhouette.
Start this style by sectioning off the area around your hairline and crown where the braided elements will be placed – this typically includes a section that starts at one ear, goes around the hairline across the forehead, and ends at the opposite ear.
The remaining hair will be left loose to create the flowing effect, so plan your quick weave application accordingly.
Create your braid pattern with extra attention to the crown area, where you’ll need a solid foundation to support the braided crown styling.
Apply your weave tracks to the sections that will remain loose, focusing on creating length, volume, and natural movement in these areas.
The hair you’ll use for the braided crown can be either your natural hair blended with small weave pieces or entirely weave hair, depending on your natural hair length and texture.
Once your base is complete and secure, begin creating the braided crown by sectioning off portions of hair around your hairline.
Start with a simple three-strand braid at one ear, incorporating small sections of hair as you work your way around the crown area.
The key is to keep the braid relatively loose and not too tight against your scalp – you want it to have some dimension and visual impact rather than lying completely flat.
As you work around the crown, you can vary the braiding technique slightly – try incorporating small accent braids or leaving some pieces loose to weave through the main braid for added texture and interest.
When you reach the opposite ear, secure the end of the braid temporarily while you assess the overall shape and make any necessary adjustments.
The loose hair underneath should be styled with gentle waves or curls that complement the structured braided crown – use a large barrel curling iron to create soft waves that start below the braided section.
Finish by securing any loose ends of the braided crown with bobby pins hidden underneath the braid, and set the entire style with a flexible hold hairspray that maintains the structure without looking stiff.
Dutch Braids with Weave Extensions

Dutch braids with weave extensions create that stunning athletic-meets-glamorous vibe that’s perfect for everything from gym sessions to music festivals to casual weekend adventures.
Unlike regular braids that sit on top of your head, Dutch braids are woven under, creating a raised, three-dimensional effect that adds incredible visual interest and makes your hair look thicker and more voluminous.
The addition of quick weave extensions allows you to achieve this look even if your natural hair isn’t long enough for traditional Dutch braids, and the extra length creates dramatic trailing braids that move beautifully as you walk.
This style is incredibly practical too – it keeps your hair completely secure and out of your face while still looking absolutely gorgeous and put-together.
Start by selecting weave hair that matches your natural texture and color, and choose a length that will give you the dramatic effect you’re going for – longer extensions create more impact, but make sure you’re comfortable with the weight.
Your preparation begins with sectioning your natural hair down the middle, creating two equal halves that will become your two Dutch braids.
Braid your natural hair on each side into flat cornrows that start at your hairline and extend toward the back of your head, creating a solid foundation for your weave application.
Apply bonding glue to these cornrowed sections, then carefully attach your weave tracks, making sure they align with the direction your braids will follow.
The key to seamless Dutch braids with extensions is blending your natural hair with the weave pieces as you braid, so don’t attach all the weave at once – instead, work in sections as you create each braid.
Begin your first Dutch braid at the hairline, taking a small section of hair and dividing it into three strands.
Cross the right strand under the middle strand, then cross the left strand under the new middle strand, and continue this under-weaving pattern while gradually adding small sections of hair from both sides.
As you work down the head, begin incorporating pieces of your weave extensions, blending them seamlessly with your natural hair so the transition is invisible.
The beauty of Dutch braids lies in their raised appearance, so make sure you’re pulling each section under rather than over as you work your way down.
Keep consistent tension throughout the braiding process – too loose and the braid will look sloppy, too tight and it will be uncomfortable and potentially damaging to your hairline.
Once you reach the nape of your neck, continue braiding with just the weave extensions, creating long, trailing braids that can hang loose or be styled into various updos.
Secure each braid with a clear elastic band, and finish with a light mist of holding spray to keep any flyaways in place throughout the day.
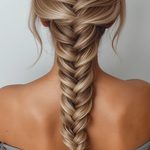
Fishtail Braid with Quick Weave

The fishtail braid is that intricate-looking style that always makes people wonder how you managed to create something so complex and beautiful, even though the technique is actually much simpler than it appears.
This braid creates a stunning woven pattern that resembles fish scales, giving your hair incredible texture and visual interest that photographs beautifully and looks elegant from every angle.
When executed with quick weave extensions, the fishtail braid becomes even more dramatic and eye-catching, with the added length and volume creating a statement piece that works for everything from bohemian casual looks to formal evening events.
The best part about this style is that slight imperfections actually add to its charm – the more relaxed and organic it looks, the more beautiful and effortless the final result appears.
Choose weave hair with some natural texture rather than completely straight hair, as this will help the fishtail pattern hold better and create more visual interest throughout the braid.
Begin by sectioning your natural hair into the pattern that will support your fishtail braid – you can create either one large fishtail down the center back or two smaller ones on either side, depending on your preference and the occasion.
Braid your natural hair into flat cornrows that follow the direction of your planned fishtail, creating a smooth foundation that won’t create bumps or irregularities in your finished style.
Apply your weave tracks along these cornrowed sections, making sure each track lies completely flat and secure before moving to the next one.
The length of weave you choose will dramatically impact the final look – longer extensions create more dramatic, flowing braids, while shorter ones give you a more manageable, everyday style.
Once your weave is secure and dry, gather all the hair (natural and weave) into the starting position for your fishtail braid – this could be at the nape of your neck for a low braid, or higher up for a side-swept fishtail.
Divide all the hair into two large sections, holding one section in each hand.
Take a thin strand from the outside edge of the right section and cross it over to join the left section.
Then take a thin strand from the outside edge of the left section and cross it over to join the right section.
Continue this pattern, alternating sides and always taking small strands from the outside edges, which creates the distinctive fishtail weave pattern.
The key to a beautiful fishtail is keeping the strands you cross over relatively thin and consistent in size – thicker strands will create a looser, more casual look, while thinner strands result in a tighter, more intricate pattern.
Don’t worry about making it absolutely perfect; slight variations in strand size actually add to the organic, handmade beauty of this style.
As you work your way down the length of the hair, maintain consistent tension to keep the braid neat and secure, but don’t pull so tight that it creates stress on your scalp or hairline.
Multiple Mini Braids with Weave

Multiple mini braids create an incredibly versatile protective style that channels the timeless beauty of traditional African braiding techniques while incorporating modern quick weave methods for faster application and easier maintenance.
This style features dozens of small, individual braids that can be styled in countless ways – worn loose for a bohemian goddess look, gathered into ponytails for athletic activities, or twisted into elaborate updos for special occasions.
The beauty of this technique lies in its protective benefits for your natural hair while giving you the length and volume that quick weave extensions provide.
Each mini braid becomes a work of art in itself, and the collective effect is absolutely stunning, creating texture, movement, and visual interest that works beautifully with any outfit or occasion.
Start by selecting weave hair in a texture that complements your natural hair – slightly textured hair works better than completely straight hair because it grips better and creates more authentic-looking braids.
You’ll need significantly more hair than other quick weave styles since you’ll be creating numerous individual braids, so plan accordingly and purchase extra bundles to ensure you have enough for full coverage.
Your preparation involves sectioning your natural hair into a grid pattern across your entire scalp, creating small squares that will each become the foundation for one mini braid.
The size of these sections determines the thickness of your final braids – smaller sections create more delicate, fine braids, while larger sections result in chunkier, more dramatic ones.
Braid each section of your natural hair into a tight, flat cornrow that extends from the scalp toward the back of your head, creating anchor points for your weave attachment.
Apply bonding glue to each cornrowed section individually, then attach small pieces of weave hair, making sure each piece is securely bonded before moving to the next section.
The braiding process requires patience but delivers incredibly rewarding results – take each section (natural hair plus attached weave) and divide it into three strands.
Braid each section from root to tip, maintaining consistent tension throughout to ensure each mini braid holds its shape and looks uniform with the others.
The beauty of mini braids lies in their uniformity, so try to keep each braid roughly the same thickness and tension as you work across your entire head.
This process can take several hours, so make sure you’re comfortable and have good lighting to work with – many people prefer to do this style over multiple sessions to avoid fatigue.
Once all your mini braids are complete, you can style them immediately or let them set overnight for better hold and longevity.
The styling options are virtually endless – try gathering them into high ponytails, creating intricate buns, or leaving them loose and adding accessories like beads or wraps for extra visual interest.
For maintenance, sleep with a silk scarf or pillowcase to prevent frizz, and refresh individual braids as needed by lightly dampening and re-braiding any that become loose over time.
Waterfall Braid with Loose Curls

The waterfall braid is pure romantic elegance, creating the illusion that your hair is literally cascading like water while being artfully woven into an intricate pattern that frames your face beautifully.
This style combines the structured beauty of braiding with the soft, flowing movement of loose curls, resulting in a look that’s both sophisticated and dreamy.
The technique involves creating a braid that travels horizontally around your head while allowing sections of hair to fall freely through the braid, creating that distinctive waterfall effect that gives this style its name.
When executed with quick weave extensions, this look becomes even more dramatic and voluminous, with the added length creating longer, more flowing cascades that move beautifully and photograph like a dream.
Begin by selecting weave hair with natural wave or curl patterns that will blend seamlessly with the loose curls you’ll create in the flowing sections – straight hair can work, but textured hair creates a more cohesive, natural-looking final result.
Your quick weave application should focus on creating length and volume throughout, with particular attention to the areas where the loose sections will fall.
Create a braid pattern that allows for horizontal movement around your head – flat cornrows that follow the curve of your hairline work perfectly as anchor points for your weave tracks.
Apply the weave in sections, making sure each track is secure and lies flat against your braided foundation to prevent any bumps or irregularities from showing through the finished style.
Once your weave is completely secure and dry, begin creating the waterfall braid by sectioning off hair at your temple area – this will be your starting point for the horizontal braid that creates the waterfall effect.
Take a three-inch section of hair at your temple and divide it into three strands to begin a traditional braid.
Make one cross-over with your three strands, but here’s where the waterfall technique differs from regular braiding – instead of continuing to use the same three strands, you’ll drop the bottom strand and pick up a new section of hair from above.
This dropped strand becomes one of your “waterfall” pieces that flows freely, while the new section you picked up continues the braid horizontally around your head.
Continue this pattern as you work around your head – braid once, drop the bottom strand, pick up a new section from above, and repeat.
The result is a horizontal braid that travels around your head while creating multiple flowing sections that cascade down like a waterfall.
The key to mastering this technique is maintaining consistent tension in the actual braid while allowing the dropped sections to fall naturally and freely.
Once your waterfall braid is complete and secured, focus on styling those gorgeous loose sections with gentle curls that enhance the romantic, flowing effect of the style.
Use a large barrel curling iron to create soft waves in all the loose hair, including both the waterfall sections and any remaining hair that wasn’t incorporated into the braid, then gently finger-comb everything to create natural-looking movement and flow.
These quick weave hairstyles prove that you don’t need to spend hours in a salon or break the bank to achieve stunning, professional-looking hair.
Each style offers its own unique appeal and works for different occasions, face shapes, and personal preferences, giving you a versatile arsenal of looks to choose from.
The best part about quick weaves is that they allow you to experiment with different lengths, textures, and styles without making permanent changes to your natural hair, so don’t be afraid to step outside your comfort zone and try something completely new.