I once showed up to a client pitch with second-day hair, dry shampoo dust still clinging to my roots, and exactly ninety seconds to fix it before walking in.
I twisted it up, pulled a few pieces loose, and walked in feeling like I had my life together.
Someone actually complimented my “effortless” style.
That’s the secret nobody tells you about a bun.
It’s not lazy.
It’s not a backup plan.
It’s the one hairstyle that can go from disaster to done in under two minutes, and somehow still look intentional at a wedding three hours later.
I’ve built my whole hair routine around this one truth, and today I’m handing you every version I actually use, not just the ones that look pretty in photos.
The 5-Minute Emergency Bun

This is the one I reach for on mornings when the alarm didn’t go off, or it did and I just didn’t listen.
Grab your hair, twist it away from your face, and wrap it around itself like you’re coiling a rope.
Don’t smooth it.
Don’t overthink it.
Secure it with a claw clip, not an elastic, because a claw clip forgives every mistake you’re about to make.
The texture is the whole point here.
Bumps, flyaways, a little lopsided lean, it all reads as “I woke up like this and I’m still gorgeous,” even if the truth is you were three minutes from being late.
I’ve done this bun with unwashed hair, wet hair, hair that had product from two days ago still sitting in it.
It works every single time.
My tip: mist a little texturizing spray at the roots before you twist, even if your hair feels fine.
It gives the claw clip something to grip, so you’re not fighting slippery strands at 7 a.m.
And honestly, this is the bun I wear more than any other style I own.
It’s not fancy.
But it’s mine, and it gets me out the door feeling like myself.
The Sleek Low Bun for Big Days

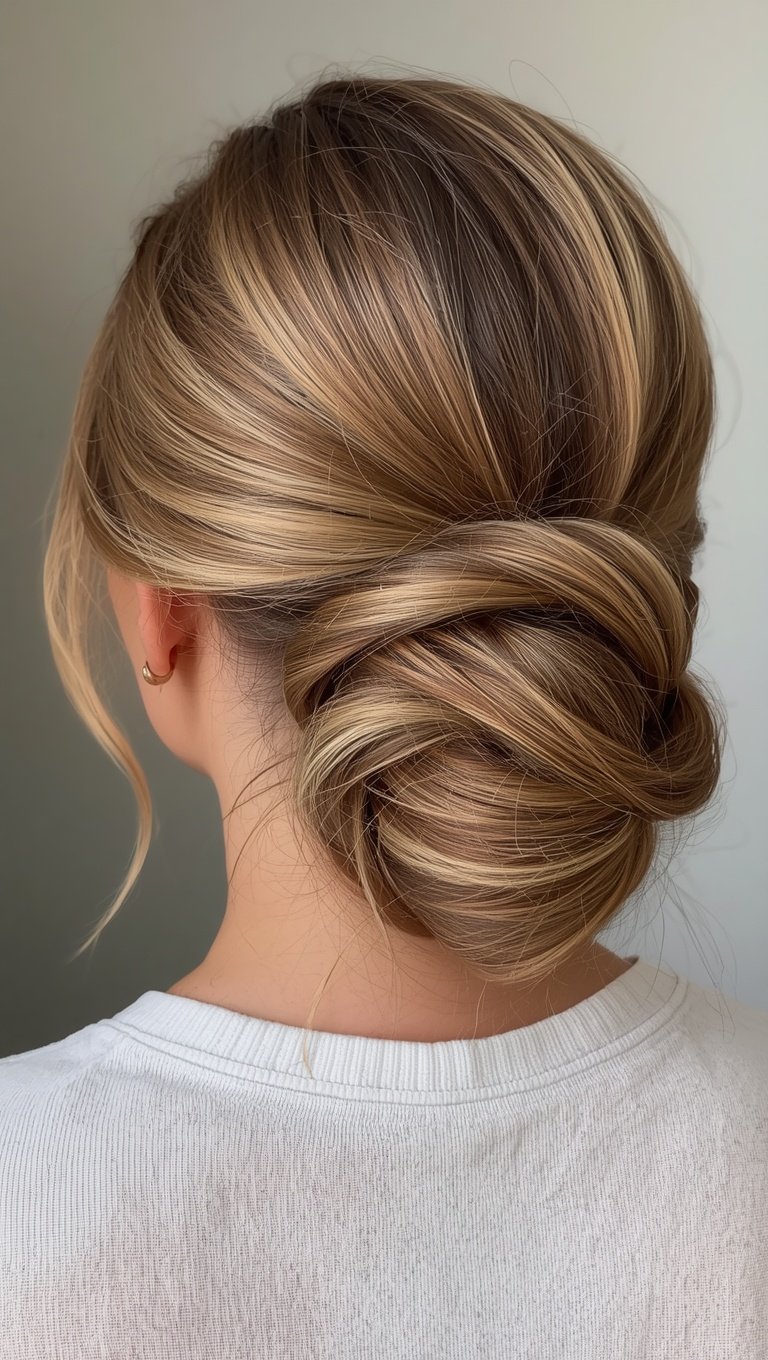
There’s something about a slicked-back low bun that makes me stand up a little straighter.
I wore mine the day I signed the lease on my first solo apartment, and I remember catching my reflection in the elevator and thinking, okay, I look like someone who has her life figured out.
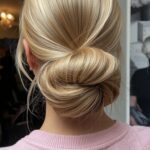
Start with damp hair if you can, because it grips smoother than dry hair ever will.
Comb it back with a fine-tooth comb, not your fingers, and pull it tight at the nape of your neck.
Wrap it into a low bun and pin it flat against your head.
Use a strong-hold gel on your edges, just a small amount, and smooth with an old toothbrush for that glassy finish.
This look feels a little severe if you let it, so I always soften mine with a small gold hoop or a few baby hairs left loose at the temples.
It’s polished without being cold.
The emotional pull of this bun is control.
When my week feels chaotic, this is the hairstyle that makes me feel like I’m holding the reins again.
Optional variation: swap the gel for a silk scarf wrapped around the base for a softer, more romantic take on the same sleek shape.
The Half-Up Bun for Errand Days
This is my in-between bun, for days that aren’t quite messy-morning but definitely aren’t black-tie either.

Grocery runs, coffee dates, picking up dry cleaning, that kind of day.
Take the top third of your hair, twist it, and secure it into a small bun at your crown, leaving the rest down.
I love this one because it keeps hair off my face without committing to a full updo, and it photographs so well in natural light.
There’s a softness to it that a full bun just doesn’t have.
The loose bottom half moves when you walk, catches a little breeze, and honestly makes you feel a bit more put-together than you probably are.
I discovered this style completely by accident one Sunday when I was rushing to meet a friend for brunch and only had time to deal with my bangs.
Now it’s in my weekly rotation, no joke.
My hack: use two small bobby pins in an X shape underneath the bun instead of one, because a single pin lets this style droop by midafternoon and nobody has time for a saggy bun during lunch.
If your hair is fine or thin, tease the crown slightly before twisting for a fuller look that holds its shape longer.
It’s a small trick but it changes everything.
The Braided Bun for Elevated Ease

I learned this one from a hairstylist before a friend’s engagement party, and I’ve never gone back to a plain bun for dressy-casual events since.
Braid a simple three-strand braid down the length of your hair, then coil that braid into a bun and pin it in place.
The texture the braid creates is what makes this bun feel special, all those little ridges catching the light instead of one flat surface.
It looks like it took forever.
It did not.
Fifteen minutes, maybe less once you get the hang of it.
I wore this to a rooftop dinner last summer and got asked twice if I’d just come from the salon.
I hadn’t.
I’d done it in my bathroom mirror with one hand while holding a mascara wand in the other.
That’s the beauty of this style, it reads as intricate but it’s really just one braid and a little patience.
For extra hold, spritz the braid with a light hairspray before you coil it, so the shape holds even if you’re dancing all night.
If you want more drama, pull small pieces of the braid loose around your face afterward for a softer, undone finish that still feels intentional.
This is the bun I recommend most to friends who say they’re “not good at hair.”
You genuinely don’t need to be.
The Ballerina Bun for Movement Days

Workout days call for a bun that isn’t going anywhere, no matter how much you sweat or how many burpees you regret mid-set.
This is a high, tight bun sitting right at the crown, and I mean tight.
Pull your hair into a high ponytail first, twist the ponytail, and wrap it around the base until it forms a neat little knot.
Secure with bobby pins pointed toward the center of the bun, which somehow holds better than pins pointed outward, and finish with a small hair tie wrapped around the whole thing for backup.
I trust this bun with everything, spin class, a run in the rain, even a long travel day when I don’t want hair sticking to my neck.
There’s something satisfying about how compact it feels, like your hair is finally out of your way and you can just move.
I started wearing this style daily after a hot yoga class where my low bun completely collapsed by the second sun salutation, and I swore never again.
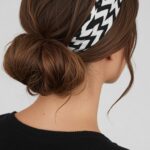
My tip: if you have layers or shorter pieces around your face, a thin headband underneath the bun keeps everything locked down through even the sweatiest workout.
It’s not glamorous, but it’s reliable, and some days reliable is exactly what you need from your hair.
The Bubble Bun for a Playful Twist

This one makes me feel like a kid again, in the best way.
Instead of one smooth bun, you section your ponytail into two or three parts and secure each with a small elastic, creating little bubble segments before twisting the ends into a small bun shape.
It’s whimsical.
It’s a little unexpected.
And it photographs beautifully with soft, wispy pieces left out around the face.
I wore a version of this to a friend’s birthday brunch and felt like I’d put in way more effort than I actually had, which is honestly my favorite kind of hairstyle.
The trick is keeping the sections loose rather than pulling them painfully tight, because the whole charm of a bubble bun is that soft, rounded look, not a slicked, structured one.
Use your fingers to gently tug at each bubble section afterward, pulling small pieces outward to create volume and fullness.
This is the bun I’d recommend to anyone who feels like their hairstyles have gotten a little too serious lately.
Sometimes you just want to feel fun and a little sparkly, and this bun does that without trying too hard.
Optional variation: add a few thin ribbons woven through the bubbles for garden parties or daytime celebrations.
It’s a small detail, but it changes the whole mood of the look.
The Black-Tie Chignon

This is the bun I trust with the biggest nights, weddings, galas, anniversary dinners where I actually want to feel beautiful.
A chignon sits low, at the nape of the neck, and has a softness that reads as formal without feeling stiff.
Curl your hair first, loosely, then gather it low and twist it into a figure-eight shape rather than a single round bun.
Pin it so the twists overlap slightly, creating dimension instead of one flat mass.
I did this exact style for my sister’s wedding, standing in a hotel bathroom with curling iron burns on my wrist and thirty minutes to spare, and it still turned out like something from a magazine.
The overlapping twists catch the light so beautifully under chandeliers, which honestly might be my favorite thing about this bun.
Add a delicate hairpin with a small pearl or crystal detail if you want a touch of sparkle without going overboard.
This look feels romantic to me, soft and a little old-world, like something your grandmother might have worn to a dance.
My tip: set the finished chignon with a light-hold hairspray, not a strong one, because you want movement and softness, not a helmet.
This is the bun that makes me feel most like myself when I’m dressed up, elegant but never trying too hard.
The Textured Top Knot

There’s a version of confidence that lives specifically in a slightly messy top knot, and I felt it the first time I wore mine to an interview and got the job.
Coincidence, probably.
But I’ve worn this bun to every important meeting since, just in case.
Gather your hair high on your head, twist it loosely, and instead of tucking every piece in neatly, let a few strands stay loose and a little wild.
The imperfection is the whole point.
A top knot that’s too perfect looks stiff, almost costume-like, but one with texture looks like you just have naturally incredible hair.
I love pairing this with statement earrings, since the high bun leaves your neck and ears completely visible.
It’s a bun that says “I know exactly who I am” without saying anything at all.
If your hair is freshly washed and too slippery to hold texture, this is actually the perfect excuse to skip washing it one more day.
Dirtier hair holds this style so much better, which might be the only time in life that not showering works in your favor.
My hack: tease the base slightly with a comb before twisting, for height and a bit of grip that lasts through a full day of meetings or errands.
My Favorite Tools and Products for Bun Longevity

I used to think all you needed for a good bun was an elastic and a prayer.
I was wrong.
A good bobby pin, the kind with actual grip and not the slippery bargain ones, changes everything about how long your bun survives the day.
I keep a small pouch of them in every bag I own, because nothing ruins an updo faster than a pin sliding out at hour three.
Texturizing spray is another non-negotiable for me, especially on freshly washed hair that’s too soft and silky to hold any shape at all.
A light dust at the roots before you start gives your bun something to actually grab onto.
For sleeker styles, a strong-hold gel and an old toothbrush do more for a polished finish than any expensive tool I’ve tried.
And for the fuller, more romantic buns, a volumizing mousse applied to damp hair before you even start styling makes a noticeable difference by the end of the day.
I also never skip a light finishing spray, applied from a distance so it doesn’t weigh anything down.
These small things feel almost too simple to matter, but they’re the difference between a bun that holds through a ten-hour day and one that’s falling apart by lunch.
Invest in a handful of good tools, and every bun on this list gets easier and lasts longer.
The Overnight Bun for Heatless Waves

This isn’t really a bun you wear out, it’s a bun you sleep in, and it might be my favorite hair hack I own.
Before bed, dampen your hair slightly, then twist it into a loose, high bun and secure with a soft scrunchie that won’t crease your strands overnight.
In the morning, take it down, run your fingers through gently, and you’re left with soft, romantic waves that look like you spent real time on them.
I discovered this trick during a stretch of early mornings when I simply didn’t have time to curl my hair before work, and it became one of those happy accidents you keep forever.
The waves it creates are looser and more natural than anything a curling iron gives me, and there’s zero heat damage involved.
My tip: the damper your hair is going in, the more defined the waves will be coming out, but not soaking wet, or it won’t dry all the way by morning.
I also like adding a small amount of leave-in conditioner before twisting, so the waves feel soft instead of crunchy.
This is the bun for anyone who wants gorgeous hair without sacrificing sleep, and honestly, isn’t that all of us.
It feels like a little gift to your future self, tucked into a twist while you sleep.
Bun Mistakes I Used to Make

I wore buns for years before I actually learned how to do them well, so let me save you some trial and error.
Mistake one, pulling too tight at the hairline, which gives you a headache by noon and can actually stress your hairline over time.
Mistake two, using only one flimsy elastic on thick or heavy hair, which is basically begging your bun to collapse mid-afternoon.
Mistake three, skipping any kind of texture or grip product and wondering why your bun slides right out on freshly washed, silky-smooth hair.
Mistake four, and this one took me embarrassingly long to learn, using the wrong size bobby pin for your hair thickness.
Thin pins on thick hair just won’t hold, no matter how many you use.
Mistake five, not curling or adding texture before a sleek bun, which leaves it looking flat and a little lifeless instead of polished.
I made every single one of these mistakes multiple times before I finally paid attention to what my hairstylist friend kept trying to tell me.
Once I fixed them, every bun on this list got so much easier, and so much longer-lasting.
Small adjustments, honestly, but they made all the difference between a bun that held all day and one I kept redoing every hour.
Choosing the Right Bun for Your Hair Type

Not every bun works the same way on every head of hair, and I wish someone had told me this years ago instead of letting me struggle through countless failed top knots.
If your hair is fine or thin, teasing at the crown before you twist gives you the volume and structure that fine hair often lacks on its own.
If your hair is thick or coarse, you’ll likely need fewer products and more pins, since thick hair holds shape well but needs sturdier support to stay put.
Curly hair does beautifully with the braided bun or the textured top knot, since the natural texture only adds to the effect instead of fighting it.
Straight, silky hair often needs a little help from texturizing spray or a light tease, or it’ll slip out of anything without serious pinning.
Shorter hair works wonderfully for the bubble bun or half-up styles, since you don’t need a ton of length for those little sections to hold.
I have naturally fine, straight hair, so texturizing spray and smaller, tighter sections have become my two best friends over the years.
Once I understood my own hair type instead of copying tutorials made for completely different textures, everything got so much easier.
Pay attention to what your hair actually does, not what you wish it did, and build your bun routine around that truth.
Quick Bun Hacks for Second-Day Hair

Second-day hair gets such a bad reputation, but honestly, it’s the best hair for almost every bun on this list.
The natural oils give your strands more grip and texture than freshly washed hair ever will, so don’t rush to wash it just because tomorrow feels important.
A little dry shampoo at the roots refreshes things without stripping away that helpful texture.
I keep a travel-size bottle in my desk drawer for exactly this reason.
If your ends look a little too separated or crunchy from yesterday’s product, a small amount of hair oil smoothed through just the ends brings everything back to life instantly.
Second-day hair also holds curls and waves so much longer, so if you did the overnight bun trick the night before, your waves will likely still be gorgeous.
My go-to move on day two is the messy morning bun or the textured top knot, since both actually benefit from hair that isn’t brand new and slippery.
I used to wash my hair every single day out of habit, not necessity, until I realized how much easier my whole routine became once I stretched it out.
Now second-day, even third-day hair, is when I feel like my buns look their absolute best.
It’s a small mindset shift, but it saves time, protects your hair, and honestly gives you better results in the end.