I used to be a five-minute-hair kind of girl.
Bun, clip, done, out the door.
And honestly, for years, I told myself that was just “efficient.”
But last spring I was getting ready for a friend’s engagement dinner and I had zero time, yet for some reason I sat down and braided my hair anyway.
I remember looking in the mirror and just… stopping.
It looked like I had tried, even though I barely had.
That’s the thing about braids nobody tells you.
They give you ten extra minutes of effort and somehow forty minutes of “wow, your hair” compliments.
So I started testing every braid I could get my fingers around, on good hair days and bad ones, on second-day hair and fresh-wash hair.
This list is everything I learned, the ones that are genuinely worth the extra time, and a few honest notes on which ones to skip when you’re running late.
The French Braid Glow-Up

The French braid gets treated like the boring older sibling of hairstyles, and I get why.
It’s the first braid most of us learned, so it feels basic.
But a French braid done slightly loose, with a few pieces pulled out at the temples, looks completely different from the tight, scalp-hugging version from your childhood dance recitals.
I like to braid mine a little to the side instead of dead center.
It softens my whole face in a way I didn’t expect.
The trick is tension, actually, not tightness.
Pull each section just enough to keep the shape, then stop.
If you yank it like you’re braiding rope, it reads costume-y instead of effortless.
I also tug gently at the edges once it’s done, just to loosen it up.
That undone-on-purpose thing is basically the whole secret.
My favorite variation is a “half French braid” that starts at the crown and just melts into loose waves by your shoulders.
It feels romantic without trying too hard.
And if you have layers or shorter face-framing pieces, don’t fight them.
Let them fall out a little.
It makes the braid look like it happened naturally, not like you spent time on it, even though we both know you did.
Dutch Braids for a Little Edge

Dutch braids are the French braid’s tougher cousin, and I mean that as a compliment.
Because you cross the strands under instead of over, the braid actually sits on top of your hair instead of blending in.
It reads bolder, almost sculptural.
I reach for Dutch braids on days I want to feel a little more put-together, a little more “I have my life in order,” even when I definitely do not.
Two Dutch braids pulled into a low ponytail is one of my go-to looks for long car rides or flights.
It keeps hair out of my face for hours, and somehow still looks intentional when I land.
One thing I learned the hard way: Dutch braids show every bump if your part isn’t clean.
So take the extra thirty seconds to section your hair properly before you start.
It genuinely makes the difference between “cool girl braid” and “I did this in the dark.”
I also love a single fat Dutch braid down the back for festival-style days.
Thicker sections mean it goes faster, which matters when you’re also trying to find your sunglasses and your ride at the same time.
If your hair is fine or thin, try teasing the crown slightly before braiding.
It gives the braid something to hold onto and makes it look fuller without any extra product.
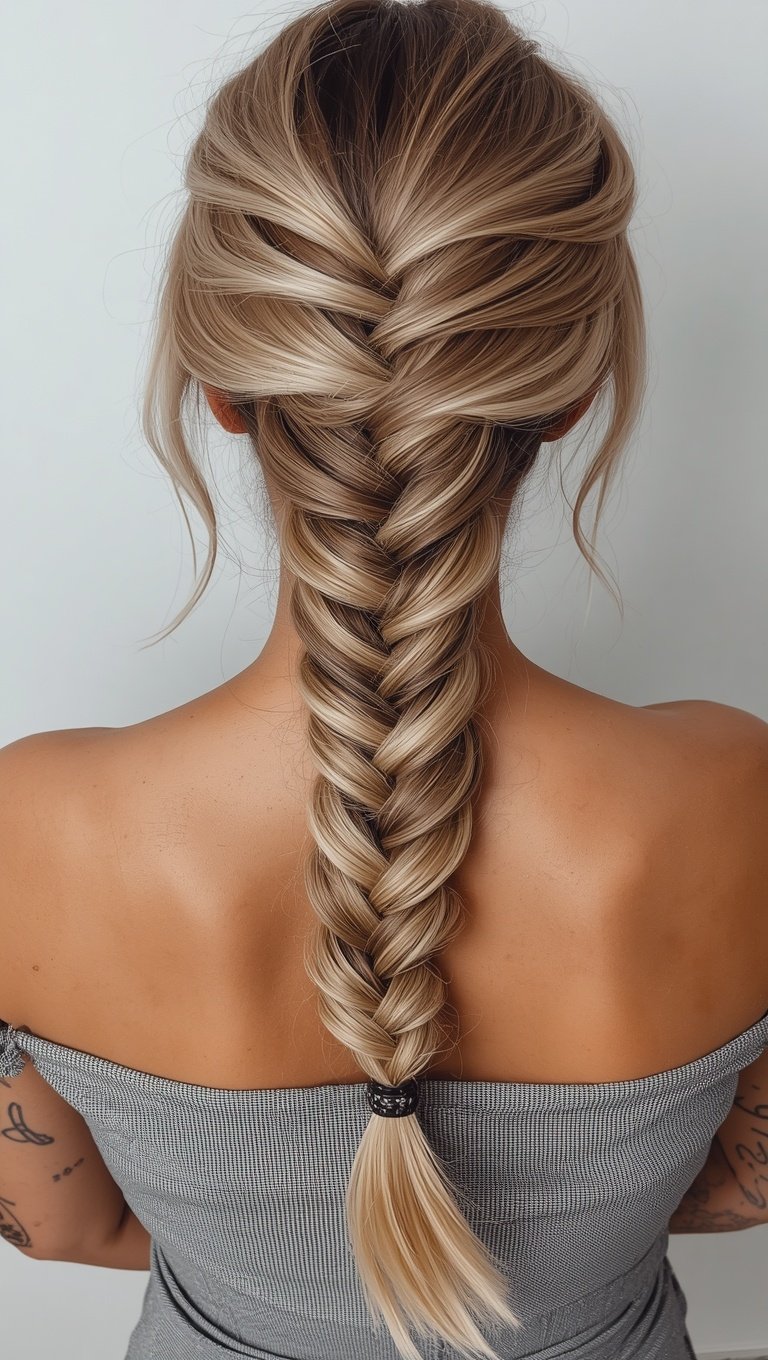
Fishtail Braids for Soft, Romantic Days

Fishtail braids intimidated me for the longest time.
They look complicated, like something a hairstylist trained for years to do.
But once you get the rhythm, it’s honestly more forgiving than a regular braid.
You’re just taking small pieces from the outer edges and crossing them to the opposite side, over and over.
It’s almost meditative once your hands catch on.
I love a loose fishtail for anything with a little romance to it, dinner dates, garden parties, that one wedding where you’re not the bride but you still want your hair to do something.
The texture it creates is so pretty and delicate, almost lace-like.
Here’s my honest tip: fishtails look better messy.
If you braid it too neatly, it just looks like a regular braid with extra steps.
So after you finish, pull tiny pieces loose all along the sides.
Spray a little texturizing spray on your hands first if you have it.
It roughs up the strands just enough to give that soft, undone look I’m always chasing.
I’ve also started doing a fishtail on damp hair the night before an early morning, then sleeping on it.
I wake up, take it out, and my hair has this soft, crimped wave from root to end.
It’s basically a heatless curl method disguised as a hairstyle, and I love that it does double duty.
Braided Half-Up for Everyday Wear

If I had to pick one braid style for actual daily life, this is it.
A simple braided half-up takes the top section of your hair, braids it back, and pins it, leaving the rest down.
It’s fast, it works with almost any hair length, and it instantly makes you look like you have a “look” instead of just hair that happened.
I do this one on mornings when I’ve hit snooze one too many times.
It genuinely takes under ten minutes, sometimes closer to five once you get used to it.
What I love most is how versatile it is.
Dress it up with a little hair jewelry or a ribbon woven through the braid for something special.
Or keep it totally plain for the grocery store, the school run, the fifty errands you didn’t plan for.
My personal trick is to braid it slightly looser than feels “correct.”
A tight, neat braid on top can look a little severe against loose waves underneath.
Loosen it, pull a few pieces out around your face, and it softens the whole thing instantly.
If your hair is naturally straight, try adding a loose wave to the ends before you start.
It gives the whole style more movement and keeps it from looking flat by midday.
The Braided Ponytail That Feels Fancy Without Trying

There’s something about a braided ponytail that makes people assume you spent real time getting ready, even on days you absolutely did not.
I first tried this before a work event I almost forgot about, and I remember thinking, well, this is the fastest fancy I’ve ever looked.
The idea is simple: pull your hair into a ponytail first, then braid the ponytail itself, either the whole length or just wrapped around the base to hide the elastic.
That little wrap-around trick is honestly the whole magic move.
It hides the hair tie completely and makes the ponytail look like it was woven that way from the start.
I like using a small section of hair, maybe an inch wide, wrapping it around the base a couple of times, then pinning it underneath where nobody can see.
For special occasions, I’ll braid the entire ponytail length and leave the ends a little loose and wavy.
It reads elegant without feeling stiff or overly formal.
For everyday wear, I just do the wrap-around trick and call it done.
My honest recommendation is to use a clear elastic first, then hide it with the braid.
That way if the wrap loosens throughout the day, you’re not suddenly showing a bright hair tie in the middle of your “elegant” look.
It’s a small detail, but it’s saved me more than once.
Milkmaid Braids for a Softer, Prairie-Girl Moment


I resisted milkmaid braids for a long time because I thought they’d feel too costume-like on me.
Two braids crossed over the top of your head just felt like a lot.
But I tried it on a whim before a farmers market trip last summer, and I actually teared up a little at how pretty and soft it looked.
It’s two braids, one from each side, crossed and pinned across the crown.
That’s genuinely it.
The effect is so much prettier than the steps suggest.
It gives this soft, feminine, almost nostalgic feeling, like something out of an old photograph.
I love pairing this look with loose, wavy pieces underneath instead of a fully sleek base.
It keeps the whole thing from feeling too polished or too “costume.”
A few tips I’ve picked up: braid a little loosely so the crossed section doesn’t look stiff or rigid across your head.
And don’t be afraid to pull the braids apart slightly with your fingers once they’re pinned.
It thickens them up and hides any thin spots if your hair is fine like mine.
This is one of my favorite styles for outdoor days, festivals, picnics, anything where you want to feel pretty without worrying about your hair for the next six hours.
It genuinely holds up all day, rain or shine, wind or not.
Waterfall Braids for That “How Did You Do That” Look

The waterfall braid is the one that gets the most compliments and the most confused questions, in my experience.
People always ask how the pieces just seem to fall out of the braid like that on purpose.
The technique drops a strand at each cross instead of keeping it in the braid, letting your hair “waterfall” down while the braid continues across your head.
The first time I got it right, I actually gasped a little at my own reflection.
It felt like I had unlocked some secret hairstylist skill, even though it’s really just one small technique shift from a regular braid.
I love this one for warm evenings, string lights, anything a little dreamy.
It works beautifully with loose curls underneath, since the dropped pieces blend right into the waves.
My honest tip is to practice this one on a day you’re not in a rush.
It took me a few tries to get the rhythm of dropping the right strand at the right moment.
Once it clicks though, it’s honestly not much harder than a regular braid.
I also like adding a few tiny braids or twists mixed into the dropped sections for extra detail.
It’s a small touch, but it makes the whole style feel a little more intentional and a little more “you.”
Braided Crown for Feeling Like Your Prettiest Self
There’s a version of me that shows up when I do a braided crown, and I genuinely mean that.

It’s the style I reach for on my birthday, on anniversaries, on days I just need to feel like my prettiest self for no particular reason.
You braid two sections from either side of your head and cross them around like a halo, pinning as you go.
It sounds fussy, but it’s really just patience, not skill.
The payoff is enormous though.
It frames your whole face and gives you this soft, ethereal look that photographs beautifully.
I always get asked if it’s “real hair” when I wear this one, which honestly tells you everything.
My favorite variation adds tiny flowers or a delicate ribbon tucked into the braid for something extra romantic.
It’s such a simple addition but it changes the whole feeling of the look.
For volume, I recommend braiding your hair the night before and sleeping on it, then redoing the crown the next morning with the wave already built in.
It gives the braid so much more texture and body than starting from pin-straight hair.
This is one I’d genuinely encourage you to try even if you think you can’t do braids.
Start messy, keep pinning, and trust that it looks better than it feels while you’re doing it.
Boxer Braids for Workouts and Busy Days

Boxer braids are my ride-or-die for anything active, workouts, hikes, days packed with errands where I need my hair completely out of my face.
Two tight Dutch braids running from your hairline to the nape, that’s really the whole style.
But don’t let the simplicity fool you into thinking it’s boring.
There’s something so satisfying about a clean, symmetrical boxer braid, almost like it makes the rest of your day feel more organized too.
I always start with a razor-sharp center part, because any wobble there is impossible to hide once the braids are in.
I use a rat-tail comb for this now, and it’s genuinely a game in my morning routine, in the best way.
My tip for staying power is spraying a little dry shampoo at the roots before braiding, even on freshly washed hair.
It gives the braids something to grip, so they last through an entire workout without loosening.
I also love wearing boxer braids under a baseball cap for outdoor errands.
It somehow makes even a plain t-shirt and leggings look like an actual outfit choice instead of “I gave up today.”
If you want a dressier version, loosen the braids slightly after and pull the ends into soft waves.
It bridges that gap between athletic and elevated so nicely.
Braided Updos for When You Actually Want to Impress

Some days call for a little more, and this is where braided updos come in.
I think of these as the “special occasion” tier, weddings, holidays, that one work event where you want people to notice you tried.
The idea is combining a braid, or a few, with pinned-up sections to create height and shape.
It sounds complicated, and okay, it takes a little longer than everything else on this list.
But it’s genuinely one of those looks where the extra effort pays off tenfold.
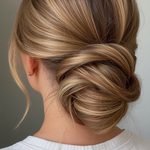
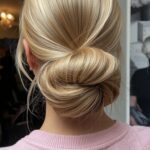
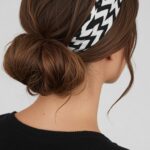
My go-to is a loose braid that wraps into a low bun, with a few face-framing pieces left out to soften everything.
It feels elegant without looking stiff or overdone.
I always recommend practicing your updo once before the actual event, ideally a few days ahead.
There’s nothing worse than trying a new hairstyle for the first time while you’re also trying to zip up a dress and find your shoes.
Bobby pins are your best friend here, more than you think you need.
I always grab a small handful and criss-cross them for extra hold, especially at the base of the bun.
And a little hairspray on the finished look, especially around any loose pieces, keeps it from unraveling halfway through the night.
You want it to last through dinner, dancing, and photos, not just the car ride there.
Braids for Second-Day (or Third-Day) Hair

This might be my favorite category honestly, because it solves a real problem instead of just looking pretty.
Braids are incredible at disguising hair that’s a little past its wash day.
The natural oils actually help the braid hold its shape and texture better than freshly washed hair does.
I learned this completely by accident when I was too tired to wash my hair before a dinner out, and my braid held all night without a single flyaway.
Now I plan for it.
Dutch braids and fishtails work especially well here, since the slightly grippy texture of unwashed hair gives them more definition.
My honest tip is to embrace it instead of fighting it.
Don’t try to make second-day hair behave like fresh hair.
Lean into the texture, add a little dry shampoo for volume, and braid it exactly as is.
I promise it looks intentional, not lazy.
This is also where I reach for a simple side braid the most.
It’s low effort, high payoff, and it hides the roots that are starting to look a little flat.
If you’re someone who stretches washes for hair health reasons, this category is genuinely your best friend.
Braids turn “I haven’t washed my hair in three days” into “I have effortless beach hair,” and honestly, that’s the dream.
Braids with Ribbons and Little Details

The last category I want to talk about isn’t a braid style exactly, it’s more of a philosophy.
Adding tiny details to any braid, a ribbon woven through the strands, a delicate hair cuff slid onto the end, a few small clips tucked in along the part, changes everything about how special it feels.
I started doing this a couple years ago almost by accident, wrapping a thin silk ribbon around an old braid before a dinner because I had nothing else to do with my hands while I waited for a table.
Someone complimented it within five minutes of sitting down.
Now it’s basically my signature move.
The trick is choosing details that match the vibe you’re going for.
A satin ribbon feels romantic and soft.
A few gold cuffs feel a little edgier, a little more “I know what I’m doing.”
Fresh flowers, even just one or two tucked near the crown, feel occasion-worthy without looking overdone.
My honest recommendation is to keep it simple, one detail, maybe two.
Piling on ribbons, clips, and cuffs all at once can start to look busy instead of intentional.
I also love using these little details to dress up my laziest braids.
A plain side braid with one ribbon woven through instantly looks like I planned it, even on the days I very much did not.