I ruined a perfectly good eyeliner brush trying to draw my first tiger stripe.
It smudged, it looked more “raccoon” than “tiger,” and I almost gave up right there at my bathroom mirror.
But something about that messy little attempt stuck with me.
There’s a reason animal print makeup keeps pulling me back, season after season.
It’s playful.
It’s a tiny act of rebellion on an otherwise ordinary Tuesday.
And honestly, it makes getting ready feel like an art project instead of a chore.
So grab your brushes, because I’m walking you through every animal-inspired look I’ve fallen for, the soft ones and the fierce ones, the mistakes I made along the way, and the tricks that finally made them work.
Tiger Stripe Eyeliner

The first time I nailed a tiger stripe look, I actually gasped at my own reflection.
It was for a friend’s birthday dinner, nothing fancy, just drinks and tacos.
But I wanted to feel like a different version of myself that night.
I used a warm orange cream shadow as my base, right across the lid.
Then I took a small angled brush with black liquid liner and pulled thin, slightly curved lines outward from the inner corner.
Not perfectly straight lines, that’s the secret.
Tigers aren’t symmetrical, and neither is your eye shape, so let the strokes wobble a little.
I finished with a tiny fleck of gold pigment at the center of the lid.
It caught the restaurant candlelight in the most magical way.
My tip, if you’re nervous: practice the stripes on the back of your hand first.
Your skin takes product differently than paper, and it’ll teach your wrist the right pressure.
Variation-wise, you can swap the orange for a soft rust brown if bold orange feels like too much for daytime.
It’s subtler, but it still has that same wild energy underneath.
Why it works emotionally is simple, I think.
Tiger stripes feel like confidence you can literally paint on.
Some days you don’t feel brave, but you can still look it, and sometimes that’s enough to shift your whole mood.
Leopard Print Freckles

This one started as a joke with my sister, and now it’s one of my favorite spring looks.
We were bored on a Sunday, flipping through old magazines, and she said my freckles looked like a “starter leopard pattern.”
So we leaned into it.
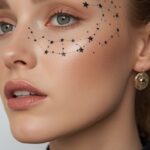
I used a fine liner brush with brown gel liner to add small, irregular dot clusters across my cheeks and the bridge of my nose.
Not perfect circles, more like little open rosettes, the way a real leopard’s spots look up close.
I added a slightly darker dot inside a few of the lighter ones, just for depth.
It genuinely looks like your skin decided to do something magical on its own.
My favorite part is how it photographs, especially in soft afternoon light.
It has this warm, sun-kissed glow that feels effortless even though there’s product involved.
For a variation, try a rose-brown shade instead of true brown for a softer, more romantic version.
It reads a little more “golden hour” and a little less “safari.”
The emotional pull here is nostalgia, honestly.
It reminds me of being a kid and loving my real freckles instead of hiding them.
This look basically celebrates texture and imperfection, and I love that so much.
One small hack: set it with a light dusting of translucent powder so it doesn’t budge if you’re out dancing all night.
Zebra Stripe Graphic Liner

I’ll be honest, this is the boldest look on this entire list.
I wore it once to a gallery opening, and three strangers asked where I got my makeup done.
I did it myself, in my kitchen, with a two dollar liner pen.
Here’s the trick.
Draw one clean black wing first, your normal shape.
Then add three or four thinner white lines running through the black, almost like the black is negative space between the stripes.
It takes patience, and yes, I messed up twice before it looked right.
Keep a cotton swab dipped in micellar water nearby for cleanup, always.
Zebra liner isn’t about symmetry between your two eyes either.
Slight differences actually look more intentional, more like art and less like a mistake.
I like pairing this with bare, dewy skin so the eyes stay the entire focus.
Nothing else needs to compete with that graphic drama.
A softer variation is doing the stripes only on the outer third of the eye, kind of a whisper of zebra rather than a full statement.
That version feels more office-appropriate, if that’s what you need.
Why does this one hit different emotionally?
It’s the look I reach for on days I need a little armor.
It says “don’t test me today” in the most stylish way possible, and honestly, some days you just need that.
Bambi Doe-Eyed Look

Okay, this one is soft, and I kind of love that it’s the opposite energy of the tiger stripe.
I created this look the morning of my best friend’s baby shower, when I wanted to feel gentle and a little dreamy.
The whole point is wide, innocent, glossy eyes.
Start with a warm taupe shadow blended softly into the crease, nothing sharp.
Then take a white or champagne pencil and line your lower waterline.
This instantly opens the eye and gives that classic doe-eyed illusion.
Add mascara mostly to your upper lashes, and just a light coat on the lower ones.
Curl your lashes twice if you have to, seriously, it makes a bigger difference than people think.
I finished mine with a dab of clear gloss right in the center of the lid.
It mimicked that wet, glassy look real fawn eyes have, and it was oddly the compliment I got the most that day.
My tip here is to keep your brows soft too, brushed up and barely filled.
A sharp brow fights against this whole gentle vibe.
For a variation, add a soft pink flush high on the cheeks for extra sweetness.
Emotionally, this look feels like permission to be tender.
Not every day calls for fierce, and I think Bambi eyes remind me of that.
Cheetah Spot Blush

I stumbled onto this one completely by accident during a makeup tutorial rabbit hole one rainy afternoon.
Someone was doing spots on their cheekbone, and I thought, wait, that’s kind of gorgeous.
So I tried it myself with a warm terracotta cream blush.
I applied my normal blush wash first, low on the cheek, blended out soft.
Then with a tiny brush, I dotted a few darker brown spots along the top edge of the blush, following the natural curve of my cheekbone.
Uneven spacing is key, cheetahs don’t do symmetry and neither should you.
It’s subtle from far away, almost looks like a trick of the light.
But up close, people notice, and they always ask about it.
I love wearing this one to brunch, it feels playful without screaming for attention.
My hack is using a cream product instead of powder for the spots.
It blends into the blush underneath instead of sitting on top looking harsh.
A fun variation is doing this in a cooler pink-brown tone if terracotta doesn’t suit your coloring.
Why I keep coming back to it, honestly, is the joy factor.
It’s a small detail that only you really know is there, kind of like wearing a fun bra under a plain sweater.
It’s just for you, and that feels special somehow.
Snakeskin Metallic Eyes

This look feels like liquid metal poured across your lid, and I mean that in the best way.
I first tried it for New Year’s, wanting something that felt sleek and a little dangerous.
Start with a deep olive or bronze cream shadow all over the lid as your base.
Then, using a fine brush with black liner, draw small overlapping diamond shapes, layered like scales climbing toward the outer corner.
It sounds complicated, but it’s really just repeated little curves, nothing precise required.
I pressed a metallic gold pigment on top of the diamonds afterward, patting gently so it caught in the grooves.
The result genuinely shimmers like scales catching lamplight.
It took me three tries to get the diamond shapes even loosely consistent, so don’t get discouraged early on.
I promise your hand gets the rhythm after a few attempts.
For daytime, you can scale this back to just the outer corner instead of the full lid.
It still reads as snakeskin, just quieter.
The reason this one feels so good to wear is the confidence boost of something so unexpected.
People don’t expect scales on an eyelid, and that surprise element is honestly half the fun of getting ready.
Giraffe Print Bronzer Contour

This is probably my most “no makeup makeup” look on the list, and I really love that about it.
I use it on beach days, when I want warmth without looking like I tried too hard.
Apply cream bronzer in your usual contour placement first, soft and blended.
Then take a slightly deeper brown cream product and add irregular, blob-like patches along the hairline and jaw, mimicking giraffe patches.
Blend the edges just enough so they’re soft, not blend them away completely.
You want texture and dimension, not a flat wash of color.
I add a touch of gold highlighter on the high points of my cheeks after.
It makes the whole look feel sun-warmed rather than “made up.”
My honest tip is to use a damp sponge for blending, it keeps everything from looking cakey.
A dry brush tends to grab too much product in one spot.
For a nighttime variation, deepen the patches slightly and add a warm bronze eyeshadow to match.
Why I reach for this so often is the low-effort glow it gives.
It feels like the makeup version of a lazy Sunday, relaxed but still put together, and honestly that balance is hard to find.
Dalmatian Spot Liner

I did this look for a friend’s costume party, and it ended up being way cuter than the actual costume I wore.
Simple white eyeshadow base across the whole lid, patted on with fingers for extra pigment.
Then, using a small round brush dipped in black gel liner, I dotted various sized black spots randomly across the lid.
Some bigger, some tiny, definitely not evenly spaced.
That randomness is honestly the whole trick, real dalmatian spots are never uniform.
I added two spots along the lower lash line too, just to carry the pattern down.
It looked graphic and a little bit silly in the best way.
My tip is to use the tip of a bobby pin dipped in liner for the tiniest spots.
A brush tip is sometimes too big for those little details.
A cute variation is swapping black for a deep brown if you want something wearable beyond a party.
It softens the whole look while keeping that spotted charm.
The emotional pull here is pure nostalgia and fun.
It reminds me of being little and not caring at all what anyone thought of my outfit choices.
Sometimes makeup should just feel like play, not perfection.
Peacock Feather Liner

This is easily the most dramatic look I’ve ever attempted, and I still think about how good it felt to wear.
I did it for a friend’s engagement party where the dress code said “make a statement.”
Challenge accepted, obviously.
I built a base of deep teal shadow across the lid, blended up slightly past the crease.
Then added a rich emerald green in the center, patted on for extra shimmer.
Using black liner, I drew a winged shape but extended little “eye” details near the tail end, like tiny peacock feather tips.
A touch of gold pigment dotted in the center of each little feather eye made them pop.
It took real patience, probably twenty minutes just on one eye the first time.
But once you understand the shape, it goes faster, I promise.
My hack is doing one eye completely before starting the second, using it as your reference guide.
Trying to do both eyes at once usually leads to mismatched details.
A toned-down variation only adds the feather tip to the outer corner, keeping the rest a simple teal smoky eye.
Why this one means so much to me is that it feels like wearing actual jewelry on your face.
It’s a moment, not just makeup, and some nights call for exactly that.
Cow Print Blush Spots

I made this look for a summer festival, paired with a little denim skirt, and it felt so playfully American in the best way.
White cream blush base first, blended soft across the apples of the cheeks.
Then, using black cream liner, I painted a few irregular blob shapes across the blush, like classic cow patches.
Keep the edges a little jagged, not smooth ovals.
That imperfection is what sells the whole print.
I added a tiny pink flush underneath the black patches for warmth, so it didn’t look flat or cartoonish.
The final effect felt fun and a little unexpected, definitely a conversation starter.
My honest tip is to use a setting spray afterward, since cream products can shift in festival heat.
Nobody wants their cow spots melting by 3pm.
A gentler variation is doing just two small patches instead of a full pattern, more subtle for daytime.
The reason I love this one is the joy it brings to other people, honestly.
Everyone who saw it that day smiled or laughed, and there’s something really lovely about makeup that makes strangers happy.
Ocelot Smoky Eye

This look takes the classic smoky eye and gives it a wild little twist, and it became my go-to for date nights for a while.
Start with your typical warm brown smoky base, blended really well with no harsh lines.
Then, using a fine brush and dark brown liner, add small open circles along the outer corner, each with a tiny black edge on one side.
That’s the ocelot rosette shape, and it reads as texture rather than a full pattern from a distance.
I kept the rest of the eye soft and smudgy so the rosettes didn’t feel too graphic against it.
A swipe of bronze pigment in the inner corner brightened the whole thing.
My tip is to blend the smoky base first and let it dry slightly before adding the rosette details.
Wet product on wet product just smears everything together.
For a subtler take, only add one or two rosettes near the outer corner instead of a full row.
I love this look because it feels sultry but still approachable, not overly costume-y.
It’s wild without shouting about it, and honestly, that balance feels very “me.”
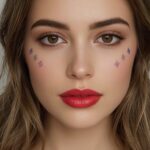
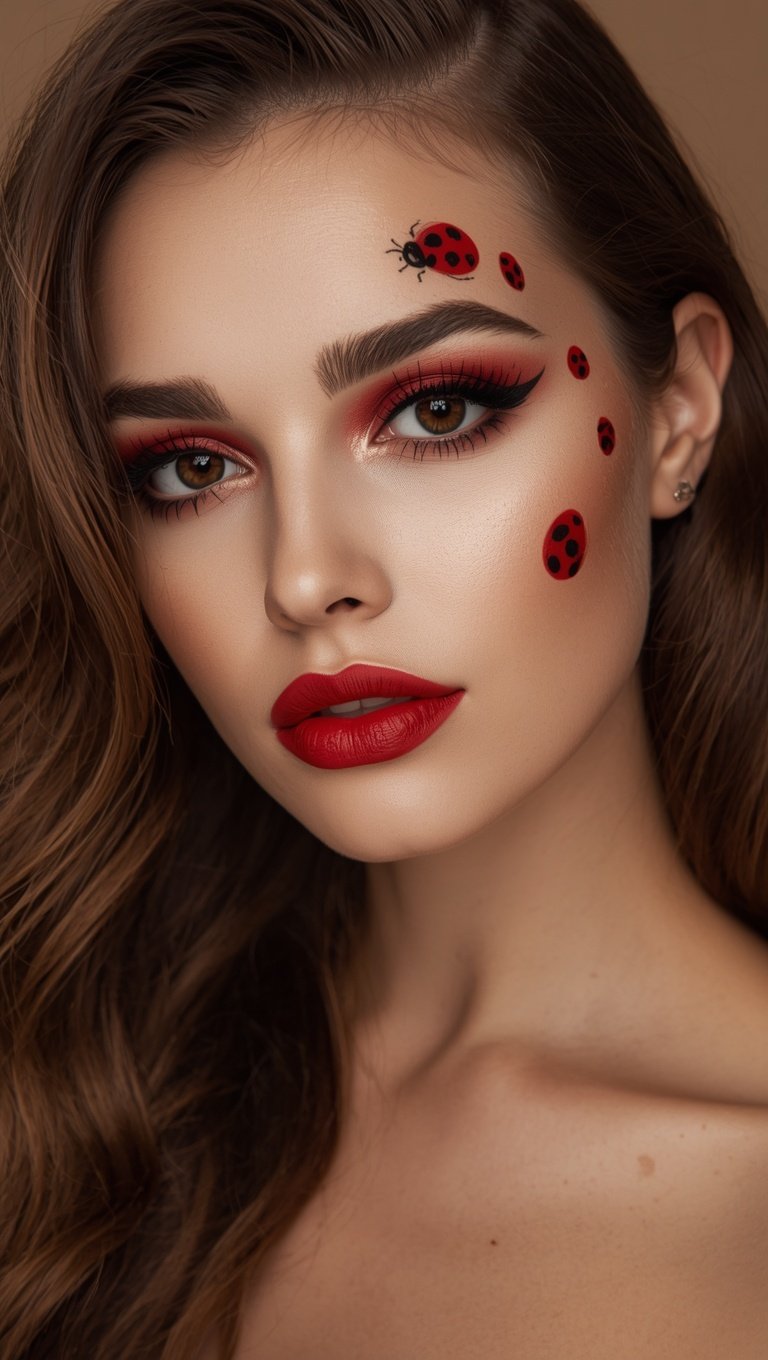
Ladybug Inspired Red Spot Look

This is easily the most cheerful, feel-good look on this whole list, and I always wear it when I need a mood lift.
Bright red cream shadow across the lid, blended just slightly at the edges.
Then black liner dots, varying in size, placed across the outer half of the lid.
A thin black line drawn down the center of the lid, mimicking where a ladybug’s wings would split, ties the whole thing together.
It’s bold, it’s a little silly, and it makes me smile every single time I look in the mirror.
I add a glossy top coat over the red for extra shine, almost like a lacquered shell.
My tip is to use a matte red base first so the gloss on top actually has contrast to shine against.
Gloss on gloss just looks muddy.
A cute variation is doing this only on the lower lash line for a subtler daytime nod to the look.
Why this one matters to me isn’t complicated at all.
Some days you just need color that makes you happy, and red genuinely does that for me every time.
It’s playful, it’s a little strange, and I wouldn’t change a thing about it.