I used to put blush right in the center of my cheeks because, well, that was just where blush went.
Then one morning, while getting ready with terrible bathroom lighting and very little patience, I swept it slightly higher toward my temples instead.
And wow.
My whole face suddenly looked a little more awake, a little softer, and somehow more polished without looking like I had tried too hard.
That tiny shift completely changed the way I wear blush now.
If you love makeup that feels fresh, feminine, and effortless, placement can honestly matter just as much as the shade you choose.
And once you notice what a few centimeters can do, you kindda never go back.
I Keep My Blush Higher Than I Used To

I used to smile and place blush right on the roundest part of my cheeks.
It looked sweet, but sometimes it also made my face feel a little fuller than I wanted.
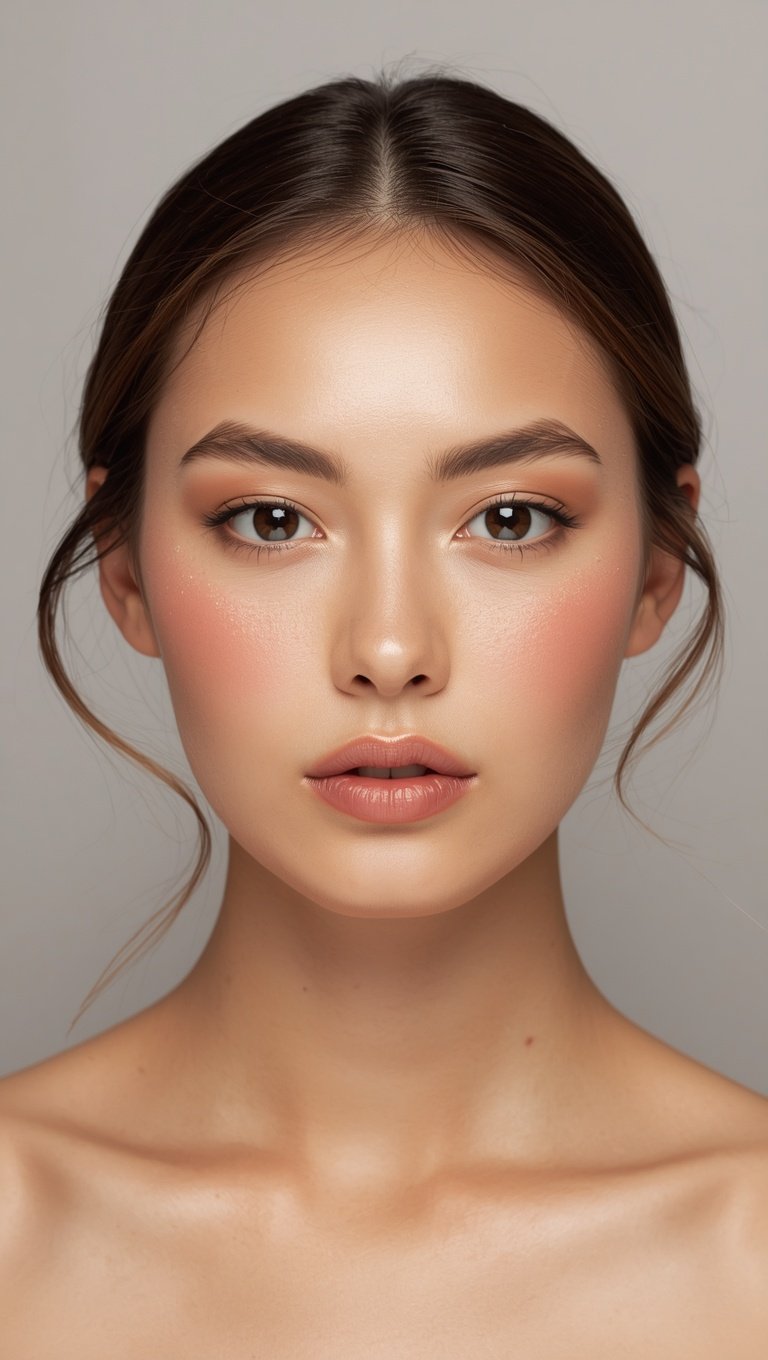
Now I start slightly above the apples of my cheeks and blend upward.
That upward movement makes everything feel lighter.
You get that soft flush, but your eye naturally follows the color toward the top of your face.
I love how subtle the difference is.
You do not look dramatically sculpted.
You just look refreshed.
If your face feels tired after a long day, this is one of my favorite tiny makeup shifts.
And I always blend more than I think I need to.
A harsh patch of blush can pull attention downward, while a soft haze almost melts into your skin.
For me, the prettiest result happens when I can barely tell where the blush begins.
I Blend Toward My Temples

This is probably the placement trick I use the most.
Instead of keeping all the color on my cheeks, I softly sweep the leftover blush toward my temples.
Not all the way into my hairline.
Just enough to create a gentle upward trail of color.
I’m obsessed with how this makes blush feel almost like part of the structure of your face.
It gives your makeup this airy, lifted feeling without the sharpness that contour can sometimes create.
When I started doing this, I noticed that even very natural makeup suddenly looked more intentional.
And it photographs beautifully too.
My little hack is to use whatever is left on the brush rather than adding more product.
That keeps the temple area soft.
You want the color to whisper up there, not shout.
If you have ever looked at your makeup and thought something just felt slightly heavy, try moving that blush upward before changing anything else.
I Leave the Center of My Face Softer

I love a rosy cheek moment, but I usually avoid bringing too much blush close to my nose when I want a lifted look.
Keeping the center of my face a little cleaner creates more visual space.
It makes the outer cheek placement feel even more elevated.
I noticed this one morning when I accidentally applied too much blush near my nose.
My makeup looked adorable, but definitely more youthful and round than lifted.
So I wiped a little away with a damp sponge.
The difference was immediate.
Now I think about blush almost like lighting.
Where you place brightness and color changes where your eye travels.
If you keep the strongest color toward the outer cheeks, your whole face can feel a bit more elongated.
And if you love that sunkissed blush-across-the-nose look, you can absolutely still wear it.
I would just keep that center color lighter when lift is your main goal.
I Place Blush Just Above My Natural Cheek Curve

One of the easiest mistakes is placing blush slightly too low.
I have done this more times than I can count.
When blush drops below the natural curve of my cheekbone, my face suddenly feels heavier.
So now I pay attention to where the top half of my cheek naturally catches light.
That is usually where I want my blush to live.
You do not need to find an exact technical point.
I just look in the mirror with a relaxed face and gently tap color onto the upper cheek.
Simple.
If I am using cream blush, I place a tiny amount first and build slowly.
Cream formulas can move around more than you expect.
And once they blend downward, you can lose that lifted placement pretty quickly.
A small amount high on the cheek gives you much more control.
Plus, it looks beautifully skin-like.
I Stop Before the Blush Reaches Too Far Down

I used to blend forever.
And honestly, sometimes I blended the blush so far down that I basically erased the whole lifting effect.
Now I keep the lower half of my cheek mostly untouched.
That clean space underneath the blush makes the cheekbone look more defined.
It is sort of like creating shape without actually drawing a contour line.
I love this on days when I want my makeup to feel soft and minimal.
You get structure, but nobody sees the technique.
If your blush tends to travel downward while you blend, try holding your brush slightly higher and using small upward motions.
I also like using a clean brush around the lower edge.
It softens everything without dragging the color down.
That one little habit has saved my blush more than once.
I Use Less Product Near My Hairline

There is something so pretty about blush fading into the outer face.
But too much pigment near the hairline can start looking muddy.
I learned this the annoying way after applying a very bright cream blush a little too enthusiastically.
It looked gorgeous on my cheek and strangely intense near my temple.
Now I keep most of the pigment on the upper cheek and let the brush carry the leftovers outward.
That creates a gradient.
You get softness near the temple and a little more life near the cheek.
It feels balanced.
And honestly, it also looks much more expensive.
I love makeup that looks almost impossible to pinpoint.
You see the overall effect, but you cannot immediately tell where one product stops and another starts.
That is exactly what I want from blush.
I Angle My Blush Instead of Making a Circle

Circular blush placement can be super cute.
But when I want my face to feel lifted, I use more of a soft diagonal shape.
I start on the upper cheek and blend slightly upward and outward.
That shape echoes the direction of a lifted cheekbone.
You do not need a dramatic stripe.
Actually, I think the softer the angle, the prettier it looks.
I usually tap the product into place first and then diffuse the edges.
This works especially well with cream blush because you can control the shape before it fully blends.
If you have been applying blush in a little round spot and wondering why your face looks different from the makeup looks you save, this may be why.
The shape matters.
And a gentle diagonal can change the entire mood of your makeup.
I Use My Fingers When I Want More Control

Sometimes a brush is perfect.
Sometimes my fingers are better.
When I want the blush placement to stay very precise, I tap cream blush onto the upper cheek with my fingertip.
The warmth of your fingers helps the product melt into your skin.
And because you are working in such a small area, it is easier to keep the blush exactly where you want it.
I especially love this when I am getting ready quickly.
A tiny dab, a few taps, and suddenly my face looks more alive.
If the edges feel too obvious, I go over them with a sponge.
That combination gives me the most natural finish.
It almost looks like the color is coming through my skin instead of sitting on top of it.
And for me, that is always the goal.
I Match My Blush Placement to My Face

I do not think there is one perfect placement for everyone.
Your face shape, cheek structure, and even the expression you naturally make can change how blush sits.
That is why I always recommend experimenting instead of following a diagram too literally.
Try placing your blush higher one day.
Then try it slightly more centered another day.
Take a quick photo in natural light.
You will notice things that are harder to see while standing inches from the mirror.
When I started doing this, I realized my favorite placement was much higher than I originally thought.
It made my whole makeup look feel fresher.
So use makeup rules as a starting point.
But let your own face tell you what actually works.
I Keep My Blush and Highlighter Close

I love when blush and highlighter almost melt into each other.
It makes the upper cheek look soft, glowy, and gently lifted.
I usually place highlighter just above the highest edge of my blush.
Then I blend the meeting point so there is no obvious line.
The glow catches the light while the blush brings warmth underneath it.
Together, they create this beautiful little lift.
And you do not need a glittery highlight for this.
A satin finish can look even prettier if you prefer something subtle.
On casual days, I sometimes skip highlighter completely and use a slightly dewy blush instead.
That gives me the same cozy, luminous feeling with one product.
Easy makeup is always my favorite makeup.
I Choose Softer Blush Shades for an Effortless Lift

Placement matters a lot, but shade can change the effect too.
When I want something soft and naturally lifted, I usually reach for rosy pinks, muted peaches, or warm pink-beige shades.
They blend into the skin so beautifully.
A very bold blush can still look gorgeous, of course.
But I find that softer shades make it easier to create that seamless upward fade.
You can build them slowly without suddenly ending up with a bright stripe.
And that gives you more room to play with placement.
If your blush always feels too intense, try using less product before changing the color completely.
I tap my brush off on the back of my hand first.
It sounds tiny, but it makes blending so much easier.
A sheer first layer always gives me a prettier result.
I Blend With a Clean Brush at the End

This is one of those boring little tricks that makes such a huge difference.
After I finish applying blush, I grab a clean fluffy brush and soften the edges.
No extra product.
Just blending.
I focus mainly around the outer edge and the lower edge of the blush.
That keeps the lifted direction while removing anything that looks too obvious.
I started doing this after noticing my makeup looked great in my bathroom mirror but slightly patchy near a window.
Natural light will humble you fast.
Now this final blending step is basically automatic for me.
It gives everything that soft-focus finish I love.
And if you accidentally applied too much blush, a clean brush can rescue it without making your skin look cakey.
Very useful.
I Check My Blush With a Relaxed Face

This one sounds strange, but stay with me.
I used to smile while applying blush and then wonder why the placement looked lower once my face relaxed.
Your cheeks move when you smile.
So now I check everything with my face completely relaxed before I finish.
It helps me see where the blush is actually sitting.
If the color has dropped lower than I wanted, I soften the bottom edge and add the tiniest touch higher up.
That small adjustment makes such a difference.
I love this trick because it feels realistic.
You are not walking around holding one expression all day.
Your blush should flatter your face when you are smiling, talking, sipping coffee, or doing absolutely nothing.
And once I started checking placement this way, my makeup became much more consistent.
I Let the Lift Stay Soft

I never want lifted blush to look like I drew an obvious stripe toward my temple.
The effect I love is much quieter than that.
Soft color.
Blurred edges.
A little warmth sitting high on the cheeks.
And just enough upward movement to make your whole face feel fresher.
Some mornings I barely wear anything else.
A little concealer, brushed brows, mascara, and blush placed high on the cheeks can make me feel surprisingly put together.
That is what I love most about this technique.
It does not feel like changing your face.
It feels like bringing a little more light and softness to the face you already have.
And when the blush catches the daylight just above your cheekbone, it gives you that warm, awake glow that makes you want to keep looking in the mirror for one extra second.