I put a tiny star on my cheekbone one random Tuesday and burst into tears in my bathroom mirror.
Okay, not tears exactly, but that little jolt of “oh, there she is” that you only get a handful of times a year.
It sounds dramatic for a rhinestone the size of a sesame seed, but stick with me here.
There’s something about celestial makeup that makes you feel like you’re in on a secret the rest of the world hasn’t noticed yet.
It’s not loud, it’s not costume-y, it’s just this quiet little sparkle that says “I know something you don’t know.”
So I started collecting looks, testing them on myself, on my sister, on my poor roommate who just wanted to go to brunch.
And now I’ve got thirteen of my favorites to hand straight to you, no filler, just the good stuff.
The One-Star Wonder

Let’s start small because honestly, this is where I always start too.
A single star, placed just above your cheekbone or right at the outer corner of your brow bone, changes your whole face.
I use a tiny star-shaped rhinestone, the kind that comes in a little pot with an spoolie applicator.
Lash glue works, but I’ve had way better luck with a proper skin-safe adhesive that dries clear and stays put through a whole night out.
The trick is placement, and I mean this genuinely, an inch in either direction changes the entire vibe.
Too close to your eye and it reads a little sleepy, a little dreamy.
Closer to your temple and it feels more editorial, more “I meant to do this.”
I like mine right where I’d naturally get a sunkissed freckle, because it feels earned, you know?
This is the look I reach for on days when I want to feel special but I’ve got zero time.
It takes fifteen seconds and somehow makes my whole face feel intentional.
My honest tip: keep a little pot of these gems in your bag, because you will absolutely want to add one mid-day once you see how it looks in natural light.
And don’t overthink the shape, tiny five-point stars read better than perfect circles for that celestial feel.
Connect-The-Dots Constellation Freckles

This one is for my freckle girls, my faux-freckle girls, all of us.
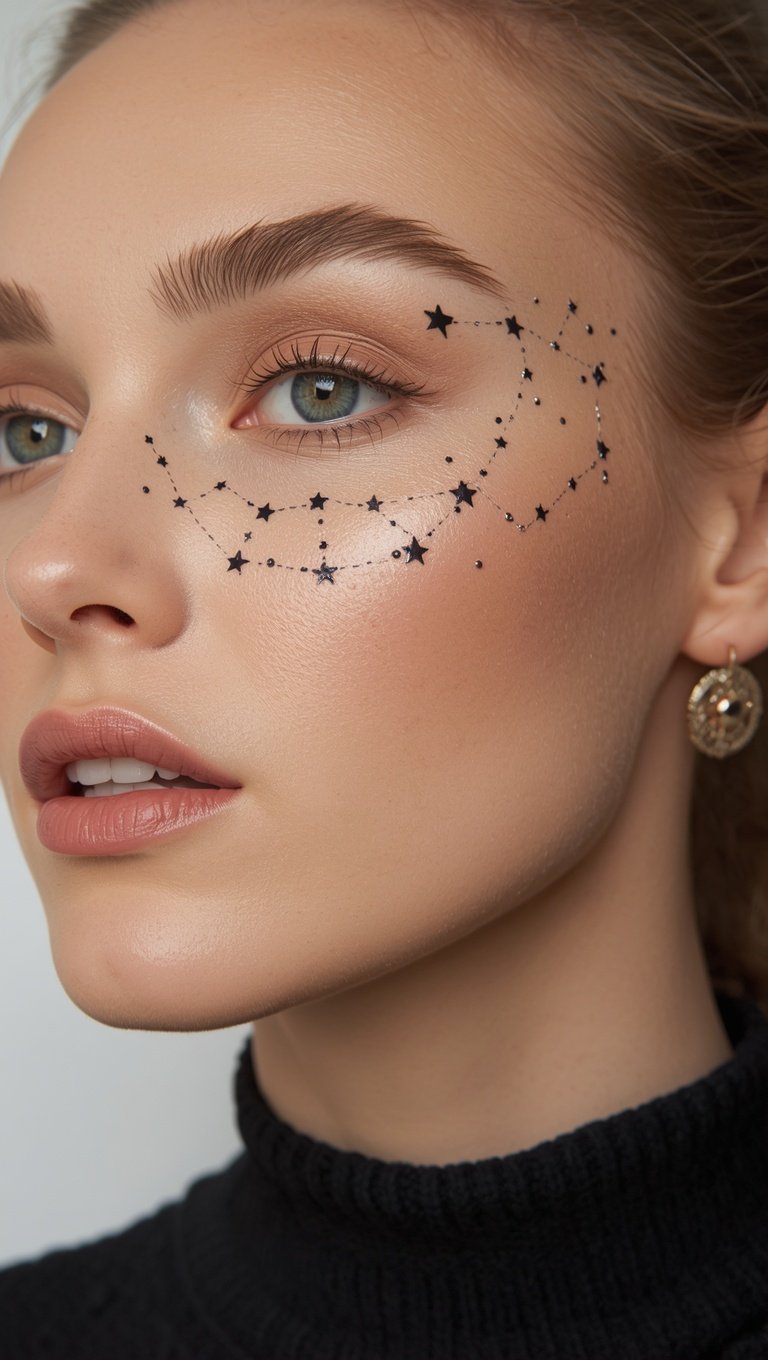
Instead of scattering random dots, you’re actually tracing out a mini constellation across your cheeks or collarbone.
I usually do a little Big Dipper or a loose Orion’s Belt, nothing too precise, because the charm is in the slight imperfection.
Grab a fine-tip brow pencil in a warm brown, not black, black reads harsh against skin.
Dot, dot, dot, then connect them with the thinnest possible line, almost like you’re doodling in a notebook.
Set it with a translucent powder so it doesn’t budge if you sweat or tear up laughing at something.
I did this for a friend’s engagement party last fall and got stopped in the bathroom line by three strangers asking what it was.
That’s the thing about this look, it photographs like a dream but still feels soft and wearable in person.
If freckles feel too twee for your taste, do just three dots in a loose triangle, way more subtle.
I love pairing this with bare, dewy skin, because the constellation should be the star of the show, pun intended.
Little hack: use a spoolie dipped in setting spray to soften any lines that feel too crisp.
It softens everything into something that looks like it’s been there your whole life.
Glitter Star Eyeliner Flick

This is the one I get the most messages about, hands down.
Take your normal winged liner and, right at the tip of the flick, add a tiny star instead of letting it taper off.
I use a fine glitter liner pen for this, the kind with a super precise tip, because a chunky brush ruins the shape instantly.
The first few times I tried this I ended up with something that looked more like a blob than a star, so don’t get discouraged.
Practice on the back of your hand first, seriously, it saves so much frustration.
Once you’ve got the shape down, it becomes muscle memory within a week or two.
I wear this for basically anything after six, dinner, a show, a random Tuesday I’ve decided is special.
It pairs beautifully with a soft brown smoky eye underneath, so the star has room to actually shine.
Gold glitter feels warmer and more romantic, silver feels a little more futuristic and cool.
My personal favorite is a deep periwinkle glitter, it catches light in the most unexpected way under candlelight.
If you’re nervous about commitment, try star stickers instead of liquid liner, they peel right off with a warm washcloth.
Either way, this tiny detail makes people lean in and ask what you did differently.
Celestial Smoky Eye In Deep Blues And Purples

Okay, this one is a little more involved, but I promise it’s worth the extra five minutes.
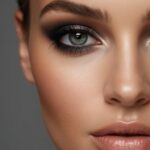
Instead of your typical brown or black smoky eye, swap in a deep indigo or plum as your base shade.
Blend it right into the crease like you would with any smoky look, nothing scary about the technique itself.
Then add a tiny fleck of gold or bronze right in the center of your lid, like a star peeking through clouds.
I did this for the first time before a winter wedding and felt like I was wearing the night sky on my face.
The deep jewel tones do something magical under warm lighting, they almost shift color depending on the angle.
If purple feels too bold for daytime, try it as just a thin line along your lower lash line instead.
That way you get the celestial feeling without the full commitment of a smoky lid.
I always finish with a tiny bit of gold pigment right at the inner corner, it opens the whole eye up.
This look genuinely makes blue and green eyes look like they’re glowing from within.
Brown eyes get this gorgeous warm depth against the cool tones, it’s honestly stunning.
Give yourself grace if the blending looks patchy at first, a fluffy blending brush fixes almost everything.
Moon-Glow Highlighter Placement

There’s a version of highlighter that isn’t about looking shiny, it’s about looking lit from within.
I call this the moon-glow because it’s soft, diffused, almost like moonlight on skin rather than a spotlight.
Instead of the usual cheekbone strobe, dab a pearl-toned highlighter on your cupid’s bow, the very center of your forehead, and your chin.
These are the places moonlight would naturally catch on a face, and it creates this ethereal, ghostly-pretty effect.
I use my fingertip instead of a brush for this, body heat melts the product into something more skin-like.
The first time I tried it, my sister asked if I’d gotten a facial, that’s how good the glow looked.
Cream formulas work so much better than powder here, powder can look chalky against the softness we’re going for.
I’m obsessed with a champagne-pink shade for this because it works on nearly every skin tone I’ve tried it on.
If your skin runs oily, just set it with the tiniest touch of translucent powder so it doesn’t slide by hour three.
This look is quietly one of my favorites because it doesn’t scream “makeup,” it just makes you look rested and soft.
Pair it with bare lips and lightly done eyes, let the glow be the whole point.
Trust me, people will ask what skincare you’re using, and you get to smile and keep your little secret.
Star Stickers For Lazy-Day Sparkle

Some days I do not have it in me for glitter liner or precise dots, and that is completely fine.
This is where star stickers become an absolute lifesaver in my routine.
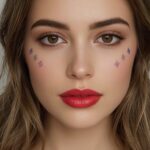
They come in little sheets, tiny holographic or matte stars in different sizes, and you just press them wherever you want.
My go-to spots are the outer corner of one eye or scattered lightly across one cheekbone.
Less is more here, I promise, three or four stickers look intentional while a dozen starts to look like a costume.
I keep a sheet in my makeup bag for exactly these low-effort, high-impact days.
They stay on shockingly well through a full day, and peel off clean with a bit of oil-based remover at night.
This is the look I’d recommend to anyone who feels intimidated by “celestial makeup” as a whole concept.
There’s zero skill required, just placement, and even that you can adjust in seconds if it’s not working.
If I had five minutes before running out the door, this is genuinely what I’d reach for first.
Kids love these too, so if you’ve got a little one who wants in on the sparkle, hand them a sheet.
It’s become a tiny bonding ritual in my house, oddly enough.
Cosmic Glossy Lips

Picture your lips catching light the way the surface of a lake does at night, that’s the goal here.
Start with a deep berry or plum lip liner, then layer a clear, glittery gloss right on top.
The color underneath does the emotional work, and the gloss on top does the literal shimmer.
I like adding just a touch of the gloss to the very center of my bottom lip, almost like a highlight.
It creates this three-dimensional, almost wet-look shine that photographs so beautifully in low light.
Honestly, this is my favorite lip look for anything after dark, dinner, a show, a late walk with someone I like.
If gloss feels too sticky for your taste, a shimmering balm gives a softer, more subtle version of the same effect.
I always keep one in my coat pocket for quick reapplication because this look does need a little upkeep.
Gold-flecked clear gloss over a soft rose liner is my other go-to combo, way more daytime-friendly.
It’s giving quiet sparkle rather than full glam, if that makes sense.
My tip: exfoliate your lips gently the night before, gloss shows every flake and you want that glassy finish, not a textured one.
Starburst Blush Placement
Most of us apply blush in that classic apple-of-the-cheek circle, and that’s lovely, but let’s do something different.

Try applying your blush in a soft starburst shape instead, blending it slightly upward and outward from the center of your cheek.
It creates this subtle radiating effect, like warmth spreading outward rather than sitting in one spot.
I use a cream blush for this because it blends so much more diffusely than powder ever could.
A warm coral or soft pink works beautifully, something that mimics an actual flush rather than a stark color block.
The first time I tried this, it took maybe an extra thirty seconds and completely changed how “alive” my whole face looked.
I like dabbing a little extra right at the very top, closer to my temple, for that starburst point.
It’s such a small technique shift but it photographs incredibly well, especially in natural light.
If you’re using powder blush, a fluffy brush with light, upward flicking motions gets you close to the same effect.
This is one of those tricks that nobody clocks as “different,” they just think you look really good that day.
And honestly, isn’t that the whole point of good makeup?
I’ll take “you look so glowy today” over “cute stars” any day of the week.
Full Galaxy Glam For Festivals And Big Nights

Alright, this is the go-big-or-go-home section, so buckle up.
Combine several of the looks above, glitter liner, a jewel-toned smoky eye, a scattering of star gems along your cheekbone and temple.
Add loose, chunky glitter in deep blues and purples right at the inner corner of your eyes for extra depth.
I did this exact combination for a festival a couple summers back and felt genuinely unrecognizable in the best way.
The key to making it look intentional rather than chaotic is picking one dominant color family and sticking with it.
Mine was all blues, purples, and gold, nothing green or pink sneaking in to compete.
Primer is non-negotiable here, both on your lids and anywhere you’re placing gems, because sweat and heat will test everything.
I always pack blotting papers too, glitter and oil do not mix well by hour six.
If you’re nervous about doing this solo, do a trial run a few days before so you’re not stressed the morning of.
Honestly, half the fun is the process, put on music, pour a drink, make an evening of it.
This look isn’t subtle, and it isn’t supposed to be, so lean all the way in.
You’ll look like you fell out of the night sky, and that’s exactly the point.
The Subtle Everyday Version For Work Or Errands

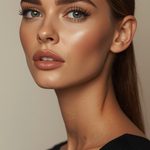
Not every day calls for stars, but some days call for just a whisper of one.
This version is basically the one-star wonder, but even smaller and paired with completely neutral everything else.
Bare, dewy skin, a soft brown mascara, a tinted lip balm, and one tiny star gem at your temple.
It reads as “put together” to literally everyone who doesn’t know to look for the tiny detail.
I wear this version constantly, running errands, grabbing coffee, sitting through a long work call.
It’s my little private joke with myself, nobody else needs to clock it for it to make me feel good.
The star can even be a shimmery eyeshadow dot instead of a physical gem, even more low-key.
Dab a pearlescent shadow with your ring finger right where a gem would go, blend the edges softly.
This is the version I’d recommend to anyone who feels shy about “doing too much.”
It costs you nothing in time and gives you that same little internal spark.
Sometimes the smallest sparkle is the one that sticks with you the longest through a long day.
I genuinely believe a tiny bit of quiet magic belongs in an ordinary Tuesday.
Prepping And Removing Star Makeup Without The Stress

Let’s talk logistics for a second, because gems and glitter are only fun if they come off easily too.
Always start with clean, slightly damp skin before applying any gems, adhesive sticks so much better that way.
A light layer of primer underneath helps everything, gems, glitter, gloss, stay put through hours of movement.
For removal, an oil-based cleanser or plain coconut oil breaks down adhesive without you having to scrub at your skin.
I press a warm, oil-soaked cotton pad against any gem for ten seconds before gently sliding it off.
Glitter is trickier, so I always do a first pass with a makeup wipe, then a proper double cleanse after.
Never, ever pick at dried glitter with your nails, it’s tempting but it just irritates your skin unnecessarily.
I learned that one the hard way after a rough morning-after situation on my cheekbone.
Keep a small dedicated pouch just for your celestial makeup bits, gems, liners, stickers, so you’re never hunting for them.
Mine lives right next to my everyday makeup bag, ready whenever the mood strikes.
My last little hack: test any new adhesive or gem on your inner wrist first if you’ve got sensitive skin.
A tiny bit of patience here saves you a much bigger headache later.
At the end of the day, none of this is about doing it “right,” it’s about what makes you feel like you.
Some of you will go straight for the full galaxy glam, and honestly, I love that for you.
Some of you will stick with one tiny star and call it a day, and that’s just as valid.
I’ve worn versions of every single look in this post, and the constant is always how they made me feel, not how “correct” they looked.
That’s kind of the whole thing about celestial makeup, it’s playful, it’s a little whimsical, and it doesn’t take itself too seriously.
So grab whatever gems, glitters, or stickers you’ve got lying around and just start experimenting on a random weeknight.
Worst case, you wipe it off and try again.
Best case, you catch your reflection somewhere unexpected and feel that same little jolt I felt on that random Tuesday.