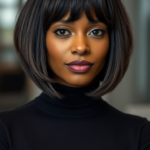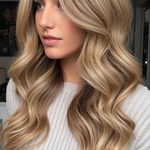
Curtain bangs were kind of designed for this exact situation.
Unlike blunt bangs, which have one job and one job only, curtain bangs are cut longer at the sides and shorter in the center, so they blend into the rest of your hair almost on purpose.
That gradual shape is honestly the whole secret.
When I got mine cut, my stylist told me something that stuck with me.
She said, “we’re not cutting bangs, we’re cutting a frame.”
And that framing idea changed how I thought about the whole grow-out process.
Because a frame doesn’t need to be short to work, it just needs to sit right around your face.
So if you’re staring down a fresh cut and already dreading the awkward weeks, take a breath.
You picked one of the only bang styles that’s forgiving by design.
It’s kind of the difference between building a house on a solid foundation versus, well, not.
You’re already ahead.
The “Awkward Stage” Is Mostly a Mindset Thing (Sorry, Had to Say It)

I know, I know, that sounds like something printed on a throw pillow.
But hear me out for a second.
A huge chunk of what makes grow-out feel awkward isn’t actually the hair, it’s the expectation that it should still look exactly like day one.
Once I let go of that, everything got easier.
My bangs on week six looked nothing like my bangs on day one, and that was fine, because I stopped comparing them.
I started thinking of it more like phases of an outfit than a single look I had to maintain forever.
Some days felt more sleek and side-swept, some days felt more soft and wispy, and both were still cute in their own way.
If I’m being honest, the days I felt most awkward were the days I kept touching my bangs and fussing with them in the mirror.
The days I just did my little routine and left the house, those were the good days.
So this section is your permission slip.
You’re allowed to have a slightly different bang vibe every single week.
That’s not failure, that’s just… growing hair.
Talk to Your Stylist Before You Even Sit Down in the Chair

This one is so underrated.
When I got my curtain bangs, I told my stylist upfront that I wanted something I could grow out gracefully, and that one sentence changed how she cut them.
She left a little more length at the very center point, and she blended the sides longer than she normally would for a “fresh” curtain look.
It felt less dramatic on day one, sure.
But it meant week four and week eight didn’t feel like a completely different haircut.
If you’re about to get curtain bangs for the first time, say the magic words, “cut these with grow-out in mind.”
Any good stylist will know exactly what that means.
And if you already have curtain bangs and you’re reading this mid grow-out, no worries, bring this up at your next trim anyway.
She can shape what you already have to sit better through the transition.
This is also a great moment to ask about your natural part, your cowlicks, and how your hair dries, because all of that affects how your bangs will behave as they grow.
My stylist actually watched me blow dry my own hair once, just so she could see how it naturally fell.
That kind of small detail matters more than people think.
So don’t be shy, talk to her like she’s your hair’s personal translator.
Because honestly, she kind of is.
The Center Part Trick That Saved Me More Than Once

Okay, this is probably my favorite trick out of everything in this whole post.
When your curtain bangs hit that in-between length where they’re too long to sit forward but too short to fully blend back, try parting your hair slightly off-center or dead center instead of your usual side part.
I promise it changes everything.
A side part pulls all that length to one spot, which is exactly when things start looking uneven or heavy on one side.
A center part distributes the length evenly, so both sides can sort of drape down like curtains, which, well, that’s literally the whole point of the style.
The first time I tried this, I remember standing in front of my mirror thinking, oh, this actually looks intentional.
Not like I was hiding an awkward stage, but like I planned this soft, face-framing look on purpose.
And that shift in feeling, from hiding to choosing, made such a difference in my confidence that week.
My tip within this tip, use a little texturizing spray at the root of your part before you style, it keeps that center part from looking too flat or too “part down the middle 2003.”
Just a light mist, scrunch it in with your fingers, and go.
It’s such a tiny adjustment but it works almost every single time.
Training Your Bangs With a Blow Dryer and a Little Patience

If you only take one styling habit from this whole post, let it be this one.
Blow drying your bangs the right way trains them to fall the way you want, even as they get longer.
Here’s my little routine, I towel dry my hair until it’s damp but not dripping, then I section off my bangs and blow dry them first while the rest of my hair is still clipped up.
I use my dryer on a medium heat setting, and I pull the bangs slightly up and away from my face with a round brush, curving them outward like a soft C shape.
The trick is doing this while they’re still damp, not after they’re already dry, because damp hair actually holds the shape as it sets.
I usually hold each section for about ten seconds before moving to the next.
It sounds fussy, but honestly it takes me maybe three extra minutes in the morning.
And those three minutes make the difference between bangs that flop straight down in my face and bangs that curve softly around it.
If your arms get tired holding the dryer at that angle, and mine definitely do sometimes, prop your elbow on the counter for a second.
Little hack, but it helps more than you’d think.
Consistency is really the secret here, not perfection.
Some mornings mine come out better than others, and that’s just how it goes.
Round Brushes and Velcro Rollers Are Your New Best Friends

Once your bangs get long enough to feel like they have a mind of their own, tools become your best allies.
A small round brush, the kind about an inch or so in diameter, gives you the most control for that classic curtain curve.
I keep mine right by my bathroom sink so I never have an excuse to skip it.
Velcro rollers are the lazy girl version of the same idea, and honestly, I love them for busy mornings.
I roll my damp bangs onto two small velcro rollers, go do my makeup or eat breakfast, and unroll them ten minutes later to soft, bouncy, face-framing pieces.
No heat required if your hair air dries fast enough.
If you’re someone who’s always running late, this is honestly the move.
I discovered this trick almost by accident when I was rushing one morning and didn’t have time to blow dry properly.
I rolled my bangs, forgot about them, and came back to the prettiest curl I’d gotten in weeks.
Sometimes the happy accidents teach you the best tricks.
My tip here, don’t roll too tightly or you’ll end up with a curl that looks more like a ringlet than a soft wave.
Loose and relaxed is the vibe you’re going for.
My Honest Product Recommendations for This Exact Stage

I get asked about products constantly, so let’s talk real talk.
A lightweight heat protectant is non negotiable for me, especially since I’m blow drying my bangs almost daily during this grow-out window.
I reach for a texturizing spray on days I want that lived-in, effortless curl to hold a little longer.
A small round ceramic brush has genuinely replaced almost every other bang tool I’ve ever owned.
For hold without stiffness, a soft flexible hairspray, the kind that brushes out easily, keeps my curtain shape in place without ever feeling crunchy.
And on lazy days, a little bit of dry shampoo at the root of my bangs specifically keeps them from looking flat or greasy by afternoon, since bangs tend to get oily faster than the rest of your hair.
I’m kind of obsessed with a silk pillowcase too, not just for the hair health benefits everyone talks about, but because it genuinely reduces the flattening and frizz my bangs would otherwise get overnight.
None of these are expensive splurges, they’re just the small things that made this whole grow-out phase feel manageable instead of stressful.
If you only pick one thing to try from this list, make it the heat protectant.
Everything else is optional, that one just protects the investment you already made in the cut.
Layers Around Your Face Make the Transition So Much Smoother

If your curtain bangs are starting to feel a little heavy or blunt as they grow, ask your stylist about adding soft face-framing layers.
This was honestly a game changer for me around the three month mark.
The layers blend your bangs into the rest of your length, so there’s no harsh line where “bang” ends and “hair” begins.
It softens everything, and it gives your whole style more movement.
I remember sitting in the chair nervous about losing length, but the layers she added were so subtle, just soft pieces around my cheekbones and jaw, that it barely felt like a haircut at all.
It felt more like a refresh.
And the best part, those layers keep working for you as everything grows out further, because they keep reshaping themselves into your length instead of just sitting there stagnant.
If you have a round face like mine, face-framing layers around the jaw are so flattering, they kind of create this soft shadow that slims things visually without you doing anything extra.
If your face shape is more angular, layers that hit slightly longer, closer to the chin, tend to soften those features beautifully instead.
Either way, this is a conversation worth having with your stylist around the two to three month point.
It’s a small ask, but it makes such a big difference in how “finished” your whole look feels during this process.
Clips, Pins, and the Art of the Cute Bad Bang Day

Let’s be real, some days your bangs just won’t cooperate no matter what you do.
And on those days, I’ve fully embraced clips and pins as part of my actual style, not just a backup plan.
A couple of small gold clips pinning my bangs slightly back and to the side has become one of my go-to looks, especially when I’m short on time.
There’s something so cute and almost effortlessly French about a few soft pieces pinned back instead of a perfectly styled curtain every single day.
I keep two or three cute clips in my bathroom drawer specifically for this purpose.
My favorite combo is a small clip on each side, pinning back just the very front pieces while letting the rest fall naturally.
It reads as intentional even on days when, honestly, I just didn’t have it in me to blow dry.
If your bangs are at that awkward “almost long enough to tuck behind my ear but not quite” stage, a bobby pin tucked slightly behind your ear does wonders too.
I like to twist the front section back gently before pinning, it adds a little texture instead of looking flat against your head.
This is one of those tips that feels almost too simple to mention, but it’s saved me on more mornings than I can count.
Give yourself permission to have a clip day.
It still counts as a good hair day, promise.
Heatless Overnight Curling for Lazy Mornings

If mornings are chaos for you like they are for me, this one’s going to feel like a gift.
Before bed, I take my damp bangs and wrap them around two tiny foam rollers or even just a soft headband, tucking the ends under gently.
I sleep on it, which sounds uncomfortable but honestly you get used to it within a night or two.
In the morning, I unroll everything and I’m left with soft, bouncy curtain pieces that look like I spent real time on them.
I usually just run my fingers through to loosen the curl a bit, maybe a tiny spritz of texture spray, and that’s it.
This trick has probably saved me twenty minutes on mornings when I truly did not have twenty minutes to spare.
It also tends to last longer through the day than a quick blow dry does, since the curl sets slowly overnight instead of being rushed with heat.
If foam rollers feel like too much commitment, a silk scrunchie wrapped gently around your bangs works in a pinch too, just not quite as dramatic of a curl.
I’d say try this on a night before a busy day, so you can really appreciate how much time it buys you.
It’s one of those small habit changes that quietly makes your whole week easier.
Trimming Your Own Ends Between Salon Visits (Carefully)

Okay, slight disclaimer before I even start this one, please be gentle with yourself and with the scissors.
But if you’re desperate for a tiny refresh between appointments, a light dusting of just the very ends can help.
I use small, sharp hair-cutting scissors, never the ones from my kitchen drawer, and I only ever point cut, snipping upward into the ends rather than straight across.
This softens things without accidentally shortening your whole grow-out progress.
I only trim the center-most pieces, the ones that tend to get in my eyes first, and I leave the longer side pieces completely alone.
Less is so much more here.
The first time I tried this, I was shaking a little, not going to lie.
But taking off maybe a quarter inch from just the center pieces made such a noticeable difference in how my bangs sat, without undoing any of the length I’d been patiently growing.
If you’re not confident with scissors, and that’s totally valid, skip this one entirely and just wait for your next appointment.
There’s no shame in that at all.
This tip is really just for the days when you need a tiny bit of relief and can’t get in to see your stylist soon enough.
Small, careful, and only when you feel steady enough to do it.
Knowing When It’s Time for a Proper Reset Trim

Somewhere around the four to five month mark, you’ll probably feel that itch for a real trim, not a DIY fix, but an actual appointment.
That’s completely normal, and honestly, it’s a good sign that your hair is growing the way it should.
I like to think of this appointment less as “starting over” and more as a little tune-up.
I ask my stylist to just clean up the shape, maybe soften the layers a touch more, without cutting back into true bang length.
This keeps the growing-out momentum going instead of resetting the clock completely.
If you’re on the fence about whether it’s time, a good sign is if your bangs are starting to feel more like annoying face-framing pieces than an intentional style, that’s usually when a tune-up helps the most.
I try to book these little resets every couple of months during the grow-out process, just short fifteen minute appointments, nothing dramatic.
It keeps everything feeling fresh and shaped instead of scraggly.
And honestly, these quick appointments became something I looked forward to, almost like a little reset button for my whole look.
Your stylist would so much rather see you for small tune-ups than have you either suffer through a shape you hate or accidentally cut too much off yourself.
So don’t be afraid to book that quick appointment.
It’s not admitting defeat, it’s just part of the process.
Embracing the In-Between as Its Own Kind of Pretty

Here’s my final little heart-to-heart for this post.
Somewhere around month six of my own grow-out journey, I stopped thinking of my hair as “bangs trying to become long hair” and started just seeing it as my hair, in this particular season.
That mental shift made such a difference in how I felt every single morning.
The soft, wispy, slightly messy layers around my face started to feel like a style choice rather than a problem to fix.
I actually got so many compliments during this stage, more than I expected, because there’s something naturally soft and romantic about grown-out curtain bangs blending into your length.
If you’re in the middle of this process right now, I want you to know that the in-between isn’t something to just survive.
It can genuinely be one of the prettiest phases if you let it.
Play with texture, play with parting, play with a few soft waves through those pieces, and let it feel like your hair evolving, not your hair failing.
I still catch myself sometimes missing the soft curtain bangs I had, and other days I’m so glad I let them grow.
Both feelings are allowed at the same time, honestly.
That’s kind of the beauty of hair, it’s never really permanent, it’s just always becoming the next version of itself.