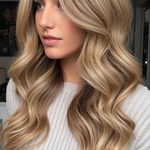
I used to fall asleep with wet hair braided so tight it gave me a mini headache, wake up to what I thought were curls, and by lunch my hair looked like it had given up on life.
Flat.
Sad.
A little defeated, honestly, kind of like me on a Monday.
So I went on this whole quest, testing every method the internet swore by, and I finally landed on a little rotation that actually works on my thick, stubborn hair.
You know that feeling when your curls are still bouncing at 6pm and someone asks what salon you went to?
That’s the energy I want for you today.
Grab your coffee, sit with me, and let’s get into what actually holds.
My Ride-Or-Die: The Silk Scarf Twist

Okay, this one is my number one, no contest.
You take damp (not soaking) hair, section it into two or four pieces depending on thickness, and twist each section around a long silk scarf like you’re wrapping a little hair burrito.
It sounds fussy the first time.
It’s not.
I promise you get faster after two or three tries.
The magic is in the silk itself, because it doesn’t grip and frizz your strands the way cotton does.
And when you sleep on it, there’s this gentle tension that trains your hair into a soft S-shape instead of a tight ringlet.
I do this on Sunday nights before a big week, and by the time I unravel it Monday morning, I’ve got these loose, romantic waves that genuinely look like I paid someone for them.
My favorite variation is doing four sections instead of two if I want more volume at the crown.
If your hair is fine or thin, go with two thicker sections so you don’t end up with crunchy little ringlets that separate weird.
Here’s the emotional truth of why this one works for me: it feels like self care, not a chore.
I put on a face mask, twist my hair up, and it’s basically a whole little ritual before bed.
Kindda love that about it, honestly.
Flexi Rods, My Second Favorite

If the scarf method is my everyday go-to, flexi rods are what I reach for when I want curls with actual bounce, the kind that move when you walk.
I remember the first time I used them before a wedding I was in, and a woman I’d never met stopped me at the bar to ask who did my hair.
Nobody did my hair.
I did, in my bathroom, watching a rerun of something forgettable.
The trick is rolling the section all the way down to the root and clipping the rod so it doesn’t slip in the night.
Smaller rods give you tighter, more defined curls, and bigger ones give you that soft, beachy bend.
I like mixing sizes actually, smaller ones around my face and bigger ones underneath.
They’re a little more time consuming than the scarf method, so I save them for occasions.
But the payoff is real.
The curls have this spring to them that just doesn’t quit, even hours later.
One tip that changed everything for me: don’t touch your hair while it’s still slightly damp after you take the rods out.
Let it breathe and set for a good ten minutes before you run your fingers through it, or you’ll deflate the whole thing.
The Sock Curls Trick For Beginners

This is the one I tell my younger cousin to try because it costs nothing and feels almost impossible to mess up.
You take an old sock, cut the toe off, roll it into a little donut shape, and wrap small sections of damp hair around it from the ends up toward your scalp.
Then you just tuck the last bit under and you’re done.
It looks a little silly, I won’t lie to you.
But you wake up with these soft, uniform curls that honestly remind me of an old Hollywood blowout.
I like this method most on second-day hair, when it already has a little grip and texture to work with.
If your hair is very long, you might need two socks instead of one so you’re not cramming too much hair into a single roll.
The curls from this method tend to be looser near your face and tighter toward the ends, which I actually love because it looks more natural, less “I clearly did something to my hair.”
A little hack: mist your ends with a bit of water before you start if they’re drier than the rest, so the curl grips evenly.
It’s such a low-effort, high-reward kind of night, and there’s something satisfying about using something you already own instead of buying another tool.
Braiding For Soft, Beachy Waves

If I’m being honest with you, this is the laziest method on my whole list, and also one of the most reliable.
Damp hair, one loose braid down the back, maybe two if you want a slightly more defined wave.
That’s it.
That’s the whole thing.
I do this most often when I’m traveling and don’t want to pack extra tools, because all you really need is a hair tie.
The tighter you braid, the more defined the wave, and the looser you braid, the more relaxed and undone it looks when you take it out.
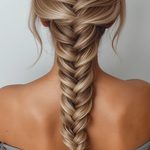
My favorite variation is a fishtail braid instead of a regular one, because it gives this slightly crimped, textured look that’s really pretty under soft lighting.
When I take the braid out in the morning, I never brush through it with a comb.
I just use my fingers to gently separate the pieces, because a brush will turn your waves into pure frizz in about four seconds flat.
A little sea salt spray on damp hair before braiding helps the wave hold its shape longer through the day too.
This one feels the most like “your hair, but a little more,” which I think is exactly what a lot of us are actually looking for.
The Heatless Curl Ribbon Method

You’ve probably seen this one floating around, the satin headband you tie your hair around instead of a scarf.
I was skeptical at first because it looked almost too easy to actually work.
But I tried it on a whim before an early flight, and I was genuinely shocked at the curl definition I woke up with.
You put the band on like a headband, then wrap sections of hair around it all the way up, tucking the ends in at the top.
The tension pulls your roots up slightly too, which gives this soft lift I really love.
It’s less messy than the scarf twist and a little faster, which makes it great for nights you’re short on time or patience.
I’ve found it works best on hair that’s past shoulder length, since shorter hair can slip out of the wrap.
If your ends are particularly damaged or dry, add a little leave-in cream before wrapping so they don’t feel rough by morning.
This is the method I recommend to friends who say they’ve “tried everything” and given up, because the learning curve is genuinely gentle.
And there’s something kind of nice about waking up already looking a little put together, before you’ve even had coffee.
Twist-And-Pin For Tighter, Defined Curls

When I want curls that feel a little more sculpted, almost retro, this is what I reach for.
You twist small sections of damp hair tightly and pin them flat against your head in little spirals, almost like tiny cinnamon rolls.
It takes patience, I won’t pretend otherwise.
But the curl definition you get is unmatched by anything else on this list.
I usually do this the night before a date or an event where I actually want people to notice my hair.
The smaller the section, the tighter and more defined the resulting curl, so adjust based on the look you’re going for.
I like doing smaller pins around my face and slightly bigger ones toward the back for a look that feels intentional but not stiff.
One thing I learned the hard way: use enough pins per twist so it stays flat against your scalp, or you’ll get weird dents instead of smooth curls.
This method holds beautifully in humid weather too, which is honestly the real test for me living somewhere sticky in summer.
If your arms get tired doing this (mine do), break it into two sessions, do the front while watching something, finish the back later.
Nobody’s timing you.
Prepping Damp Hair The Right Way

Here’s something nobody told me for years: the curl method matters less than how you prep your hair before you even start.
Towel-dry your hair until it’s damp, not dripping, because soaking wet hair takes forever to dry and can leave you with weird crunch or unset curls by morning.
I like to apply a light curl cream or mousse through my mid-lengths and ends before doing any twisting or wrapping.
This gives the hair something to actually hold onto, instead of just falling flat under its own weight.
A little leave-in conditioner underneath helps too, especially if your hair leans dry like mine does in colder months.
Skip heavy oils at this stage, because they can weigh curls down and stop them from holding any real shape.
I learned this one the hard way after a very oily, very flat curl situation before a work event I actually cared about.
Comb through gently first so you’re not locking in any knots or tangles into your twists.
The prep step feels boring, I get it, you just want to skip to the fun part.
But trust me, the fifteen minutes you spend here is the difference between curls that fall apart by noon and curls that are still going strong at dinner.
The Overnight Timing That Actually Matters
A question I get asked constantly is how long you actually need to leave any of these methods in.

The honest answer is at least six to eight hours, which usually means overnight is your best bet.
I’ve tried rushing it, doing a two-hour set before running errands, and the curl barely holds an hour after I take it down.
Your hair needs real time to dry completely and cool into its new shape.
If you’re in a rush, a blow dryer on a cool, low setting can speed things along, though it does take away a little bit of the “heatless” purity of the method.
I personally treat this as an overnight ritual now, twisting or wrapping right before bed and unraveling everything after my shower the next morning.
There’s something almost meditative about it, doing the same little routine each night before sleep.
If your hair dries faster than most, you might get away with a shorter set time, closer to four or five hours.
Thicker or coarser hair, like mine, really does need the full overnight stretch to set properly.
Patience is genuinely the secret ingredient here, more than any product or tool.
Locking In The Curl So It Actually Stays

Taking the twists or rods out is only half the job, and this is the part most people rush.
Once your hair is fully dry, resist the urge to touch it immediately.
Let it sit for a few minutes so the curl can settle into its shape.
I like to flip my head upside down and gently shake the roots for volume before doing anything else.
A light-hold setting spray, misted from about arm’s length, helps the curl hold its shape through the day without feeling stiff or crunchy.
I avoid heavy hairsprays for this because they tend to make heatless curls look a little too “done,” almost like a wig.
Cold air from your blow dryer, if you have one, can also help set the curl pattern once you’ve finished styling.
Separating curls with your fingers instead of a brush is non-negotiable for me at this point, a brush will pull the curl apart into frizz almost instantly.
I usually do one final light mist after separating, just to lock everything in place.
This is the step that turns “cute for an hour” into “still cute at your evening plans,” so don’t skip it even when you’re in a hurry.
Refreshing Curls Without Any Heat At All

Some days your curls need a little pick-me-up around hour eight or nine, and heat is the last thing I want to reach for at that point.
My go-to is a spritz of water mixed with a tiny bit of leave-in conditioner in a small spray bottle I keep in my bag.
A light mist over your curls, then a gentle scrunch upward with your palms, brings a lot of the shape right back.
Dry shampoo at the roots does double duty here too, adding grip and a little lift if things have gone flat.
I also just flip my hair upside down for thirty seconds and shake it out, which sounds silly but genuinely resets the whole shape.
If I know I have a long day ahead, I’ll actually pack a couple of bobby pins to twist any stray sections that fall flat first.
Finger-combing through with a little curl cream on your palms can revive curls that have loosened without making them look wet or overworked.
I’ve saved so many “second half of the day” hair situations with just this little kit, and it takes up almost no space in my bag.
The goal isn’t to redo your whole hair, just to gently coax the curl back to life.