Winter can be brutal on your hair, but these stunning braid ideas will keep you looking effortlessly chic while staying warm and comfortable.
Braids aren’t just practical during the colder months – they’re your secret weapon for looking put-together when hats and scarves threaten to ruin your hairstyle.
Low Side Braid with Texture

Your go-to messy bun just got a major upgrade with this effortlessly chic low side braid that screams cozy sophistication.
This style works perfectly when you want to look polished without spending hours in front of the mirror.
Start by creating a deep side part and gathering all your hair to one side of your neck.
The key to nailing this look is embracing the imperfect, lived-in texture that makes it feel modern and relaxed.
Begin braiding loosely from just behind your ear, working your way down toward the nape of your neck.
Don’t worry about making it perfect – the slightly undone quality is exactly what makes this braid so appealing.
Once you reach the end, secure with a clear elastic and gently tug at the braid to create more volume and texture.
The beauty of this style lies in how it frames your face while keeping your hair completely out of the way.
You can dress it up with delicate hair accessories or keep it simple for everyday wear.
This braid works especially well with second-day hair because the natural oils give you that perfect texture you’re looking for.
If your hair is freshly washed and too slippery, spray some texturizing spray throughout before you start braiding.
The low placement makes it ideal for wearing under scarves and beanies without creating uncomfortable bulk.
You can also sleep in this braid and wake up with gorgeous waves the next morning.
For extra staying power, mist your finished braid with a light-hold hairspray.
This style flatters every face shape and works on hair that’s shoulder-length or longer.
Dutch Crown Braid

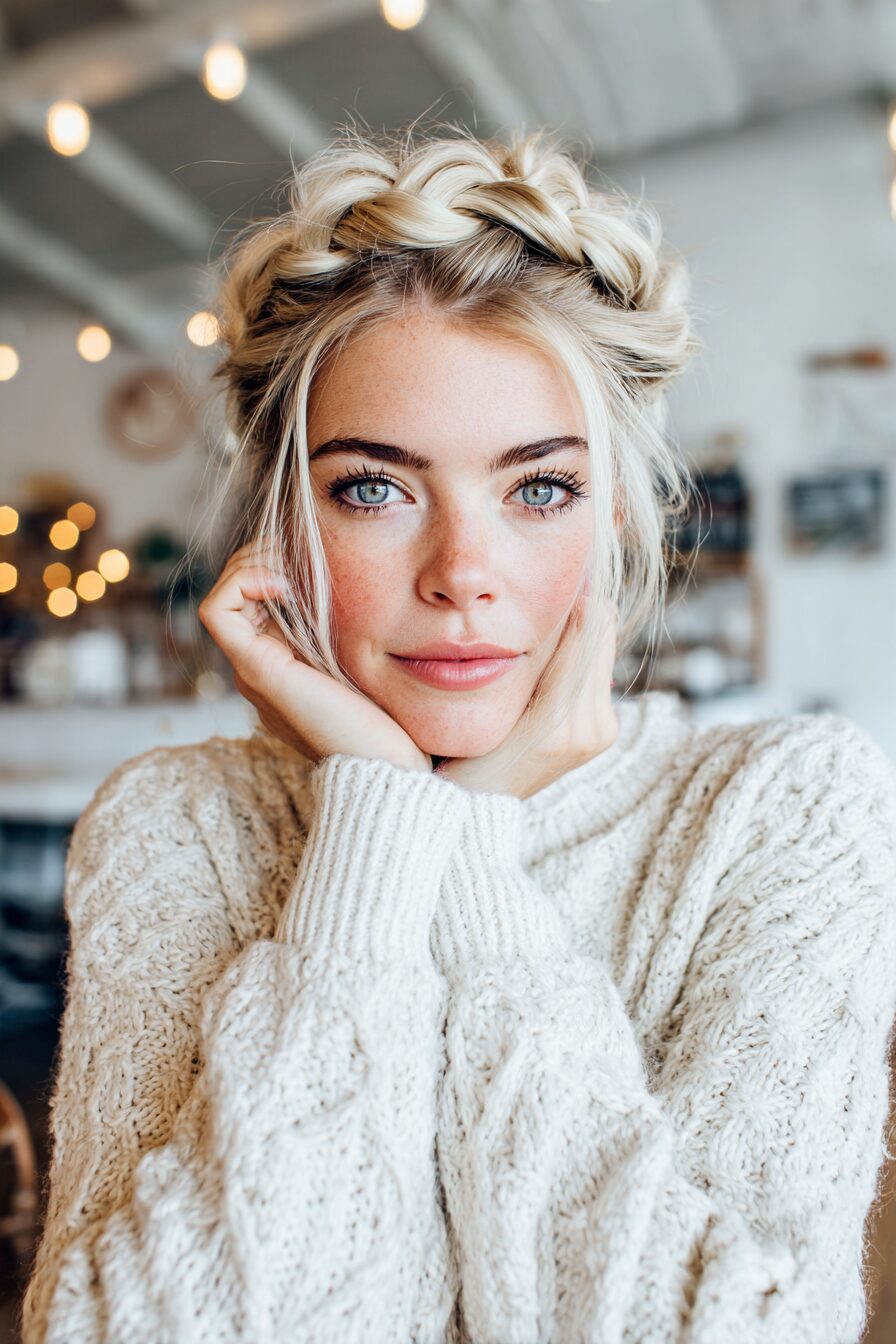
Transform your winter look with this regal Dutch crown braid that keeps your hair secure while making you feel like absolute royalty.
Unlike regular braids that sit on top of your hair, Dutch braids are woven underneath, creating a beautiful raised effect that stands out beautifully.
Start with slightly damp hair and apply a volumizing mousse from roots to ends for extra grip and texture.
Create a part from ear to ear across the top of your head, sectioning off the front portion you’ll be working with.
Begin your Dutch braid at one ear, taking a small section of hair and dividing it into three strands.
As you braid, cross the outer sections under the middle section instead of over, which creates that distinctive raised appearance.
Continue adding hair to your braid as you work your way around your hairline like a headband.
The trick is to keep consistent tension and add equal amounts of hair to each section as you go.
When you reach the opposite ear, you can either continue the braid down and pin it behind your ear, or secure it with bobby pins for a true crown effect.
This style is absolutely perfect for keeping shorter layers and bangs out of your face during windy winter days.
The raised braid creates gorgeous dimension and works beautifully with highlights or balayage.
You can make this look more casual by gently pulling at the braid to create a fuller, more relaxed appearance.
For special occasions, weave in some delicate ribbon or add small hair accessories along the braid.
This protective style helps prevent breakage from harsh winter conditions while looking incredibly sophisticated.
The crown braid pairs beautifully with loose waves in the remaining hair or can be combined with a low bun for extra elegance.
Chunky Fishtail Side Braid

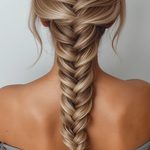
Ditch the basic three-strand braid for this eye-catching chunky fishtail that adds serious texture and visual interest to your winter hair routine.
Fishtail braids might look complicated, but they’re actually easier than you think once you get the hang of the technique.
Start by brushing all your hair to one side and dividing it into two equal sections at the nape of your neck.
The secret to a chunky fishtail is working with larger pieces of hair than you would for a traditional delicate version.
Take a thick section from the outside of the left section and cross it over to join the right section.
Then take a thick section from the outside of the right section and cross it over to join the left section.
Continue this pattern, always taking from the outside and crossing to the opposite side.
The larger sections create that chunky, substantial look that feels modern and effortless.
Don’t worry about making each section exactly the same size – slight variations add to the organic, textured appearance.
As you work your way down, the braid will naturally start to take on that distinctive fishtail pattern.
Secure the end with a clear elastic and gently tug at the edges of the braid to make it appear fuller and more voluminous.
This style works incredibly well on thick hair but can also add the illusion of thickness to finer hair types.
The side placement is universally flattering and draws attention to your profile in the most beautiful way.
You can make this braid even more winter-appropriate by working in some braided ribbon or incorporating small twists before you begin the fishtail.
For extra texture and grip, use some sea salt spray before braiding, especially if your hair tends to be slippery.
Boxer Braids with a Twist

Take the athletic boxer braid trend and give it a cozy winter makeover with loose, textured plaits that balance sporty and feminine perfectly.
These aren’t your tight, sleek gym braids – they’re the relaxed, effortless version that works for everything from coffee runs to dinner dates.
Start by creating a clean center part from your forehead all the way down to the nape of your neck.
Apply some texturizing cream throughout your hair to give you better grip and that slightly undone finish.
Working on one side first, begin a Dutch braid starting at your hairline near your forehead.
Keep the braid loose and relaxed rather than pulling it tight against your scalp.
As you add hair to each section, deliberately keep the tension gentle to create that soft, lived-in appearance.
Continue braiding down past your ears and secure with a clear elastic when you reach the ends.
Repeat the exact same process on the other side, trying to keep both braids roughly the same height and tension.
Once both braids are complete, gently tug at the edges to create more volume and texture.
You can also carefully pull apart some of the loops to make the braids appear even fuller and more relaxed.
This style is absolutely perfect for days when you want to look put-together but still feel comfortable and casual.
The loose texture means they won’t leave those harsh creases in your hair when you take them out.
Boxer braids are also incredibly practical for winter activities like hiking, skiing, or any outdoor adventures.
You can dress them up with decorative hair ties or small clips woven throughout the braids.
For an extra touch of winter glamour, try incorporating some metallic thread or ribbon as you braid.
These braids also work beautifully under winter hats without creating uncomfortable pressure points.
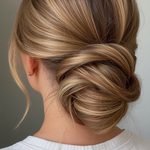
Romantic Low Bun with Braided Detail

Elevate your everyday low bun with delicate braided accents that add romance and sophistication to this timeless winter hairstyle.
This look combines the practicality of having your hair up with beautiful details that make it special enough for any occasion.
Start with hair that has some natural texture – either second-day hair or hair with texturizing spray applied throughout.
Create a deep side part and section off a piece of hair from the front on the heavier side of your part.
Braid this front section into a loose, relaxed braid, keeping it fairly loose and gently pulling at the edges for texture.
Temporarily clip this braid out of the way while you work on the rest of your hair.
Gather the remaining hair into a low ponytail at the nape of your neck, leaving it slightly loose rather than pulling it tight.
Twist the ponytail loosely and wrap it around the base to create a soft, romantic bun.
Secure the bun with bobby pins, but don’t worry about making it perfect – the slightly messy quality adds to its charm.
Now take your braided section and wrap it around the bun, weaving it through and around for a beautiful accent.
Pin the braided piece in place, allowing some pieces to stick out slightly for that effortless, romantic feel.
Pull out a few face-framing pieces and leave them loose, or curl them gently for extra softness.
This style works beautifully for both casual days and more formal winter events.
The braided detail adds just enough interest to make a simple bun feel special and intentional.
You can customize this look by adding multiple small braids or incorporating different braiding techniques.
For extra staying power, use bobby pins that match your hair color and mist with hairspray.
This protective style keeps your ends tucked away safely during harsh winter conditions.
Bohemian Half-Up Braid Crown

Channel your inner boho goddess with this dreamy half-up style that combines multiple braiding techniques for maximum texture and visual impact.
This look gives you the best of both worlds – the romance of flowing hair with the practicality of keeping the top section secured.
Begin by sectioning off the top portion of your hair from temple to temple, creating a curved line that follows your natural hairline.
Apply some volumizing mousse to this section for extra grip and texture that will help your braids hold better.
Starting at one temple, create a small Dutch braid that follows your hairline toward the back of your head.
Keep this braid loose and deliberately imperfect for that effortless bohemian vibe you’re going for.
When you reach about the middle of the back of your head, secure this first braid temporarily with a small elastic.
Now create a matching Dutch braid starting from the opposite temple, following the same curved path.
When both braids meet at the back, you can either braid them together or simply twist them together and secure with bobby pins.
The key is to make sure both braids frame your face beautifully while creating a gorgeous crown effect.
Gently tug at both braids to create more volume and that perfectly imperfect texture.
Leave the rest of your hair flowing freely, or add some loose waves for extra movement and romance.
This style works incredibly well with winter accessories like headbands or delicate hair jewelry.
You can also weave small flowers or ribbon through the braids for special occasions.
The half-up nature of this style means it works well under light scarves or with over-ear headphones.
For fine hair, backcomb the crown area slightly before braiding to create more volume and texture.
This look transitions beautifully from day to night with just a few small adjustments.
Twisted Rope Braid Ponytail


Master this stunning twisted rope braid that creates incredible texture and dimension while being surprisingly simple to execute.
This technique creates a braid that looks complex and intricate but actually requires just two sections of hair instead of three.
Start by gathering your hair into a high ponytail and securing it with a strong elastic that won’t slip.
Apply some texturizing spray or dry shampoo to the ponytail for better grip and that perfect matte finish.
Divide your ponytail into two equal sections and twist each section tightly in the same direction – either both clockwise or both counterclockwise.
The key is to make sure both sections are twisted in the same direction, which creates the tension needed for the rope effect.
Once both sections are twisted tightly, begin wrapping them around each other in the opposite direction from how you twisted them.
So if you twisted both sections clockwise, you’ll wrap them around each other counterclockwise.
This opposite direction is what creates the rope-like appearance and keeps the braid from unraveling.
Continue wrapping the two twisted sections around each other all the way down to the ends.
Secure with another elastic and gently tug at the braid to create more volume and texture.
The finished result looks like an intricate rope that adds serious visual interest to a simple ponytail.
This technique works especially well on longer hair where you can really see the full rope effect.
You can position the ponytail high for a more playful look or low for something more sophisticated.
For extra dimension, try this technique on hair that has subtle highlights or balayage.
The twisted texture catches light beautifully and shows off any color variation in your hair.
This style is also incredibly secure, making it perfect for active winter days or windy conditions.
Multi-Strand Waterfall Braid

Create an absolutely stunning focal point with this intricate waterfall braid that lets some hair cascade freely while keeping the top section beautifully controlled.
This advanced braiding technique creates the illusion of hair flowing like water through your braid, hence the romantic name.
Start with slightly wavy hair, as the texture helps show off the waterfall effect more dramatically.
Create a deep side part and begin working on the heavier side, starting your braid near your temple.
Take a small section near your hairline and divide it into three strands to begin a traditional braid.
Cross the top strand over the middle, then cross the bottom strand over the new middle.
Here’s where the waterfall technique begins – instead of continuing with the top strand, drop it completely and let it fall.
Pick up a new section of hair from above to replace the dropped strand and continue braiding.
This creates the “falling water” effect as strands are continuously dropped and replaced with new ones.
Continue this pattern as you work your way around your head, always dropping the top strand and picking up a new one.
The key is to maintain consistent tension and keep the braid following a gentle curve around your head.
When you’ve reached the desired point (usually behind your opposite ear), finish with a regular braid and secure.
You can pin this finishing braid behind your ear or let it blend with the rest of your hair.
The dropped strands create beautiful cascading layers that frame your face and add movement.
This style works particularly well with highlights because it showcases the different tones as they fall.
For special occasions, you can curl the dropped strands for even more romantic movement.
The waterfall braid is perfect for winter events where you want to look elegant but still have your hair provide some warmth around your shoulders.
Braided Space Buns

Put a playful spin on the classic space bun trend by incorporating braids for a look that’s both fun and surprisingly sophisticated.
This style strikes the perfect balance between edgy and cute, making it ideal for everything from casual weekends to winter parties.
Start by creating a clean center part from your forehead to the nape of your neck.
Section your hair into two equal halves and secure each side with a temporary elastic at ear level.
Working with one side first, create a Dutch braid starting from your hairline and working upward toward where your bun will sit.
Keep the braid fairly tight as it needs to support the weight of the bun above it.
Continue braiding until you’ve incorporated all the hair from that section, then secure the end temporarily.
Repeat the exact same process on the other side, trying to keep both braids symmetrical.
Now comes the fun part – twist each braided section into a bun and secure with bobby pins.
The braided base gives your space buns much more texture and visual interest than the basic version.
You can make the buns tight and neat for a more polished look, or leave them loose and messy for a casual vibe.
Gently pull at the buns to create more volume and that perfectly imperfect finish.
This style is incredibly practical for winter activities since it keeps all your hair securely up and out of the way.
The braided base also means your space buns will stay put much longer than traditional twisted versions.
You can customize this look with colorful hair ties, glitter, or small hair accessories woven through the braids.
For a more grown-up take, position the buns slightly lower and keep the braids sleek and polished.
This style works on almost any hair length as long as you have enough to create small buns.
Infinity Braid Headband

Master this gorgeous infinity braid technique that creates a stunning headband effect while incorporating a mesmerizing figure-eight pattern.
This advanced braiding method looks incredibly complex but becomes manageable once you understand the basic infinity motion.
Start by sectioning off a band of hair from ear to ear across the top of your head, about two inches wide.
Apply some texturizing product to this section for better grip and to help the intricate pattern show up more clearly.
Divide this front section into two equal parts and begin the infinity braid by crossing the right section over the left.
Now here’s where it gets interesting – take the right section and loop it under and back over itself to create a figure-eight motion.
Bring the left section through the loop you just created, then repeat the process from the other side.
The key is to maintain consistent tension while creating these loops and figure-eight patterns.
Continue this infinity motion as you work your way around your head like a headband.
Each loop creates the distinctive infinity symbol pattern that gives this braid its unique appearance.
When you reach your starting point, secure the braid and tuck the end under the beginning for a seamless look.
Pin everything in place with bobby pins that match your hair color.
The remaining hair can be left down in loose waves or gathered into a low bun for a more formal look.
This braided headband is absolutely perfect for keeping bangs and shorter layers out of your face during winter.
The intricate pattern creates a stunning focal point that works as a natural hair accessory.
This style photographs beautifully and is perfect for special winter occasions when you want to look extra sophisticated.
For added glamour, weave thin ribbon or metallic thread through the infinity loops.
These winter braid ideas prove that cold months don’t mean sacrificing style for comfort.
Each technique offers its own unique charm while keeping your hair protected and beautifully styled throughout the season.